
Note: The engine must be fully settled before starting work.
Withdrawal
1. Disconnect the negative cable from the battery.
2. Drain the coolant from the radiator and block (see chapter 1).
3. Drain the oil and remove the oil filter (see chapter 1)
4. On engines with petrol injection, relieve pressure in the fuel system (see chapter 4).
5. Remove intake manifold (see Section 5).
6. Remove the exhaust manifold (see Section 6).
7. Remove the drive belt and camshaft sprocket (see Section 7).
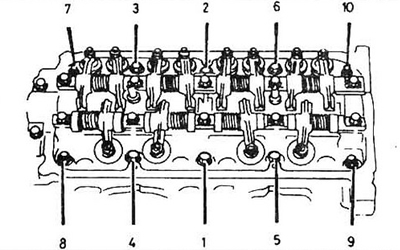
8. Remove the camshaft and rocker shaft assembly.
9. Inspect the cylinder head: mark and remove all cables, hoses and wires
10. Loosen the cylinder head bolts in ¼ turn increments until they can be unscrewed by hand. We recommend loosening the bolts in the reverse order shown in fig. 12.10 to avoid warping.
Pic. 12.10a Cylinder head bolt tightening sequence (models from 1984 to 1987). Reverse order when unscrewing
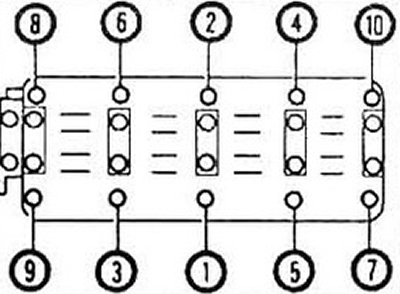
Pic. 12.106 Cylinder head bolt tightening sequence (models since 1988). Reverse order when unscrewing
11. Raise the block head. If it is stuck, very carefully lift it with screwdrivers, bringing them from the ends of the head and slowly wedging the joint.
12. Remove any protruding parts from the mating surfaces for cleaning and inspection. Some engines are equipped with auxiliary valves. They can be dismantled from the cylinder head by unscrewing the plug nut using a deep socket. The valve can be disassembled to replace the seals. If any valve components are damaged, the entire valve must be replaced.
Always use new gaskets and o-rings when installing the auxiliary valve.
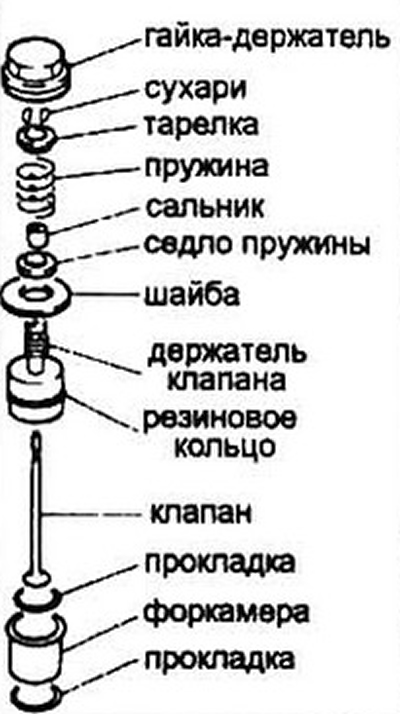
Pic. 12.12a Assembly of the additional valve
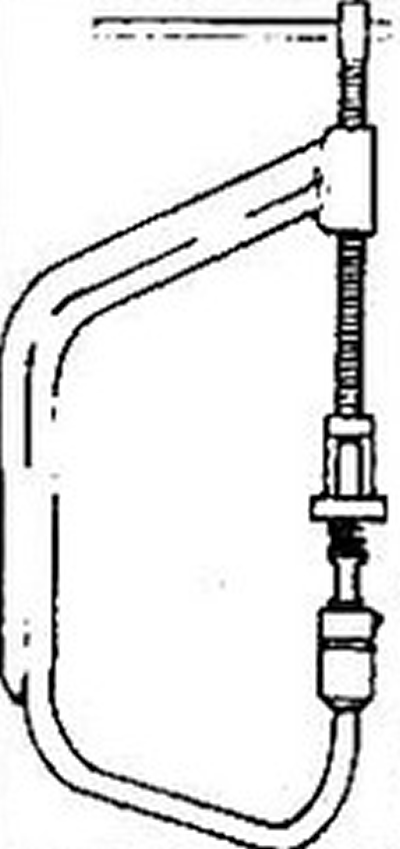
Pic. 12.12b Assembly of the additional valve assembly in a special tool
13. The procedure for servicing the cylinder head is described in Part B Chapter 2.
Installation
14. If the engine has oil flow restrictors, remove them and clean the installation site.
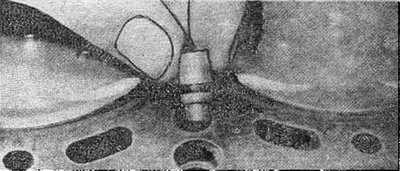
Pic. 12.14 Removing the oil flow limiter from the block
15. Remove traces of old gaskets and coke deposits from the mating surfaces of the head and block and flush them.
Do not lubricate the surfaces of the head and block with oil. When working on the block, cover the cylinders with a soft, clean cloth to prevent dirt particles from getting in.
16. Check block faces and head for nicks, cracks, or other damage.
17. In case of severe contamination of the threaded holes in the block, clean them with a tap and blow with compressed air. Make sure nothing is left in the holes.
18. Clean the threads of the cylinder head bolts: dirt, corrosion, thread damage will give an error in estimating the force when tightening the bolts.
19. Install oil flow limiters. Replace rubber sealing ring.
20. Install a new gasket on the block. Make sure the gasket is seated on the guide pins.
21. Carefully lower the head onto the block, being careful not to move the gasket.
22. Lubricate the threads of the mounting bolts with a small amount of engine oil and lower them into their sockets in the head.
23. Finger tighten the bolts. Then, following the recommended sequence, finally tighten the bolts in two steps. Tightening torques are specified in the specification.
24. Reassemble in the reverse order of disassembly.
25. Check valve adjustment and adjust if necessary (see chapter 1).
26. Install a new oil filter. Fill the engine with oil and coolant (see chapter 1).
27. Start the engine and check for leaks. Set ignition timing (see chapter 1), then correct it when you test it on the road.