
2. If the vehicle is equipped with a manual transmission, remove the clutch basket (see chapter 8). At the same time, check the condition of the clutch and, if necessary, replace worn parts.
3. Turn away bolts of fastening of a flywheel (or fluid couplings). To turn the flywheel, use a screwdriver, inserting it into the teeth of the crown.
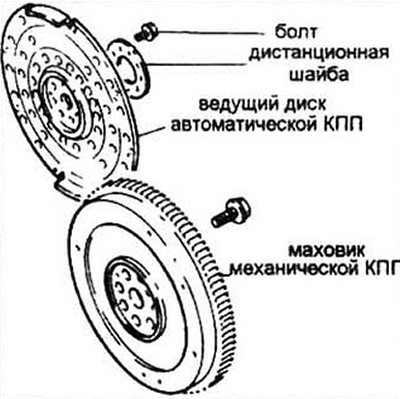
Pic. 15.3 Assembling the flywheel or drive coupling
4. Remove the flywheel.
5. Clean the flywheel of grease. Inspect the surface of the flywheel, the clutch drive plate, for cracks, rivet beards, burns and scuffing. Light scuff marks can be removed with sandpaper. Lay the flywheel on a flat surface and use a metal ruler to check it for warping. Make sure there are no chips or cracks on the ring gear.
6. Clean and inspect the flywheel and crankshaft seating surfaces. If oil is leaking from the rear oil seal, replace it before installing the flywheel.
7. Before installing the flywheel, clean the threaded holes in the crankshaft and apply sealant to the bolt threads. Install the flywheel or fluid coupling on the guide pins and tighten the bolts by hand. Don't forget the spacer on cars with automatic transmission.
8. Lock the flywheel from turning by inserting a screwdriver into the teeth of the flywheel. Tighten the bolts in three steps in sequence. shown in Fig. 15.8 with the force specified in the specification.
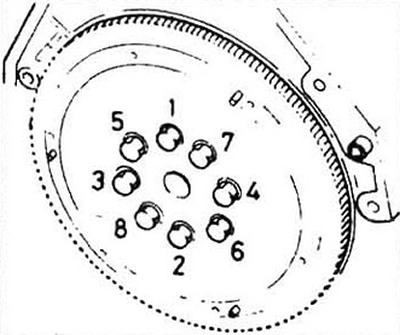
Pic. 15.8 Tightening order for flywheel bolts
9. Reassemble the unit in reverse order.