
Caution: The engine must be completely cool before starting this work.
1. Disconnect the negative cable from the battery.
2. Disconnect the oxygen sensor cable (λ-sensor) and its fasteners. If the manifold needs to be replaced, remove the oxygen sensor as well (see Chapter 6).
3. Unscrew the three bolts securing the manifold protective cover, remove the cover, the exhaust gas recirculation (EGR) tube and the air intake tube (if installed).
4. Lubricate the manifold mounting bolts and nuts with oil, fuel or brake fluid.
5. Raise the vehicle and support it securely on stands.
6. Working from underneath the vehicle, lubricate the two bolts securing the bracket to the manifold and the three self-locking nuts securing the muffler pipe with oil or brake fluid.
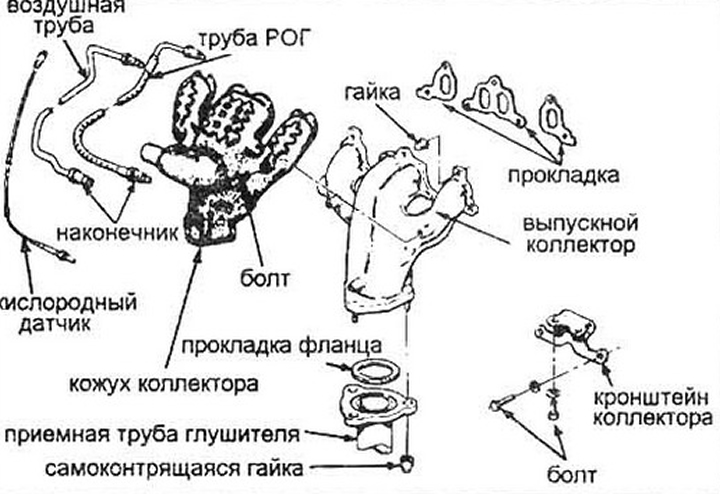
Fig. 6.3a Assembly of a typical exhaust manifold (carburetor engines)
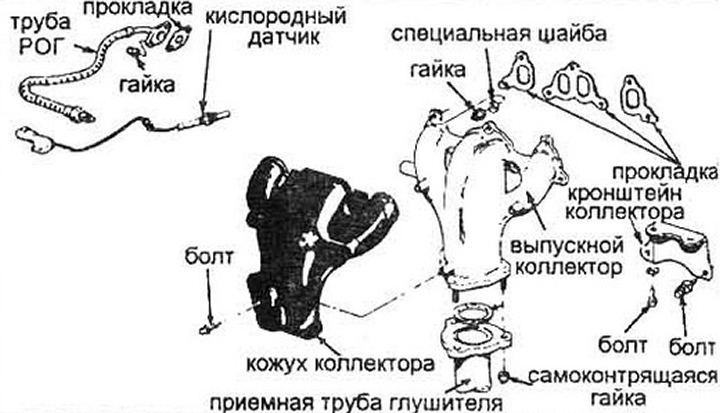
Fig. 6.3b Assembly of a typical exhaust manifold (gasoline injection engines)
7. Unscrew the muffler pipe mounting nuts and disconnect it from the manifold.
8. Unscrew the nuts and disconnect the manifold and gaskets
9. Lower the vehicle.
10. Unscrew the nuts and disconnect the manifold and gaskets.
11. Clean the mating surfaces of the manifold and cylinder head from gasket residues and coke deposits. If there are traces of exhaust gas leaks along the gasket, check the manifold for warping of the mating surface and restore flatness if necessary.
12. Install new cylinder head gaskets.
13. Install the exhaust manifold.
14. Tighten the manifold mounting nuts from the center to the periphery to the torque specified in the specification for this Chapter.
15. Install the removed units in the reverse order of removal. We recommend using new self-locking nuts and gaskets. The tightening forces of the threaded connections are specified in the specification.
16. Start the engine and check for exhaust leaks.
(The original can be found on the resource «www.hondabook.ru»)