
2. Using a small wire brush, clean carbon deposits from combustion chambers and valve passages.
3. Inspect the cylinder head for cracks in the exhaust passages, combustion chambers or external cracks.
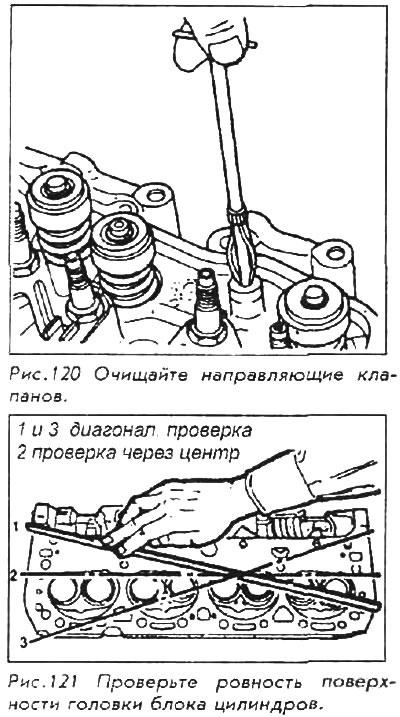
4. Completely clean the valve guides using a suitable wire brush for the bore.
Excessive clearance between the valve stem and valve port walls will cause excessive oil consumption and may also result in valve failure. Insufficient clearance will result in valve sticking and noise during valve operation.
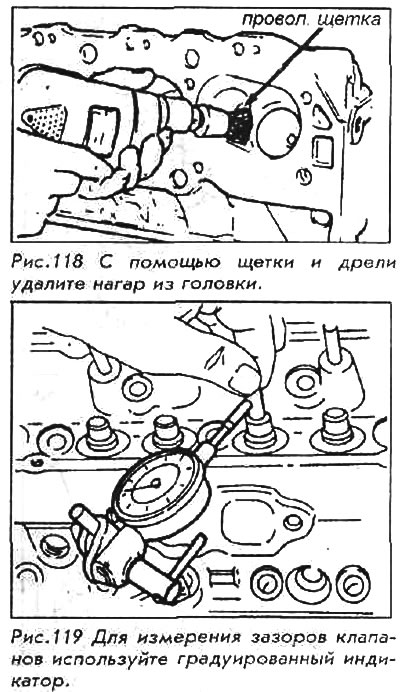
5. Measure the clearance between the valve stem and the channel walls as follows:
- a. Attach the dial indicator to the edge of the cylinder head.
- b. Position the indicator so that the movement of the valve stem from side to side (across the cylinder head) will cause a direct movement of the indicator rod. The indicator stem should touch the side of the valve stem just above the valve guide.
- c. Extend the valve so that the valve head is 1.6 mm from the valve seat.
- d. Move the valve stem from side to side using light pressure to get the clearance. If the backlash is greater than specification, the valve guides will need to be expanded or replaced.
6. Inspect rocker arms for wear or damage.
7. Install a micrometer into the valve guide, and check the valve seat for concentricity.
Surface treatment
1. Using a rectangle, check the cylinder for deformation.
2. If the deformation exceeds 0.05mm, the cylinder head must be replaced. Surface treatment can be carried out, but the total reduction in head thickness should not exceed - 0.05 mm. Since almost any deformation exceeds this value, surface finishes are generally not recommended by Honda.