
Note:
- To avoid warping of the cylinder head, do not remove it when the coolant temperature is above 38°C.
- Label all wires and hoses before disconnecting. Make sure they do not come into contact with other wires, hoses or components.
1. Release residual fuel pressure,
2. Drain the coolant.
3. Remove the air filter assembly.
- a) Disconnect the sensor connector.
- b) Unscrew the bolts.
- c) Remove the air filter.
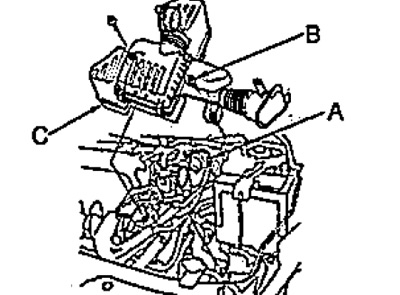
A - connector,
B - bolt,
C - air filter.
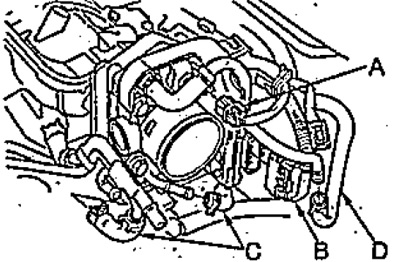
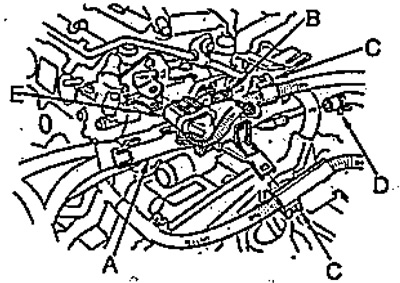
4. Disconnect the connectors of the fuel vapor recovery system filter "A", throttle body "B", coolant bypass hose "C" and purge hose "D".
5. Remove the upper and lower radiator hoses.
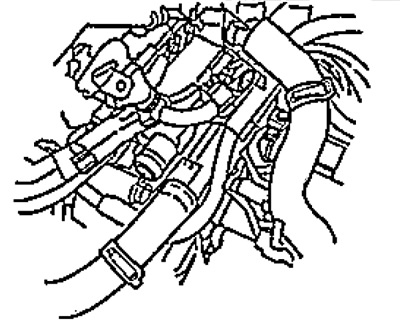
6. Remove the heater hoses.
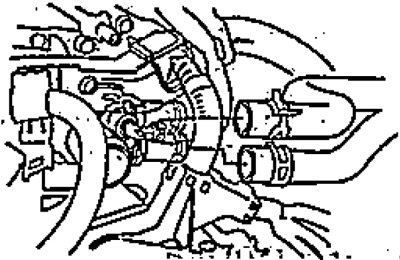
7. Remove the accessory drive belt.
8. Remove the intake manifold.
9. Remove the exhaust manifold.
10. Disconnect the wiring harness connectors and remove the retainers from the cylinder head.
11. Remove the fuel manifold.
12. Remove the wire holder "A", ground wire "B", wire retainer "C", coolant bypass hose "D" and wire harness retainer "E".
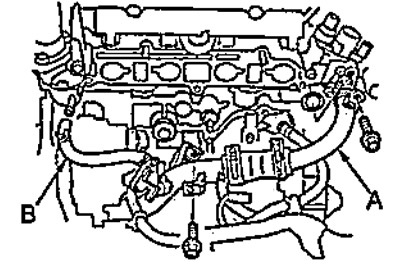
13. Remove the connecting pipe "A" and the coolant bypass hose "B".
14. Remove the cylinder head cover.
15. Remove the generator bracket mounting bolts and loosen the generator mounting bolt.
16. Remove the intermediate roller.
17. Set the piston of the first cylinder to TDC. In this case, the "UP" mark on the crankshaft sprocket should be directed upwards, and the notches on the sprocket should lie in the plane of the cylinder head.
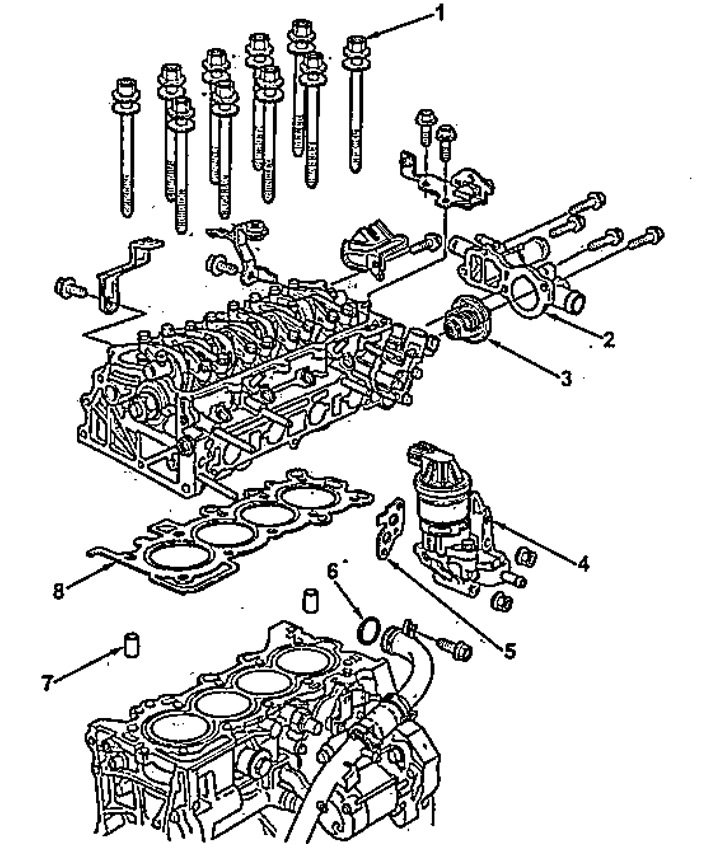
Removal and installation the cylinder head.
1 - cylinder head mounting bolts,
2 - thermostat housing,
3 - thermostat,
4 - recirculation system valve,
5 - gasket,
6 - O-ring seal,
7 - mounting pin,
8 - cylinder head gasket.
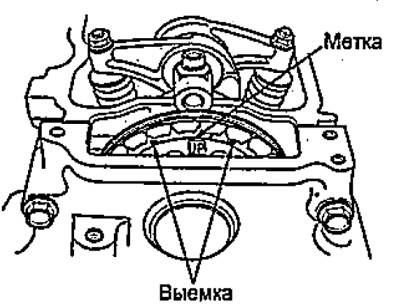
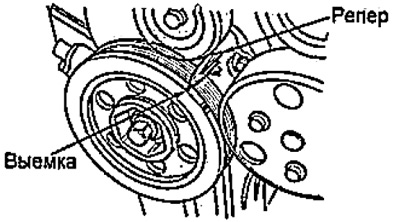
18.Make sure the pulley recess is aligned with the reference mark.
19. Remove the coolant pump pulley.
20. Remove the crankshaft pulley.
21. Disconnect the crankshaft position sensor connector and clips.
22. Jack up the engine. Place a wooden block between the jack foot and the engine.
Note: Do not place the jack in the center of the oil pan to avoid damaging the pan.
23. Remove the ground wire and the front engine mount bracket (see the Timing Chain section).
24. Remove the generator. Remove the timing chain cover.
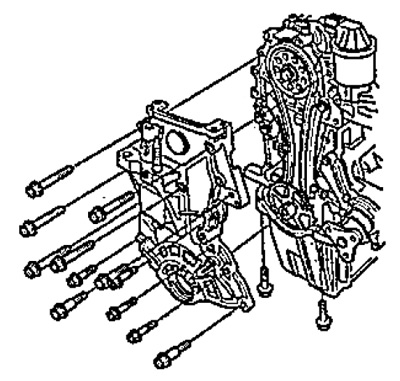
25. Place a mark on the target and camshaft sprocket.
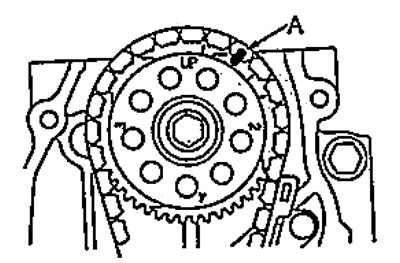
26. Temporarily install the crankshaft pulley.
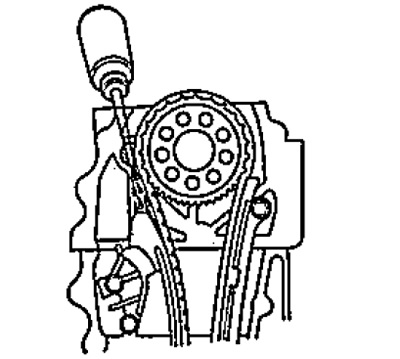
27. Apply engine oil to the tensioner contact surface through the oil return hole in the cylinder head.
28. Secure the crankshaft pulley and install the wrench on the camshaft sprocket bolt.
29. Turn the camshaft clockwise until the chain tensioner is compressed, then install the M6x1.0 mm bolt into the hole in the cylinder block through the tensioner shoe.
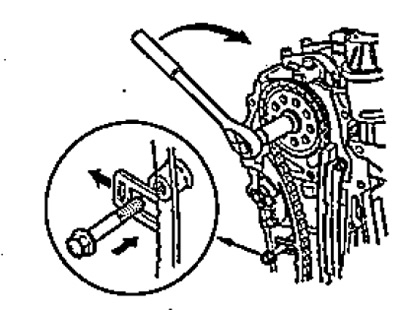
Note:
- The torque when turning the camshaft bolt should not exceed 56 Nm.
- Do not turn the camshaft counterclockwise.
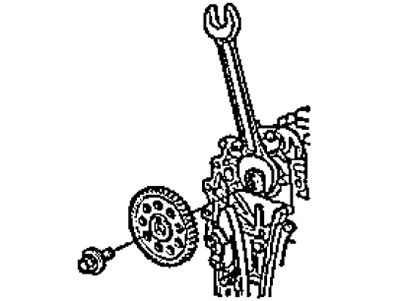
30. Secure the camshaft with a 27mm wrench, remove the bolt and remove the sprocket.
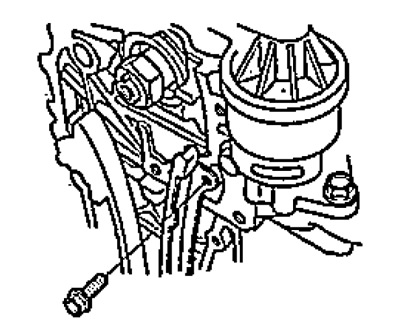
31. Remove the chain guide mounting bolt.
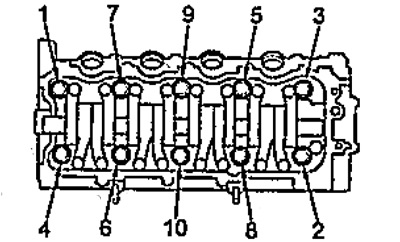
32. Remove the cylinder head mounting bolts. To prevent warping of the cylinder head, remove the bolts one by one by ⅓ of a turn per pass in the sequence shown in the figure.
33. Remove the cylinder head.
[Article source on the website: www.HondaBook.ru]