
Diesel engines (N22A) car Honda Civic 8

Checking engine compression
Note: To perform the test, you will need special tools: a compression tester (070AJ-RBD0100) Note: After completing this procedure, you must select the operation "Data Reset" ("Reset") of the engine management computer,...
Note: To perform the test, you will need special tools: a compression tester (070AJ-RBD0100) Note: After completing this procedure, you must select the operation "Data Reset" ("Reset") of the engine management computer,...

Replacing the drive belt
Note: To perform the replacement procedure, you will need a special tool: a device for reducing the tension of the drive belt (Snap-on YA9317 or other similar parts available on the market). 1. Slide the automatic...
Note: To perform the replacement procedure, you will need a special tool: a device for reducing the tension of the drive belt (Snap-on YA9317 or other similar parts available on the market). 1. Slide the automatic...
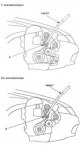
Checking the automatic drive belt tensioner
Note: To perform the replacement procedure, you will need a special tool: a device for reducing the tension of the drive belt (Snap-on YA9317 or other similar parts available on the market). 1. Turn the ignition switch...
Note: To perform the replacement procedure, you will need a special tool: a device for reducing the tension of the drive belt (Snap-on YA9317 or other similar parts available on the market). 1. Turn the ignition switch...

Removal and installation the automatic tensioner pulley of the drive belt
1. Remove the drive belt. 2. Remove the pulley A mounting bolt, then remove the automatic tensioner pulley B. 3. Install the automatic tensioner pulley in the reverse order of removal.
1. Remove the drive belt. 2. Remove the pulley A mounting bolt, then remove the automatic tensioner pulley B. 3. Install the automatic tensioner pulley in the reverse order of removal.
Removal and installation the automatic drive belt tensioner
1. Remove the drive belt. 2. Remove the idler pulley base. 3. Remove the automatic drive belt tensioner. 4. Install the automatic drive belt tensioner in the reverse order of removal.
1. Remove the drive belt. 2. Remove the idler pulley base. 3. Remove the automatic drive belt tensioner. 4. Install the automatic drive belt tensioner in the reverse order of removal.

Removal and installation the drive belt drive pulley base
1. Remove the engine cover. 2. Remove the drive belt. 3. Remove the idler pulley base. 4. Install the idler pulley base in the reverse order of removal.
1. Remove the engine cover. 2. Remove the drive belt. 3. Remove the idler pulley base. 4. Install the idler pulley base in the reverse order of removal.
Checking the drive belt
1. Check the drive belt for cracks or damage. If the drive belt is cracked or damaged, replace it. 2. Check that the automatic tensioner indicator A is in the standard range B as shown in the figure. If not, replace the...
1. Check the drive belt for cracks or damage. If the drive belt is cracked or damaged, replace it. 2. Check that the automatic tensioner indicator A is in the standard range B as shown in the figure. If not, replace the...

Checking engine oil pressure
Note: To perform the check, you will need special tools: a mounting adapter and an oil pressure gauge (07406-0030000). Note: If the low oil pressure indicator remains on while the engine is running, check the engine oil...
Note: To perform the check, you will need special tools: a mounting adapter and an oil pressure gauge (07406-0030000). Note: If the low oil pressure indicator remains on while the engine is running, check the engine oil...

Replacing the engine oil filter
1. Remove the oil filter assembly using oil filter wrench A (P/N 04151-RBD-305 or equivalent). Use only a socket wrench for the oil filter to avoid damaging the oil filter plug. 2. Remove the plug from the oil filter...
1. Remove the oil filter assembly using oil filter wrench A (P/N 04151-RBD-305 or equivalent). Use only a socket wrench for the oil filter to avoid damaging the oil filter plug. 2. Remove the plug from the oil filter...
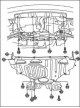
Removal the oil pan
Note: Check the oil pump drive chain by removing the oil pan. 1. If the engine is removed from the vehicle, proceed to step 10. 2. Remove the drive belt. 3. Remove the generator. 4. Remove the air conditioner (A/C)...
Note: Check the oil pump drive chain by removing the oil pan. 1. If the engine is removed from the vehicle, proceed to step 10. 2. Remove the drive belt. 3. Remove the generator. 4. Remove the air conditioner (A/C)...

Installing the oil pan
1. Remove any remaining old liquid gasket from the mating surfaces of the oil pump, bolts and their holes. 2. Clean and dry the mating surfaces of the oil pan. 3. Apply a uniform layer of liquid sealant, P/N...
1. Remove any remaining old liquid gasket from the mating surfaces of the oil pump, bolts and their holes. 2. Clean and dry the mating surfaces of the oil pan. 3. Apply a uniform layer of liquid sealant, P/N...

Removal the timing chain
Note: Keep the timing chain away from magnetic fields. 1. Remove the panel under the shield. 2. Remove the cylinder head cover. 3. Set piston No.1 to the top dead center (TDC) position. The "UP" mark A on the timing...
Note: Keep the timing chain away from magnetic fields. 1. Remove the panel under the shield. 2. Remove the cylinder head cover. 3. Set piston No.1 to the top dead center (TDC) position. The "UP" mark A on the timing...

Installing the timing chain
1. Set the crankshaft to the top dead center (TDC) position. Align the TDC mark A on the crankshaft sprocket with the pointer B on the engine block. 2. Set the camshaft to TDC. The ' 'UPA mark on the timing chain...
1. Set the crankshaft to the top dead center (TDC) position. Align the TDC mark A on the crankshaft sprocket with the pointer B on the engine block. 2. Set the camshaft to TDC. The ' 'UPA mark on the timing chain...

Removal and installation the crankshaft pulley
Removal 1. Remove the right front wheel. 2. Remove the lower engine cover. 3. Remove the drive belt. 4. Hold the pulley with handle A and pulley holding handle B. 5. Remove the bolt using a 19mm C socket and a pry bar....
Removal 1. Remove the right front wheel. 2. Remove the lower engine cover. 3. Remove the drive belt. 4. Hold the pulley with handle A and pulley holding handle B. 5. Remove the bolt using a 19mm C socket and a pry bar....

Removal and installation the automatic timing belt tensioner
Removal 1. Remove the timing chain housing. 2. Turn the crankshaft counterclockwise to compress the automatic tensioner. 3. Align the holes on the lock A and the automatic tensioner B, then insert the 2.5mm diameter...
Removal 1. Remove the timing chain housing. 2. Turn the crankshaft counterclockwise to compress the automatic tensioner. 3. Align the holes on the lock A and the automatic tensioner B, then insert the 2.5mm diameter...

Installing the timing chain housing oil seal
1. Use special tools to install the new oil seal strictly perpendicularly into the timing chain housing to the specified depth. 2. Measure the distance between the surface of the timing chain housing A and the oil seal...
1. Use special tools to install the new oil seal strictly perpendicularly into the timing chain housing to the specified depth. 2. Measure the distance between the surface of the timing chain housing A and the oil seal...

Removal the cylinder head
Note: Cover the fenders to prevent damage to the paintwork. To avoid damage, disconnect electrical connectors carefully, holding the connector by its body. To prevent damage to the cylinder head, wait until the coolant...
Note: Cover the fenders to prevent damage to the paintwork. To avoid damage, disconnect electrical connectors carefully, holding the connector by its body. To prevent damage to the cylinder head, wait until the coolant...

Removal the cylinder head valve, spring, valve seals
Note: Mark the valves and valve springs as you remove them so you can return them to their original locations when reinstalling. 1. Remove the cylinder head. 2. Using a suitable sized spacer A and a plastic hammer B,...
Note: Mark the valves and valve springs as you remove them so you can return them to their original locations when reinstalling. 1. Remove the cylinder head. 2. Using a suitable sized spacer A and a plastic hammer B,...
Checking the cylinder head valve
1. Remove the valves. 2. Measure each valve in the directions shown: Inlet valve dimensions A Standard (new): 27.85-28.15 mm. In Standard (new): 100.4-100.9 mm. C Standard (new): 5.480-5.490 mm. With Limit Value: 5.450...
1. Remove the valves. 2. Measure each valve in the directions shown: Inlet valve dimensions A Standard (new): 27.85-28.15 mm. In Standard (new): 100.4-100.9 mm. C Standard (new): 5.480-5.490 mm. With Limit Value: 5.450...

Checking the clearance between the cylinder head valve stem and the guide bushing
1. Remove the valves. 2. Pull the valve out of its guide bushing by about 10 mm, then measure the clearance between the valve stem and the guide bushing using a dial indicator while swinging the stem in a perpendicular...
1. Remove the valves. 2. Pull the valve out of its guide bushing by about 10 mm, then measure the clearance between the valve stem and the guide bushing using a dial indicator while swinging the stem in a perpendicular...

Replacing the cylinder head valve guide
1. Check the clearance between the valve stem and the guide bushing. 2. As shown in the figure below, use a commercially available air hammer driven valve guide rod A modified to fit the valve guide diameter. In most...
1. Check the clearance between the valve stem and the guide bushing. 2. As shown in the figure below, use a commercially available air hammer driven valve guide rod A modified to fit the valve guide diameter. In most...
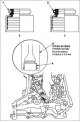
Installation of cylinder head valve, spring, valve seals
1. Lubricate the valve stems with engine oil. Install the valves into the valve guides. 2. Make sure the valves move up and down freely. 3. Install the spring spacers on the cylinder head. 4. Install new valve stem...
1. Lubricate the valve stems with engine oil. Install the valves into the valve guides. 2. Make sure the valves move up and down freely. 3. Install the spring spacers on the cylinder head. 4. Install new valve stem...
This section is available on: russian, bulgarian, belarusian, ukrainian, serbian, croatian, romanian, polish, slovak, hungarian
Link in different formats to this section
TEXTHTMLBB Code
- General information
- Technical data
- Governing bodies
- Driving and maintenance
- Power unit
- Gasoline engines (L13A)
- Gasoline engines (R18A)
- Diesel engines (N22A)
- Cooling and lubrication (L13A)
- Cooling and lubrication (R18A)
- Cooling and lubrication (N22A)
- Injection system (gasoline)
- Injection system (diesel)
- Toxicity reduction system
- Troubleshooting
- Transmission
- Clutch and drive shafts
- Mechanical gearbox
- Chassis and running gear
- Suspension and wheels
- Steering
- Brake system
- Body and interior
- Exterior (external elements)
- Doors, locks and windows
- Electrical equipment
- Equipment and devices
- Headlights and lighting
- Power devices
- Electrical circuits
- General information
- User manual
- Maintenance
- Power unit
- Engines D15B and D17A
- K20A Engines
- Overhaul engine
- Cooling system
- Lubrication system
- Fuel injection system
- Toxicity reduction system
- Engine electrical equipment
- Transmission
- Clutch
- Manual gearbox
- Automatic gearbox
- Variator (CVT)
- Drive shafts
- Chassis and running gear
- Car suspension
- Steering
- Brake system
- Body and interior
- Exterior (external elements)
- Interior (internal elements)
- Doors, locks and windows
- Heater and air conditioner
- Manual air conditioner
- Automatic air conditioner
- Security system
- Electrical equipment
- Equipment and devices
- Headlights and lighting
- Windscreen wipers
- Audio system
- Electrical diagrams
- General information
- Introduction to guide
- User manual
- Maintenance
- Power unit
- Engine in car (Civic)
- Engine in car (Integra)
- Engine overhaul
- Cooling and heating
- Power and exhaust systems
- Engine electrical equipment
- Engine management systems
- Transmission
- Manual gearbox
- Automatic transmission (AT/CVT)
- Clutch and drive shafts
- Chassis and running gear
- Brake system
- Car suspension
- Steering
- Body and interior
- Exterior (external elements)
- Interior (internal elements)
- Doors, locks and windows
- Electrical equipment
- Equipment and devices
- Electrical circuits
- Power unit
- SOHC engines
- DOHC engines
- Engine overhaul
- Cooling and lubrication system
- Intake and exhaust system
- Fuel injection system (SOHC)
- Fuel injection system (DOHC)
- Carburetor
- Transmission
- Clutch
- Manual gearbox S4C
- Manual gearbox S40
- Automatic gearbox
- Drive shafts
- Chassis and running gear
- Car suspension
- Steering
- Brake system
- Body and interior
- Body elements
- Heater and air conditioner
- Electrical equipment
- Power devices
- Equipment and instruments
- Electrical circuits
- General information
- Maintenance
- Power unit
- Engine in a car
- Engine overhaul
- Cooling system
- Power and exhaust system
- Engine electrical equipment
- Emission control system
- Transmission
- Mechanical gearbox
- Automatic gearbox
- Clutch and drive shafts
- Four-wheel drive
- Chassis and running gear
- Brake system
- Car suspension
- Steering
- Body and interior
- Body elements
- Electrical equipment
- Equipment and devices
- Electrical circuits