
2. Put the car on the parking brake and block the rear wheels.
3. Raise the front of the car and place it securely on stands.
4. Remove the engine mudguard, if installed.
5. Drain the oil and remove the oil filter (see chapter 1). Remove the dipstick. On 4WD models, drain the transmission fluid.
6. Disconnect the exhaust pipe from the engine and its clamp (behind the engine) and remove the pipe..
Note: on 4WD models, remove the drive shaft (see chapter 8).
7. Put the jack under the engine, and raise the latter so that you can disconnect the lower support. Next, you need to loosen the bottom support (see Section 17) and remove the cross member under the oil pan.
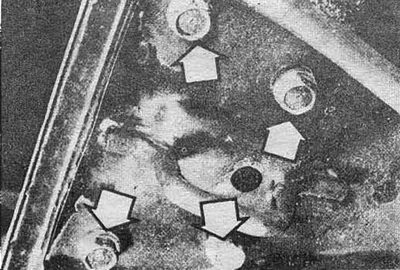
Pic. 13.7a Bolts for fastening the front end of the central cross member (arrow)
Pic. 13.7b Bolts of fastening of the rear end of the central cross member
8. On 4WD models, remove the left cowl and drive gear from the transmission case. On all models, remove the protective screen of the engine-gearbox connection.
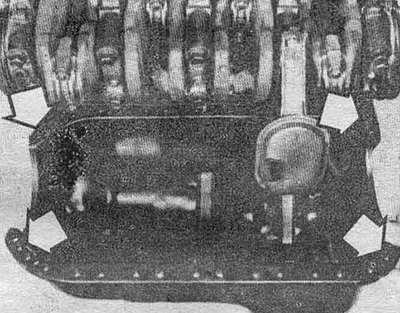
9. Turn away bolts and remove the oil pallet.
10. Clean the pallet and block from the remnants of the old gasket. Rinse surfaces.
11. Clean the threaded holes in the block.
12. Check the oil pan flange for flatness, especially in the bolt area.
13. Make sure there are no cracks on the oil pump intake pipe. If this node needs to be removed, see Section 14.
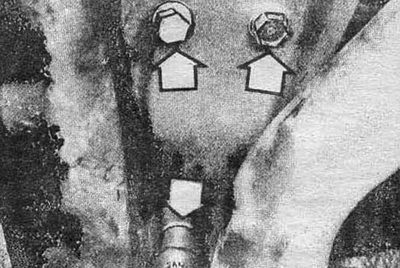
14. Apply sealant to the corners of the oil pan.
Pic. 13.14 Places for applying sealant to the oil pan (arrows)
15. Install a new gasket. Install the oil pan. The bolt tightening order is shown in fig. 13.15, and tightening torque in the specification. We recommend tightening the bolts in three to four steps.
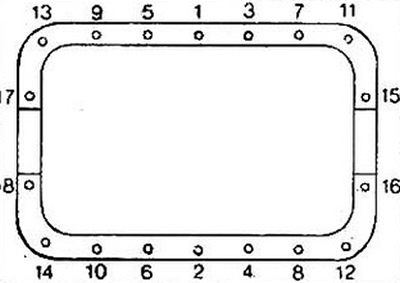
Pic. 13.15 Oil pan bolt tightening sequence
16. Reassemble in the reverse order of disassembly. Don't forget to install a new oil filter and fill the engine with oil.
17. Start the engine and check for oil pressure and leaks.