
Overhaul of car engines Honda Civic 5 and 6

Removal the engine
1. Open the hood as far as possible. 2. Disconnect the negative battery terminal first, then the positive one. 3. Remove the rack trim (engines B16A2, B16A4, B16A5, B16A6). 4. Disconnect the connection cables from the...
1. Open the hood as far as possible. 2. Disconnect the negative battery terminal first, then the positive one. 3. Remove the rack trim (engines B16A2, B16A4, B16A5, B16A6). 4. Disconnect the connection cables from the...

Tightening torques for mounting bolts
Engines B16A2, B16A4, B16A5, B16A6: 1 - rear bracket; 2 - front bracket; 3 - power steering pump mounting bracket; 4 - side engine mounting bracket; 5 - air conditioning compressor mounting bracket; 6 - generator...
Engines B16A2, B16A4, B16A5, B16A6: 1 - rear bracket; 2 - front bracket; 3 - power steering pump mounting bracket; 4 - side engine mounting bracket; 5 - air conditioning compressor mounting bracket; 6 - generator...
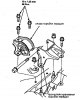
Engine installation
Installation is carried out in the reverse order of removal. 1. Install the transmission support and transmission mounting bracket, then tighten the mounting bolts to the body. Note: Do not tighten the transmission...
Installation is carried out in the reverse order of removal. 1. Install the transmission support and transmission mounting bracket, then tighten the mounting bolts to the body. Note: Do not tighten the transmission...

Cylinder block — device
Engines B16A2, B16A4, B16A5, B16A6 Engines D15Z6, D15Z7, D16Y5, D16Y8 Engines D14A3, D14A4, D15Z4, D15Z5, D16Y4, D16Y6, D16Y7, D16Y9 Direction of piston installation:
Engines B16A2, B16A4, B16A5, B16A6 Engines D15Z6, D15Z7, D16Y5, D16Y8 Engines D14A3, D14A4, D15Z4, D15Z5, D16Y4, D16Y6, D16Y7, D16Y9 Direction of piston installation:

Flywheel and drive disk — replacement
Manual transmission Engines B16A2, B16A4, B16A6 Remove the eight flywheel bolts, then separate the flywheel from the crankshaft flange. After installation, tighten the bolts in the sequence shown. Except for engines...
Manual transmission Engines B16A2, B16A4, B16A6 Remove the eight flywheel bolts, then separate the flywheel from the crankshaft flange. After installation, tighten the bolts in the sequence shown. Except for engines...

Connecting rod and crankshaft
Clearance between connecting rod cap and crankshaft cheek Standard gap: 0.15 - 0.30 mm Maximum allowable: 0.40 mm If the clearance is greater than the maximum allowable, install a new connecting rod. If after installing...
Clearance between connecting rod cap and crankshaft cheek Standard gap: 0.15 - 0.30 mm Maximum allowable: 0.40 mm If the clearance is greater than the maximum allowable, install a new connecting rod. If after installing...

Main bearings
Gap 1. To check the oil clearance between the main journal and the bearing, remove the main caps and liners. 2. Clean the main journal and bearing shell with a clean cloth. 3. Place one plastic measuring plate across...
Gap 1. To check the oil clearance between the main journal and the bearing, remove the main caps and liners. 2. Clean the main journal and bearing shell with a clean cloth. 3. Place one plastic measuring plate across...

Connecting rod bearings
Gap 1. Remove the connecting rod cap and bearing shell. 2. Wipe the main journal and bearing with a clean cloth, 3. Place the measuring plate along the crankpin. 4. Install the insert and cover and tighten the nuts....
Gap 1. Remove the connecting rod cap and bearing shell. 2. Wipe the main journal and bearing with a clean cloth, 3. Place the measuring plate along the crankpin. 4. Install the insert and cover and tighten the nuts....

Pistons and crankshaft
Removal 1. Remove the oil pan assembly. 2. Remove the cover. 3. Remove the oil pick-up. 4. Remove the oil pump. 5. Remove the oil baffle plate (engines B16A2, B16A4, B16A5, B16A6). 6. Loosen the bolts and remove the...
Removal 1. Remove the oil pan assembly. 2. Remove the cover. 3. Remove the oil pick-up. 4. Remove the oil pump. 5. Remove the oil baffle plate (engines B16A2, B16A4, B16A5, B16A6). 6. Loosen the bolts and remove the...

Crankshaft — inspection
Clean the crankshaft oil passages with a brush or suitable brush. Check keyways and threads. Beating Measure the runout on all main journals to ensure the crankshaft is not bent. The difference between the measurements...
Clean the crankshaft oil passages with a brush or suitable brush. Check keyways and threads. Beating Measure the runout on all main journals to ensure the crankshaft is not bent. The difference between the measurements...

Pistons — inspection
1. Check the piston for warping and cracks. Note: If the cylinder is overbored, an oversize piston must be used. 2. Measure the piston diameter at a distance A from the bottom of the skirt. Engines A16A2, B16A4, B16A5,...
1. Check the piston for warping and cracks. Note: If the cylinder is overbored, an oversize piston must be used. 2. Measure the piston diameter at a distance A from the bottom of the skirt. Engines A16A2, B16A4, B16A5,...

Cylinder block
Examination 1. Measure wear and taper in X and Y directions in three planes in each cylinder as shown. Cylinder bore size: Engines A16A2, V16A4, V1BA5, V16A6: Nominal value: 81.00-81.02 mm Operational value: 81.07 mm...
Examination 1. Measure wear and taper in X and Y directions in three planes in each cylinder as shown. Cylinder bore size: Engines A16A2, V16A4, V1BA5, V16A6: Nominal value: 81.00-81.02 mm Operational value: 81.07 mm...

Piston pins — removal
Note: To remove the piston pins, use only the special piston pin removal tool kit (07AP-0010000). Make sure you are using the correct number guide bushing. 1. Install special tools as shown. 2. Place the piston on the...
Note: To remove the piston pins, use only the special piston pin removal tool kit (07AP-0010000). Make sure you are using the correct number guide bushing. 1. Install special tools as shown. 2. Place the piston on the...

Connecting rods — selection
Each connecting rod falls into one of four tolerances (0 to +0.024 mm) in increments of 0.006 mm, depending on the size of its crankpin bore. It is then marked with numbers (1, 2, 3 or 4), indicating the size range. You...
Each connecting rod falls into one of four tolerances (0 to +0.024 mm) in increments of 0.006 mm, depending on the size of its crankpin bore. It is then marked with numbers (1, 2, 3 or 4), indicating the size range. You...

Piston pins
Installation Engines A16A2, B16A4, B16A5, B16A6: Note: Make sure you use the correct number guide bushing. Piston pin bore diameter: 21 mm 1. Install the piston pin as shown. Guide bushing Other engines: Installation is...
Installation Engines A16A2, B16A4, B16A5, B16A6: Note: Make sure you use the correct number guide bushing. Piston pin bore diameter: 21 mm 1. Install the piston pin as shown. Guide bushing Other engines: Installation is...

Clearance in the piston ring lock
1. Using a piston, insert a new ring into the cylinder bore 15-20 mm from the bottom end of the cylinder. 2. Measure the distance between the ends of the piston ring cut using a set of feeler gauges. If the distance is...
1. Using a piston, insert a new ring into the cylinder bore 15-20 mm from the bottom end of the cylinder. 2. Measure the distance between the ends of the piston ring cut using a set of feeler gauges. If the distance is...

Installing the seal
The surface under the seal on the block should not be dry. Apply a light layer of oil to the crankshaft and the edges of the seal. 1. Insert the crankshaft oil seal into the right side cover. Note: Insert the final...
The surface under the seal on the block should not be dry. Apply a light layer of oil to the crankshaft and the edges of the seal. 1. Insert the crankshaft oil seal into the right side cover. Note: Insert the final...

Pistons — installation
Before installing the piston, apply a layer of engine oil to the piston ring grooves and cylinder bores. 1. If the crankshaft is already installed: Set the crankshaft to TDC for each cylinder. Remove the connecting rod...
Before installing the piston, apply a layer of engine oil to the piston ring grooves and cylinder bores. 1. If the crankshaft is already installed: Set the crankshaft to TDC for each cylinder. Remove the connecting rod...

Crankshaft — installation
Before installing the crankshaft, apply a coat of engine oil to the main and connecting rod bearings. 1. Insert the bearing shells into the cylinder block and connecting rods. 2. Install the crankshaft so that the...
Before installing the crankshaft, apply a coat of engine oil to the main and connecting rod bearings. 1. Insert the bearing shells into the cylinder block and connecting rods. 2. Install the crankshaft so that the...

Oil pan — installation
Engines D15Z6, D15Z7, D16Y5, D16Y8: Attention: Use liquid gasket, part number OY740-99986 or 08C70-X0134S. Ensure contact surfaces are clean and dry before applying liquid gasket. Apply liquid gasket evenly and...
Engines D15Z6, D15Z7, D16Y5, D16Y8: Attention: Use liquid gasket, part number OY740-99986 or 08C70-X0134S. Ensure contact surfaces are clean and dry before applying liquid gasket. Apply liquid gasket evenly and...
This section is available on: russian, bulgarian, belarusian, ukrainian, serbian, croatian, romanian, polish, slovak, hungarian
Link in different formats to this section
TEXTHTMLBB Code
- General information
- Technical data
- Governing bodies
- Driving and maintenance
- Power unit
- Gasoline engines (L13A)
- Gasoline engines (R18A)
- Diesel engines (N22A)
- Cooling and lubrication (L13A)
- Cooling and lubrication (R18A)
- Cooling and lubrication (N22A)
- Injection system (gasoline)
- Injection system (diesel)
- Toxicity reduction system
- Troubleshooting
- Transmission
- Clutch and drive shafts
- Mechanical gearbox
- Chassis and running gear
- Suspension and wheels
- Steering
- Brake system
- Body and interior
- Exterior (external elements)
- Doors, locks and windows
- Electrical equipment
- Equipment and devices
- Headlights and lighting
- Power devices
- Electrical circuits
- General information
- User manual
- Maintenance
- Power unit
- Engines D15B and D17A
- K20A Engines
- Overhaul engine
- Cooling system
- Lubrication system
- Fuel injection system
- Toxicity reduction system
- Engine electrical equipment
- Transmission
- Clutch
- Manual gearbox
- Automatic gearbox
- Variator (CVT)
- Drive shafts
- Chassis and running gear
- Car suspension
- Steering
- Brake system
- Body and interior
- Exterior (external elements)
- Interior (internal elements)
- Doors, locks and windows
- Heater and air conditioner
- Manual air conditioner
- Automatic air conditioner
- Security system
- Electrical equipment
- Equipment and devices
- Headlights and lighting
- Windscreen wipers
- Audio system
- Electrical diagrams
- General information
- Introduction to guide
- User manual
- Maintenance
- Power unit
- Engine in car (Civic)
- Engine in car (Integra)
- Engine overhaul
- Cooling and heating
- Power and exhaust systems
- Engine electrical equipment
- Engine management systems
- Transmission
- Manual gearbox
- Automatic transmission (AT/CVT)
- Clutch and drive shafts
- Chassis and running gear
- Brake system
- Car suspension
- Steering
- Body and interior
- Exterior (external elements)
- Interior (internal elements)
- Doors, locks and windows
- Electrical equipment
- Equipment and devices
- Electrical circuits
- Power unit
- SOHC engines
- DOHC engines
- Engine overhaul
- Cooling and lubrication system
- Intake and exhaust system
- Fuel injection system (SOHC)
- Fuel injection system (DOHC)
- Carburetor
- Transmission
- Clutch
- Manual gearbox S4C
- Manual gearbox S40
- Automatic gearbox
- Drive shafts
- Chassis and running gear
- Car suspension
- Steering
- Brake system
- Body and interior
- Body elements
- Heater and air conditioner
- Electrical equipment
- Power devices
- Equipment and instruments
- Electrical circuits
- General information
- Maintenance
- Power unit
- Engine in a car
- Engine overhaul
- Cooling system
- Power and exhaust system
- Engine electrical equipment
- Emission control system
- Transmission
- Mechanical gearbox
- Automatic gearbox
- Clutch and drive shafts
- Four-wheel drive
- Chassis and running gear
- Brake system
- Car suspension
- Steering
- Body and interior
- Body elements
- Electrical equipment
- Equipment and devices
- Electrical circuits