


Electrical equipment and devices of the car Honda Civic 7
.

Relays and fuses
Relays and fuses Location of relays and fuses (mounting block in the engine compartment). A - air conditioner compressor electromagnetic clutch relay, B - rear window heater relay, C - heater fan relay, D - headlight...
Relays and fuses Location of relays and fuses (mounting block in the engine compartment). A - air conditioner compressor electromagnetic clutch relay, B - rear window heater relay, C - heater fan relay, D - headlight...

Cigarette lighter — removal and installation
1. Remove the cigarette lighter (A). 2. Remove the cartridge (B) and disconnect the connector (C). 3. Disconnect the connector (A) from the illumination ring and remove it (B) (sedan). Remove the ring (hatchback). 4....
1. Remove the cigarette lighter (A). 2. Remove the cartridge (B) and disconnect the connector (C). 3. Disconnect the connector (A) from the illumination ring and remove it (B) (sedan). Remove the ring (hatchback). 4....

Instrument cluster
Removal and installation 1. Remove the instrument panel. 2. Remove the steering column cover. 3. Loosen the screws (A) and disconnect the connectors (B). Note: Before removing the instrument cluster, place a rag (D) on...
Removal and installation 1. Remove the instrument panel. 2. Remove the steering column cover. 3. Loosen the screws (A) and disconnect the connectors (B). Note: Before removing the instrument cluster, place a rag (D) on...

External lighting system
Removing and installing the lighting control switch 1. Remove the steering column cover. 2. Disconnect the connector (A) from the light control switch (B) (See the illustration "Light control switch"). 3. Loosen the...
Removing and installing the lighting control switch 1. Remove the steering column cover. 2. Disconnect the connector (A) from the light control switch (B) (See the illustration "Light control switch"). 3. Loosen the...

Checking the light switch
1. Remove the light switch. 2. Check the continuity between the terminals of the light switch connector. Direction indicators Switch position Conclusions Right turn 6-14 Starting position - Left turn 13-14 Headlights...
1. Remove the light switch. 2. Check the continuity between the terminals of the light switch connector. Direction indicators Switch position Conclusions Right turn 6-14 Starting position - Left turn 13-14 Headlights...

Ignition switch
Removal and installation the steering column lock assembly with the ignition lock 1. Remove the steering column. 2. Punch two shear bolts and drill them out with a 5mm drill. Caution: Be careful not to damage the...
Removal and installation the steering column lock assembly with the ignition lock 1. Remove the steering column. 2. Punch two shear bolts and drill them out with a 5mm drill. Caution: Be careful not to damage the...

Checking the limit switch in the trunk lid/tailgate lock
Sedan 1. Lift the trunk lid. 2. Disconnect the connector from the rear door lock. 3. Check the conductivity between the terminals of the limit switch in the trunk lid lock according to the table. Switch position...
Sedan 1. Lift the trunk lid. 2. Disconnect the connector from the rear door lock. 3. Check the conductivity between the terminals of the limit switch in the trunk lid lock according to the table. Switch position...
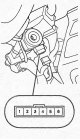
Checking the key presence sensor in the ignition switch
1. Remove the steering column cover. 2. Disconnect the connector. 3. Make sure there is no conductivity between terminals "1" and "2". 4. Insert the key into the ignition switch. 5. Make sure there is conductivity...
1. Remove the steering column cover. 2. Disconnect the connector. 3. Make sure there is no conductivity between terminals "1" and "2". 4. Insert the key into the ignition switch. 5. Make sure there is conductivity...
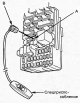
Electrical equipment control system (MULTIPLEX)
Location of electrical control system components (sedan). 1 - interior lighting lamp, 2 - Multiplex control unit, 3 - local lighting lamp. Location of electrical control system components (hatchback). 1 - interior...
Location of electrical control system components (sedan). 1 - interior lighting lamp, 2 - Multiplex control unit, 3 - local lighting lamp. Location of electrical control system components (hatchback). 1 - interior...

Removal and installation the main window control switch
1. Remove the auxiliary handle trim. 2. Loosen the screws, disconnect the connector (A), and remove the power window main switch (B). Sedan. Hatchback. 3. Loosen the screws and remove the cover (B) from the main switch...
1. Remove the auxiliary handle trim. 2. Loosen the screws, disconnect the connector (A), and remove the power window main switch (B). Sedan. Hatchback. 3. Loosen the screws and remove the cover (B) from the main switch...

Checking the main power window control switch
Driver's door 1. Remove the main power window control switch. 2. Disconnect the connector from the main switch. 3. Check the main switch according to the tables "Checking the main power window control switch". If a...
Driver's door 1. Remove the main power window control switch. 2. Disconnect the connector from the main switch. 3. Check the main switch according to the tables "Checking the main power window control switch". If a...
Resetting the driver's door window lift control unit
Note: A factory reset should be performed in the following cases: the battery is disconnected; fuses #6 (7.5 A) and #23 (20 A) are blown or missing (mounting block in the cabin); the connector from the main window...
Note: A factory reset should be performed in the following cases: the battery is disconnected; fuses #6 (7.5 A) and #23 (20 A) are blown or missing (mounting block in the cabin); the connector from the main window...
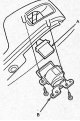
Removal and installation window lifter control switches
1. Remove the auxiliary handle trim. 2. Loosen the screws, disconnect the connector (A), and remove the window control switch (B). Sedan. Hatchback (front passenger door). Hatchback (rear doors). 3. Loosen the two...
1. Remove the auxiliary handle trim. 2. Loosen the screws, disconnect the connector (A), and remove the window control switch (B). Sedan. Hatchback (front passenger door). Hatchback (rear doors). 3. Loosen the two...
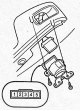
Checking the window control switches
1. Remove the window control switch. 2. Disconnect the connector from the switch. Sedan. Hatchback. 3. Check for continuity between the switch terminals. Front passenger door. Switch position Conclusions UP 1 (3)-4(1),...
1. Remove the window control switch. 2. Disconnect the connector from the switch. Sedan. Hatchback. 3. Check for continuity between the switch terminals. Front passenger door. Switch position Conclusions UP 1 (3)-4(1),...
Checking the electric window lifter drive
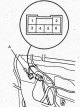
Driver's door 1. Remove the driver's door trim panel. 2. Disconnect the connector (A). 3. Check the operation of the window lift by applying battery voltage to terminals "1" and "2". Conclusions Electric drive 1 2 + -...
Driver's door 1. Remove the driver's door trim panel. 2. Disconnect the connector (A). 3. Check the operation of the window lift by applying battery voltage to terminals "1" and "2". Conclusions Electric drive 1 2 + -...

Checking the central locking remote control unit
Checking the door lock control unit See section "Electrical Equipment Management System (MULTIPLEX)" Checking the central locking remote control unit 1. Remove the lower instrument panel trim. 2. Remove the radio. 3....
Checking the door lock control unit See section "Electrical Equipment Management System (MULTIPLEX)" Checking the central locking remote control unit 1. Remove the lower instrument panel trim. 2. Remove the radio. 3....
Checking electric door lock drives
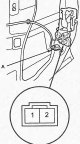
Sedan 1. Remove the door trim panel. 2. Disconnect the connector (A). Driver's door. Front passenger door. Rear doors. 3. Check the operation of the electric drive by applying battery voltage to the terminals as shown...
Sedan 1. Remove the door trim panel. 2. Disconnect the connector (A). Driver's door. Front passenger door. Rear doors. 3. Check the operation of the electric drive by applying battery voltage to the terminals as shown...

Checking the electric drive of the rear door lock
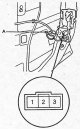
1. Remove the rear door trim panel. 2. Lift the rear door. 3. Disconnect the connector (B) from the lock (A). 4. Check the operation of the electric drive by applying battery voltage to the terminals as shown in the...
1. Remove the rear door trim panel. 2. Lift the rear door. 3. Disconnect the connector (B) from the lock (A). 4. Check the operation of the electric drive by applying battery voltage to the terminals as shown in the...
Checking the central lock switch
1. Remove the door trim panel. 2. Disconnect the connector (A). Sedan. Hatchback. 3. Check the presence of conductivity at the connector terminals according to the table. Switch position Conclusions LOCK 1 (2)-2(3)...
1. Remove the door trim panel. 2. Disconnect the connector (A). Sedan. Hatchback. 3. Check the presence of conductivity at the connector terminals according to the table. Switch position Conclusions LOCK 1 (2)-2(3)...
Transmitter registration
Note: You can register three transmitters, when registering the fourth transmitter, the code of the transmitter that was registered first will be erased. 1. Turn the ignition switch to the "ON" (II) position. 2. Within...
Note: You can register three transmitters, when registering the fourth transmitter, the code of the transmitter that was registered first will be erased. 1. Turn the ignition switch to the "ON" (II) position. 2. Within...

Sound signal
Removal, installation and inspection 1. Remove the front bumper. 2. Disconnect the connector (A) from the horn (B), loosen the bolt (C), and remove the horn. 3. Connect the battery as shown in the figure, make sure the...
Removal, installation and inspection 1. Remove the front bumper. 2. Disconnect the connector (A) from the horn (B), loosen the bolt (C), and remove the horn. 3. Connect the battery as shown in the figure, make sure the...

Rear Window Defogger — Checking Defogger Wires
Note: Check fuse #11 (30A) (mounting block in the engine compartment) and No.14 (10 A) (mounting block in the cabin). 1. Wrap the end of the voltmeter probe (A) with foil (B). 2. Turn the ignition switch to the "ON"...
Note: Check fuse #11 (30A) (mounting block in the engine compartment) and No.14 (10 A) (mounting block in the cabin). 1. Wrap the end of the voltmeter probe (A) with foil (B). 2. Turn the ignition switch to the "ON"...

Rear Window Defogger — Wiring Repair
1. Degrease the ends of the wire at the break point using alcohol. 2. Apply protective tape (A) along the break (B). 3. Mix the repair compound (A) thoroughly and apply a drop of the substance to the wire using a...
1. Degrease the ends of the wire at the break point using alcohol. 2. Apply protective tape (A) along the break (B). 3. Mix the repair compound (A) thoroughly and apply a drop of the substance to the wire using a...
Rear Window Defogger — Checking Antenna Coil
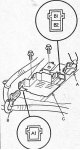
1. Open the trunk lid. 2. Disconnect the connectors (A, B) from the antenna coil (C). 3. Make sure there is conductivity between terminal "B2" and ground, terminals "A1" and "B1". If there is no conductivity, replace...
1. Open the trunk lid. 2. Disconnect the connectors (A, B) from the antenna coil (C). 3. Make sure there is conductivity between terminal "B2" and ground, terminals "A1" and "B1". If there is no conductivity, replace...
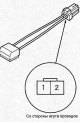
Rear Window Defogger — Checking the Noise Suppression Filter
1. Remove the luggage compartment side trim on the right side. 2. Disconnect the connector. 3. Measure the capacitance of the capacitor using a tester. Nominal capacitance - 0.47±0.09 μF If the capacity does not match...
1. Remove the luggage compartment side trim on the right side. 2. Disconnect the connector. 3. Measure the capacitance of the capacitor using a tester. Nominal capacitance - 0.47±0.09 μF If the capacity does not match...
External mirror adjustment system
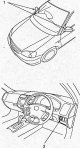
1 - outside mirrors, 2 - outside mirror position adjustment switch. Checking the switch for adjusting the position of the outside mirrors 1. Remove the additional storage compartment (sedan). 2. Remove the outside...
1 - outside mirrors, 2 - outside mirror position adjustment switch. Checking the switch for adjusting the position of the outside mirrors 1. Remove the additional storage compartment (sedan). 2. Remove the outside...
Checking the electric drive of the outside mirrors
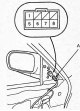
1. Remove the outside mirror trim. 2. Disconnect the connector (A). Sedan. Hatchback. 3. Apply battery voltage to the terminals of the electric drive connector and check its operation according to the table. Sedan....
1. Remove the outside mirror trim. 2. Disconnect the connector (A). Sedan. Hatchback. 3. Apply battery voltage to the terminals of the electric drive connector and check its operation according to the table. Sedan....

Removal the electric drives of the outside mirrors
Sedan 1. Remove the outside mirror assembly. 2. Disconnect the connector. 3. Remove the cover (A) and unscrew the screws (C) securing the connector (B). 4. Cut the wire with wire cutters, unscrew the three screws (C)...
Sedan 1. Remove the outside mirror assembly. 2. Disconnect the connector. 3. Remove the cover (A) and unscrew the screws (C) securing the connector (B). 4. Cut the wire with wire cutters, unscrew the three screws (C)...

Installation of electric drives for exterior mirrors
Sedan 1. Install the new motor and pass the wire through the mirror housing (B) and through the bracket (A). 2. Install the bracket (A) and tighten the screws (C). 3. Connect the wires to the connector according to the...
Sedan 1. Install the new motor and pass the wire through the mirror housing (B) and through the bracket (A). 2. Install the bracket (A) and tighten the screws (C). 3. Connect the wires to the connector according to the...

Electric sunroof drive
Location of sunroof electric drive components (sedan). 1 - hatch opening relay and hatch closing relay, 2 - limit switch, 3 - hatch electric drive control switch, 4 - hatch drive electric motor. Location of the electric...
Location of sunroof electric drive components (sedan). 1 - hatch opening relay and hatch closing relay, 2 - limit switch, 3 - hatch electric drive control switch, 4 - hatch drive electric motor. Location of the electric...

Checking the sunroof electric drive control unit (hatchback)
1. Remove the roof trim. 2. Disconnect the connector (A) from the sunroof control unit (B). 3. Check the sunroof electric drive control unit according to the table " Checking the sunroof electric drive control unit "....
1. Remove the roof trim. 2. Disconnect the connector (A) from the sunroof control unit (B). 3. Check the sunroof electric drive control unit according to the table " Checking the sunroof electric drive control unit "....

Checking the sunroof electric drive control switch
Sedan 1. Remove the additional storage box. 2. Squeeze the latches, remove the sunroof control switch (A) and disconnect the connector (B). Table. Checking the sunroof electric drive control unit. Conclusion Wire color...
Sedan 1. Remove the additional storage box. 2. Squeeze the latches, remove the sunroof control switch (A) and disconnect the connector (B). Table. Checking the sunroof electric drive control unit. Conclusion Wire color...

Checking the sunroof electric drive
Electric motor 1. Remove the roof trim. 2. Disconnect the connector (B) from the sunroof motor (A). 3. Connect the battery to terminals "2" (+) and "1" (-), make sure the hatch opens. 4. Connect the battery to terminals...
Electric motor 1. Remove the roof trim. 2. Disconnect the connector (B) from the sunroof motor (A). 3. Connect the battery to terminals "2" (+) and "1" (-), make sure the hatch opens. 4. Connect the battery to terminals...
Hatch position sensor
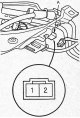
1. Remove the roof trim. 2. Disconnect the connector from the sunroof position sensor (A). 3. Check for conductivity between the sensor terminals according to the table. Hatch position Conclusions Closed 1-2 Opened - If...
1. Remove the roof trim. 2. Disconnect the connector from the sunroof position sensor (A). 3. Check for conductivity between the sensor terminals according to the table. Hatch position Conclusions Closed 1-2 Opened - If...
This section is available on: russian, bulgarian, belarusian, ukrainian, serbian, croatian, romanian, polish, slovak, hungarian
Link in different formats to this section
TEXTHTMLBB Code
- General information
- Technical data
- Governing bodies
- Driving and maintenance
- Power unit
- Gasoline engines (L13A)
- Gasoline engines (R18A)
- Diesel engines (N22A)
- Cooling and lubrication (L13A)
- Cooling and lubrication (R18A)
- Cooling and lubrication (N22A)
- Injection system (gasoline)
- Injection system (diesel)
- Toxicity reduction system
- Troubleshooting
- Transmission
- Clutch and drive shafts
- Mechanical gearbox
- Chassis and running gear
- Suspension and wheels
- Steering
- Brake system
- Body and interior
- Exterior (external elements)
- Doors, locks and windows
- Electrical equipment
- Equipment and devices
- Headlights and lighting
- Power devices
- Electrical circuits
- General information
- User manual
- Maintenance
- Power unit
- Engines D15B and D17A
- K20A Engines
- Overhaul engine
- Cooling system
- Lubrication system
- Fuel injection system
- Toxicity reduction system
- Engine electrical equipment
- Transmission
- Clutch
- Manual gearbox
- Automatic gearbox
- Variator (CVT)
- Drive shafts
- Chassis and running gear
- Car suspension
- Steering
- Brake system
- Body and interior
- Exterior (external elements)
- Interior (internal elements)
- Doors, locks and windows
- Heater and air conditioner
- Manual air conditioner
- Automatic air conditioner
- Security system
- Electrical equipment
- Equipment and devices
- Headlights and lighting
- Windscreen wipers
- Audio system
- Electrical diagrams
- General information
- Introduction to guide
- User manual
- Maintenance
- Power unit
- Engine in car (Civic)
- Engine in car (Integra)
- Engine overhaul
- Cooling and heating
- Power and exhaust systems
- Engine electrical equipment
- Engine management systems
- Transmission
- Manual gearbox
- Automatic transmission (AT/CVT)
- Clutch and drive shafts
- Chassis and running gear
- Brake system
- Car suspension
- Steering
- Body and interior
- Exterior (external elements)
- Interior (internal elements)
- Doors, locks and windows
- Electrical equipment
- Equipment and devices
- Electrical circuits
- Power unit
- SOHC engines
- DOHC engines
- Engine overhaul
- Cooling and lubrication system
- Intake and exhaust system
- Fuel injection system (SOHC)
- Fuel injection system (DOHC)
- Carburetor
- Transmission
- Clutch
- Manual gearbox S4C
- Manual gearbox S40
- Automatic gearbox
- Drive shafts
- Chassis and running gear
- Car suspension
- Steering
- Brake system
- Body and interior
- Body elements
- Heater and air conditioner
- Electrical equipment
- Power devices
- Equipment and instruments
- Electrical circuits
- General information
- Maintenance
- Power unit
- Engine in a car
- Engine overhaul
- Cooling system
- Power and exhaust system
- Engine electrical equipment
- Emission control system
- Transmission
- Mechanical gearbox
- Automatic gearbox
- Clutch and drive shafts
- Four-wheel drive
- Chassis and running gear
- Brake system
- Car suspension
- Steering
- Body and interior
- Body elements
- Electrical equipment
- Equipment and devices
- Electrical circuits