
Note: Read the entire section first. The engine and gearbox are removed as an assembly. Removing the gearbox is carried out outside the car.
Withdrawal
1. On models with fuel injection, relieve fuel pressure in the system (see chapter 4).
2. Disconnect the negative cable from the battery.
3. Put protective covers on the fenders and remove the engine hood (see chapter 11).
4. Remove the air cleaning unit (see chapter 4).
5. Raise the vehicle and place it on stands. Drain coolant and oil, remove drive belts (see chapter 1).
6. Label, then disconnect all vacuum lines, hoses, wires, ground cables, and fuel lines. Mark them with duct tape or paint.
7. Remove the fan, diffuser and radiator of the cooling system.
8. Relieve residual fuel pressure in the tank (open the lid) and disconnect the fuel supply from the housing to the engine (see chapter 4). Close open tubes.
9. Disconnect throttle link, throttle valve link and hand throttle link from engine (see chapter 4).
Note: Do not bend the inner traction cable. Replace the defective cable with a new one.
10. If the car is equipped with power steering (power steering), disconnect the power steering pump. If there is free space nearby, fix the power steering pump there without disconnecting the hoses from it; otherwise, remove the power steering pump (see chapter 10).
11. On vehicles equipped with air conditioning, remove the compressor and without removing the hoses, put it aside (see chapter 3).
12. Disconnect the muffler downpipe from the exhaust manifold (see Section A).
13. Disconnect the wheel drive (see chapter 8), wires, shaft rod and speedometer cable from the gearbox (see chapter 7).
Note: On 4WD vehicles, remove the control cable from the transfer case housing. Disconnect the axle shaft from the gearbox.
14. Install the hoist hooks into the engine bracket. Tighten the lines with very light force.
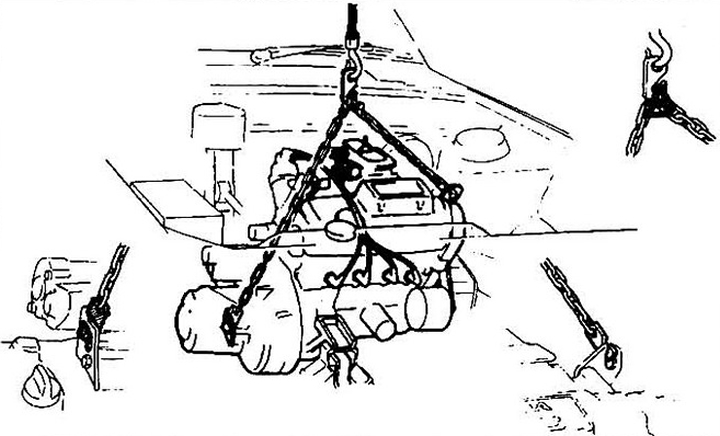
Pic. 5.14 lifting the engine
15. Check again that nothing but the engine mounts is connected to the engine and gearbox housing.
16. Place a jack under the gearbox. Place a piece of wood between the jack and the gearbox housing. Remove the through bolt from the motor mount and unscrew the strut (see Section A), unscrew the gearbox support bracket (if it is installed) from her.
Caution: Do not place any part of your body under the engine. when the power unit is on the jack.
17. Slowly raise the power package. If necessary, pull the supports off the frame with a lever.
18. Remove the power unit from the vehicle and carefully lower it onto stands.
19. Remove the reinforcement link engine / gearbox.
20. On models with automatic transmission, remove the protective cover from the torque converter. Remove clamps from torque converter drive clutch (see chapter 7) and pull the transformer out of the crankcase.
21. Unscrew the bolts securing the gearbox to the engine and remove the gearbox
22. Lay the engine on the floor and remove the flywheel. Mount the engine on the stand.
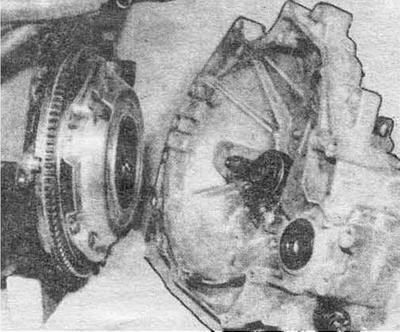
Pic. 5.21 Removing the gearbox
Installation
23. Inspect the engine and gearbox mounts. They must not be worn or damaged.
24. On models with a manual transmission, check the condition of the clutch (see chapter 8). On an automatic transmission, check the condition of the oil seals and bushings.
25. On manual transmission models, apply high-temperature grease to the crankshaft support bearing.
26. On automatic transmission models, lubricate the tip and sealing lip of the oil seal.
27. Carefully install the gearbox in place, following the procedure described in Chapter 7.
Note: Do not use bolt torque to align the gearbox with the engine. This may damage the main parts.
28. Attach the gearbox securely to the engine.
29. Lower the power unit into the engine compartment.
30. Install the mounting bolts and tighten them.
31. Install the removed parts in the reverse order of disassembly.
32. Fill in coolant and oil. If necessary, add transmission fluid to the power steering pump reservoir (see chapter 1).
33. Start the engine and check its operation. Stop the engine and check the level of all fluids.