
Withdrawal
1. Disconnect the cables from the battery and remove it. this will greatly facilitate your work in the future.
2. Remove the air filter housing and its hoses
3. Remove the distributor (see chapter 5).
4. Disconnect the speedometer cable.
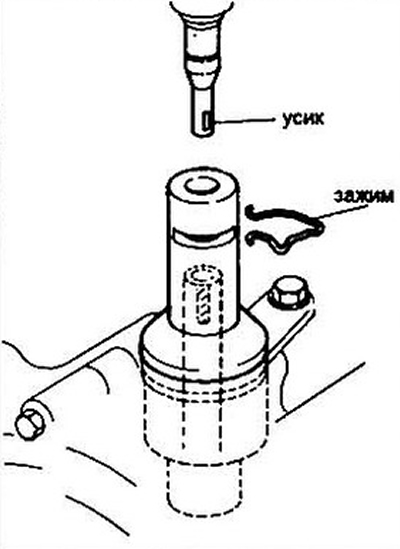
Pic. 7.4 To disconnect the speedometer cable, remove the clip and pull out the cable. Do not remove the drive housing, otherwise the speedometer drive will fall into the box housing
5. Tag and disconnect the hoses from the box
6. Disconnect the starter wires and remove the upper mounting bolt (see chapter 5). The lower bolts are easier to unscrew from under the car.
7. Disconnect all wires from the box.
8. Disconnect the box cooling hoses, plug them so that no oil flows out and secure them with wire.
9. Disconnect throttle cable (see Section 3).
10. Loosen the wheel nuts. Raise the front of the car and place it on stands. Remove the front wheels.
11. Remove protection of a motor compartment and fender liner.
12. Remove the exhaust pipe muffler (see chapter 4).
13. Drain the oil from the box (see chapter 1). Reinstall the drain plug.
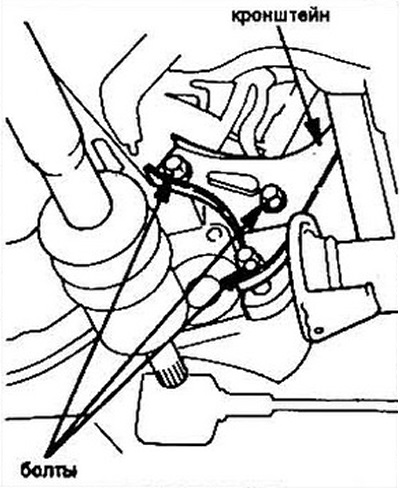
14. Remove the exhaust pipe mounting bracket and cable holder from the torque converter housing. Remove the torque converter cover.
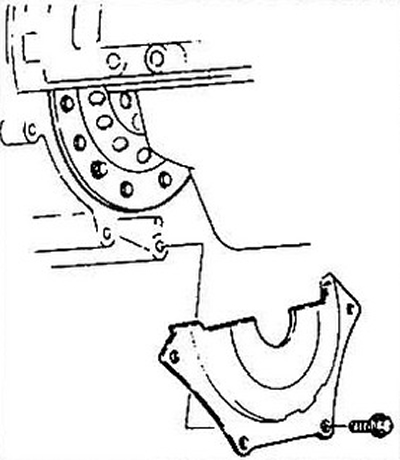
Pic. 7.14 Collapsing torque converter guard
15. Remove the shift cable (see Section 4).
16. Mark the relative position of the drive clutch and torque converter.
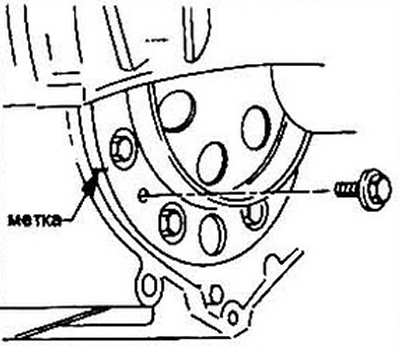
Pic. 7.16 Marking the torque converter drive plate
17. Turn away bolts of fastening of the coupling to the hydrotransformer. Rotate the engine to access all bolts.
18. On models since 1988, remove the right torque rod (see chapter 10).
19. Remove the drive axles from the box (see chapter 8).
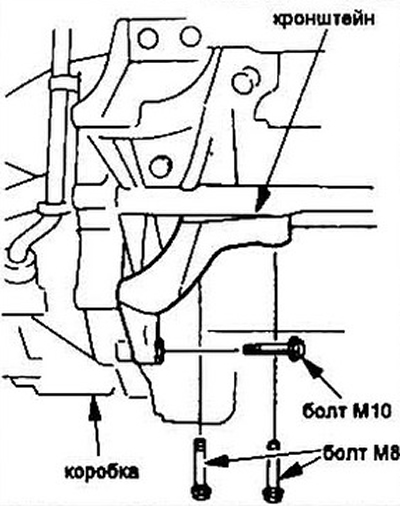
20. Support the engine with an eyebolt or place a jack under the oil pan with a block of wood between them.
21. Put a jack under the box, preferably a special design.
22. Raise the box so that you can lift it all off the box supports. Loosen the bolts securing the box to the engine.
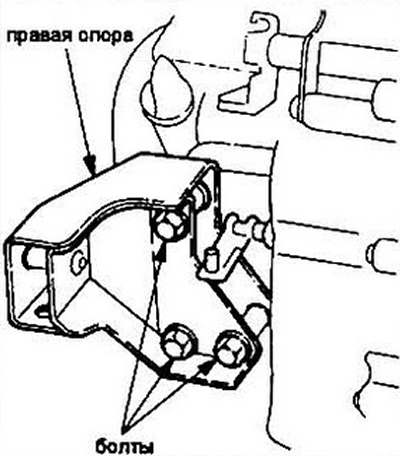
23. Remove bolts of fastening of a forward support of a box.
Pic. 7.23. Front box support (typical)
24. Remove the rear support bracket bolts and remove the bracket.
Pic. 7.24 Rear box support (typical)
25. Remove the side support bolts.
Pic. 7.25 Box side support (typical)
26. Slowly lower the box, pushing it back until it clears the engine block and drive clutch.
Installation
27. Prior to installation, make sure that the torque converter hub is securely fastened to the pump.
28. Jack up the box and lift it into the assembly position. Follow that. so that the box does not move out of the jack.
29. Align the marks on the drive clutch and torque converter. The torque converter pins must be aligned with the drive clutch bores.
30. Carefully slide the box onto the engine block over the pins.
31. Establish bolts of fastening of a box to the engine and tighten them.
32. Install the fasteners for the drive clutch and torque converter Torque is specified in the specification.
33. Install the side, rear and front box supports. Tighten the bolts.
34. Remove additional box and engine supports.
35. Install the drive axles and suspension parts removed when dismantling the box.
36. Connect shift cable (see Section 4).
37. Install the torque converter cover, exhaust pipe bracket, cable holder.
38. Install the exhaust pipe of the muffler and other parts of the exhaust system, removed during the dismantling of the box (see chapter 4).
39. Install fenders and engine compartment protection.
40. Install the wheels, tighten the fastening nuts by hand, lower the car.
41. Connect the throttle cable and adjust it (see Section 3).
42. Connect cooling hoses.
43. Install the starter.
44. Connect the wire connectors. Check the gearbox ground contact.
45. Connect all vacuum hoses.
46. Reinstall the speedometer cable.
47. Install the distributor (see chapter 5).
48. Install the air filter and air ducts (see chapter 4).
49. Fill the box with fresh gear oil (see chapter 1).
50. Install the battery and connect it.
51. Start the engine and check for leaks.