
Warning! Remember that the dust generated during the operation of the brake mechanisms may contain asbestos, which is extremely harmful to human health. Never blow off dust with compressed air or inhale it - when servicing mechanisms, wear a protective mask or respirator. Never use gasoline or petroleum-based solvents to clean brake system components - use only branded cleaners or methyl alcohol!
Withdrawal
1. Loosen the wheel nuts. Jack up the front/rear of the vehicle and place it on jack stands. Remove wheels.
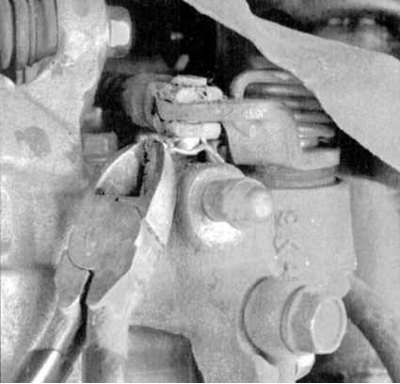
2. When removing the rear wheel disc brake caliper, remove the cotter pin and disconnect the parking brake cable from the actuating lever (see accompanying illustration).
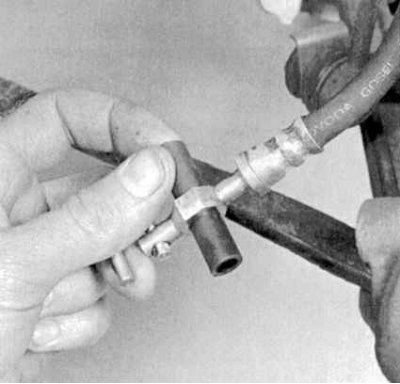
3. Disconnect the hydraulic line from the caliper, in order to minimize the loss of brake fluid, and also, in order to prevent dirt from entering the path, plug the union connection (see accompanying illustration).
4. Remove the caliper (see Replacing the brake pads of disc brakes).
Repair
Front wheel brake caliper
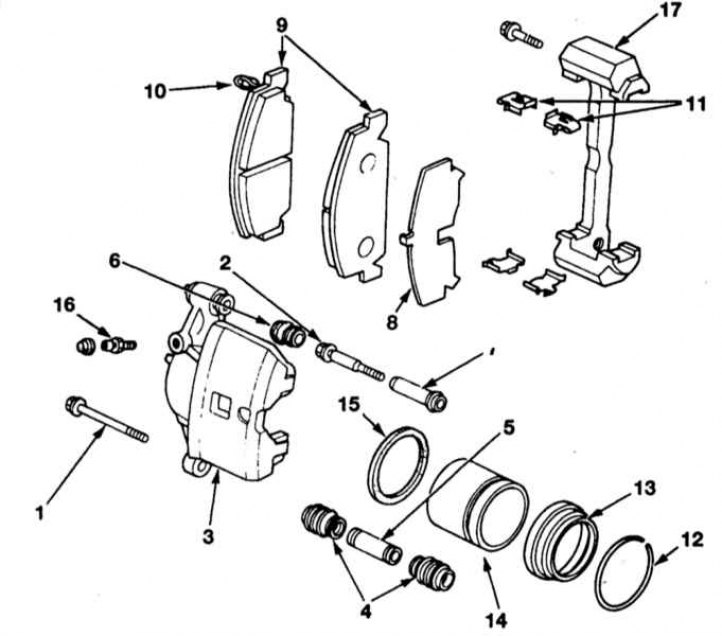
Akebono caliper
1 - Lower caliper bolt; 2 - Upper caliper bolt; 3 - Caliper housing (caliper); 4 - Protective covers; 5 - Bushing; 6 - Protective cover; 7 - Bushing; 8 - Adjusting lining pads; 9 - Outer block; 10 - Inner block (with wear indicator); 11 - Spring shoe holders; 12 - Retaining ring for fixing the anther of the piston; 13 - Piston boot; 14 - Piston; 15 - Piston cuff; 16 - bleed valve; 17 - Anchor bracket
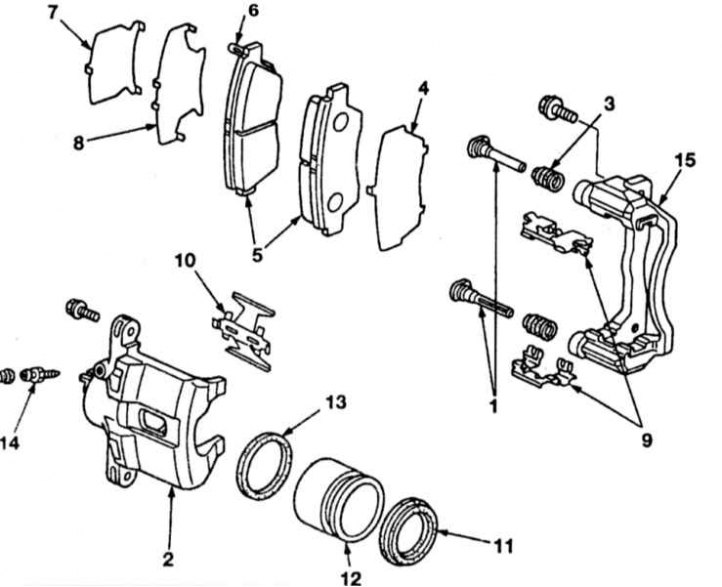
Nissin caliper
1 - Caliper bolts; 2 - Caliper housing; 3 - Protective cover; 4 - Adjusting gasket of the outer shoe; 5 - Outer block; 6 - Inner block (with wear indicator); 7 - Inner lining; 8 - Adjusting lining of an internal block; 9 - Spring shoe holders; 10 - Spring pads; 11 - Piston boot; 12 - Piston; 13 - Piston cuff; 14 - bleed valve; 15 - Anchor bracket
1. Design options for disc brake calipers are shown in the accompanying illustrations above.
2. Place the caliper on a clean workbench. If spring pad holders are installed on the caliper, note their location on the assembly, then remove. If the piston boot is fixed with a spring ring, remove it by prying it with a screwdriver.
3. Remove the boot.
4. Before removing the piston, lay a wooden block between it and the caliper wall (to protect the piston). The piston is pushed out by supplying compressed air to the brake hose connection. The air pressure must be kept to a minimum.
Attention! Make sure that your fingers do not get between the piston and caliper!
5. Assess the condition of the working surfaces of the piston and cylinder in the caliper. If cavities, scuffs, roughness, or discoloration are found, replace the caliper assembly.
6. If the components are in good condition, remove the piston collar from the groove in the cylinder by prying it with a wooden or plastic tool (using a metal tool can damage the cylinder face).
7. Push out plugs of fixing bolts of a support from eyes in the case of the last. If equipped, first remove the rubber protective covers installed on both sides.
8. Wash all removed parts with a special cleaner. Prepare a repair kit that matches the design of the caliper. Moisten a new piston cup with clean brake fluid and fill it into its groove in the caliper cylinder. Make sure the cuff is not twisted.
9. If the piston boot is installed without a circlip (nissin calipers), insert the boot into the upper groove in the caliper cylinder. Make sure that the boot flange is fully seated in the groove.
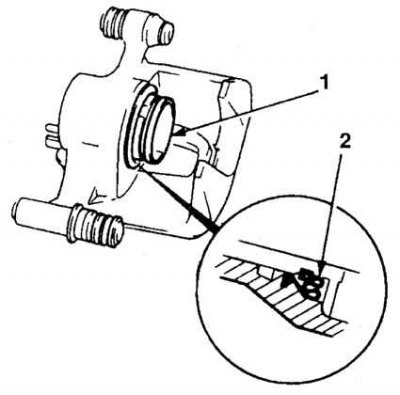
10. Lubricate the piston with clean brake fluid, carefully push it through the new boot and fill it into the caliper cylinder (the piston should enter the cylinder with little resistance). Make sure the boot is in the groove on the piston (see accompanying illustration).
11. If a snap ring is provided to fix the anther (Akebono calipers), put it in its place. Make sure that the boot is in the groove on the piston.
12. Lubricate the caliper bolts with silicone grease enclosed in the repair kit and fill them into the body lugs. Don't forget to install protective covers.
Rear wheel brake caliper
To disassemble the rear wheel brake calipers, special tools are required, which is why it would be wise to entrust their repair to car service specialists.
Installation
1. Installation is carried out in the reverse order. Don't forget to replace the copper sealing washers (gaskets) on both sides of the nipple connector for connecting to the brake hose caliper. Usually a set of new gaskets is included in the repair kit.
2. Bleed the brake circuit (see Check of serviceability of functioning/tightness, removal and installation of assembly of the vacuum amplifier of brakes). Check the brake line fittings for signs of leakage.
3. Replace the wheels, lower the vehicle to the ground and tighten the wheel nuts to the required torque (see Specifications to the head Ongoing maintenance).
4. Before starting the operation of the car, check the proper functioning of the brakes.