
Contents: Removal ⇊ Installation ⇊
Note: In case of leaks, wheel cylinders must be replaced without fail. Manufacturers do not recommend attempting to perform restorative repairs on these brake components.
Removal
1. Jack up the rear of the car and place it on supports. Support the front wheels with wheel chocks.
2. Remove the brake drum and shoes (see Replacing the shoes of the rear wheel drum brake mechanisms).
3. Clean the wheel cylinder and surrounding surfaces from dirt.
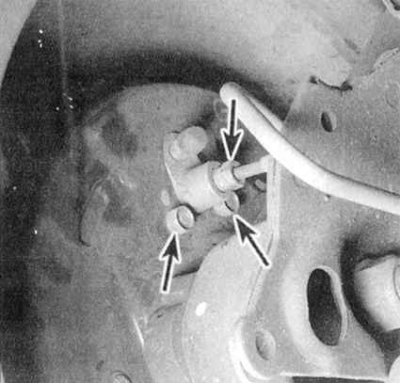
4. Disconnect the hydraulic line from the rear of the wheel cylinder (see accompanying illustration). To avoid rounding the splines of the fitting, use a special open-end wrench with a slotted head. When disconnecting, do not pull on the metal tube of the brake line to avoid its deformation, which can significantly complicate the connection procedure. Immediately plug the open end of the brake line in order to minimize fluid loss and to prevent dirt from entering the hydraulic system.
5. Remove the two wheel cylinder mounting bolts (see illustration above).
6. Remove the wheel cylinder from the brake shield and transfer it to a clean workbench.
Note: If there are traces of hydraulic fluid on the friction linings of the brake shoes, the shoes should be replaced and the working surface of the drum should be thoroughly cleaned.
Installation
1. Lubricate the mating surfaces of the wheel cylinder and brake shield with RTV sealant. Install the cylinder in its regular place and connect the hydraulic line to it. Do not tighten the union nut yet.
2. Insert the mounting bolts and tighten them securely. Now you can tighten the union nut completely. Reinstall the shoe assembly.
3. Bleed the brake system (see Bleeding the brake system).
4. Before operating the vehicle, make sure that the brakes are functioning properly.
Original article on the website www.hondabook.ru