
HondaBook.ru
Auto companies Volkswagen Auto companies Ford Auto companies Lada Auto companies Skoda Auto companies BMW Auto companies Mazda Auto companies Peugeot
English Русский
Български
Беларускі
Український
Српски
Hrvatski
Română
Polski
Slovenský
Magyar
Bookmark Contacts Sitemap   


Accord Civic Fit / Jazz CR-V HR-V Others Articles
Civic 3 and 4 (1983-1991) Civic 5 and 6 (1991-2000) Civic 6 (1995-2000) Civic 7 (2000-2005) Civic 8 (2005-2011)

Replacement of brake pads of disc brake mechanisms (Honda Civic 6)

  • Main
  • Honda Civic
  • 6 (1995-2000)
  • Chassis and running gear
  • Brake system
  • Replacement of brake pads of disc brake mechanisms
0
Contents: Front wheel brakes ⇊ Rear wheel brakes ⇊ Braking mechanisms of the front and…⇊
Warning! Brake pads must be replaced simultaneously on both front/rear brake mechanisms. Remember that dust generated during operation of the brake mechanisms may contain asbestos, which is extremely harmful to human health. Never blow off dust with compressed air or inhale it - wear a protective mask or respirator when servicing the mechanisms. Never use gasoline or petroleum-based solvents to wipe brake system components - use only branded cleaning agents or methyl alcohol!


Note: The procedure applies equally to both front and rear disc brakes.


1. Remove the cap from the brake fluid reservoir.

2. Loosen the front wheel nuts. Jack up the front/rear of the car and place it on supports.

3. Remove the front/rear wheels.

Note: All four brake shoes on both wheels of one axle must be replaced at the same time. To avoid confusion, work on each mechanism individually.


4. Carefully inspect the brake disc (see Checking the condition, removing and installing the brake disc). If it is necessary to perform a turning, remove the disk.

Front wheel brakes


Front wheel brakes


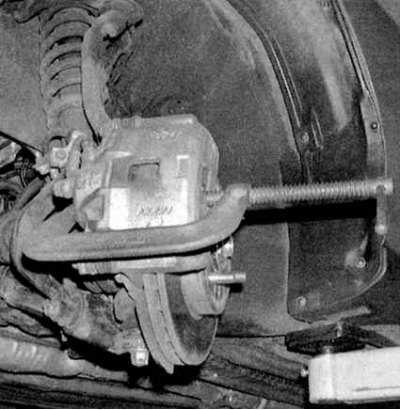
1. Using a clamp, press the piston into the caliper cylinder, thereby providing the necessary free space for installing new pads that have a greater thickness (see accompanying illustration). When the piston is pressed into the caliper, the fluid level in the master cylinder reservoir will rise – make sure that it does not start to overflow; if necessary, pump out the excess.


1. Using a clamp, press the piston into the…


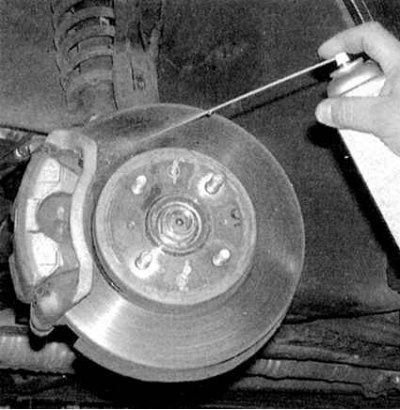
2a. Before you begin dismantling the components, be sure to wash them with a special cleaner (see accompanying illustration).
2a. Before you begin dismantling the components,…


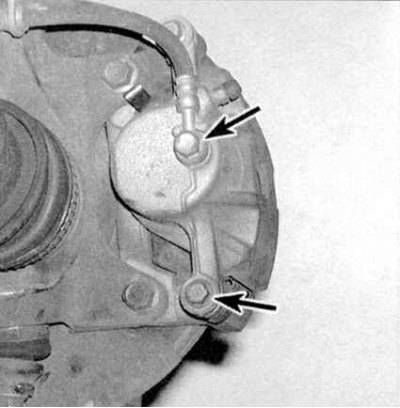
2b. Remove the lower caliper bolt (bottom arrow); the upper arrow shows the hollow bolt of the brake hose nipple connection; the hose should only be disconnected if there is a need to remove the caliper from the vehicle.
2b. Remove the lower caliper bolt (bottom arrow);…


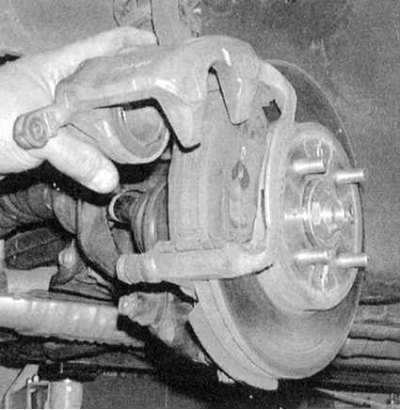
2c. Turn the caliper upward, thereby providing access to the brake pads.
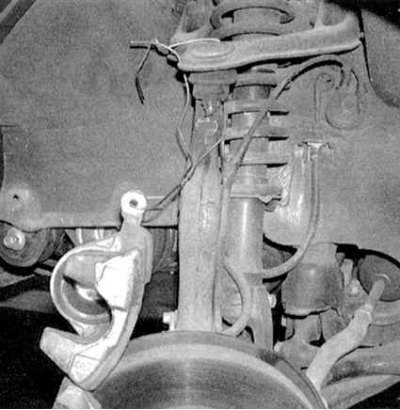


2c. Turn the caliper upward, thereby providing…


2d. To secure the caliper in the raised position, tie it with wire to the suspension strut.
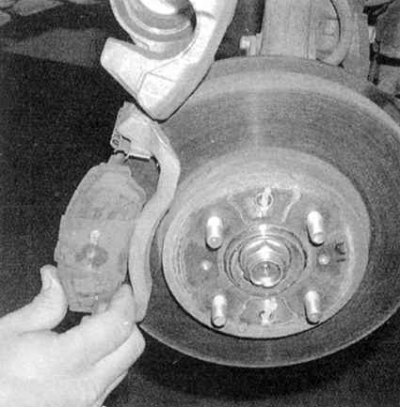
2d. To secure the caliper in the raised position,…


2e. Remove the outer brake shoe with the adjusting shim.
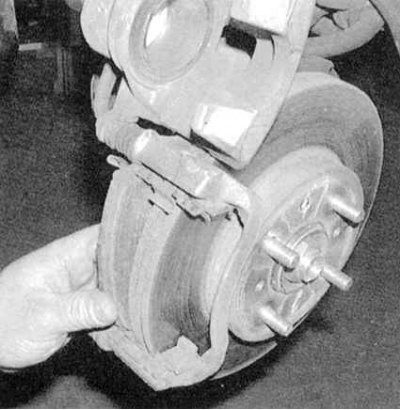
2e. Remove the outer brake shoe with the…


2f. Remove the inner brake shoe (on some models, the inner shoe is not equipped with an adjusting lining).
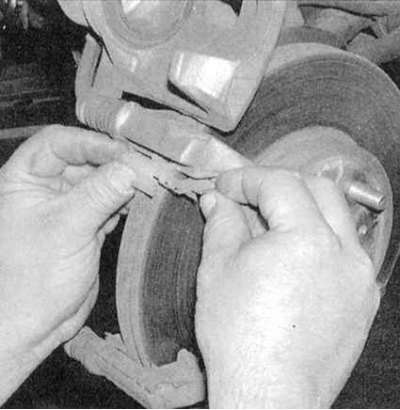
2f. Remove the inner brake shoe (on some models,…


2g. Remove the upper and lower spring shoe holders and check their condition (remember that the inner shoe is also equipped with holders).
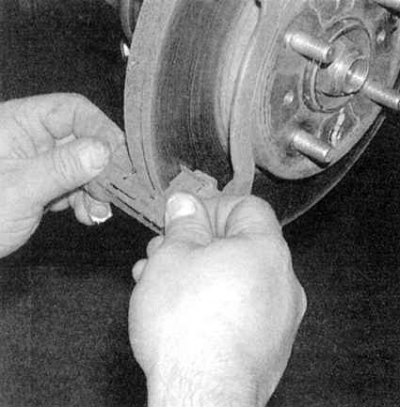


2g. Remove the upper and lower spring shoe…


2h. Check that the spring clips are securely seated in their grooves in the caliper anchor bracket (replace the holders if necessary).
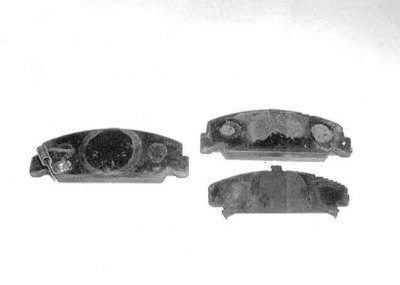
2h. Check that the spring clips are securely…


2i. Inner (left) and outer brake shoes with outer shoe adjusting shim (on some Integra models of recent years, the inner shoe is also equipped with an adjusting shim).
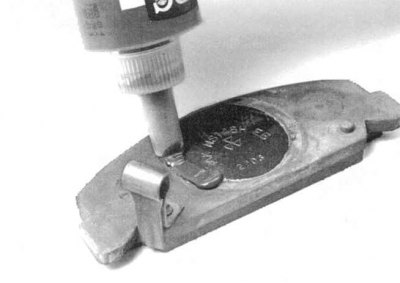
2i. Inner (left) and outer brake shoes with outer…


2j. Before installing the adjusting linings, lubricate the back of the pads with a special anti-squeal compound.
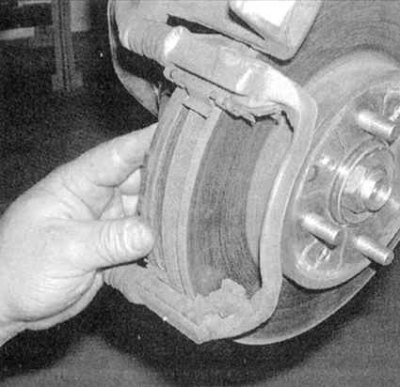


2j. Before installing the adjusting linings,…


2k. Install the inner brake shoe (make sure that the tongues on the upper and lower ends of the shoe fit into the corresponding grooves and are securely fixed by the spring holders).
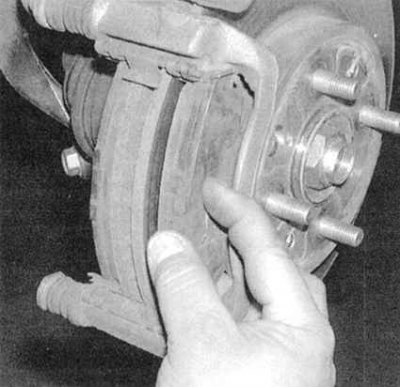
2k. Install the inner brake shoe (make sure that…


2l. Install the outer brake shoe (if the new pads do not come with an adjusting shim, install the old shim on the pad).
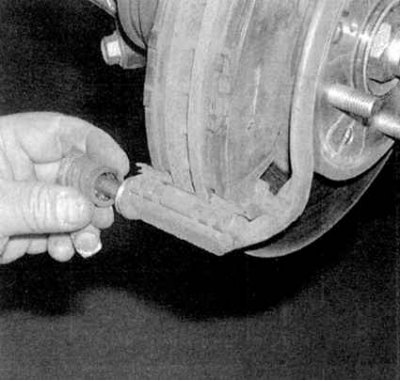
2l. Install the outer brake shoe (if the new pads…


2m. Before lowering the caliper, do not forget to check the condition of the protective covers of the guide pins; replace damaged covers.
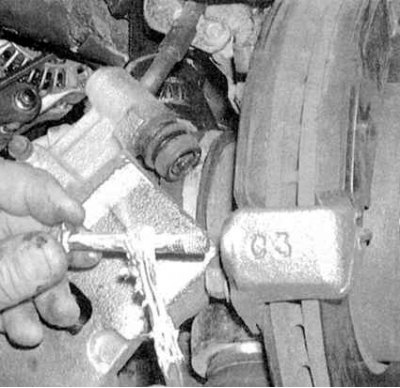


2m. Before lowering the caliper, do not forget to…


2n. The outer caliper pin should be cleaned and lubricated with high-melting grease before installation; the same should be done with the lower caliper mounting bolt

Note: This requirement only applies to Civic models with long shoulder bolts and fixed upper pins [type 2056 caliper]).
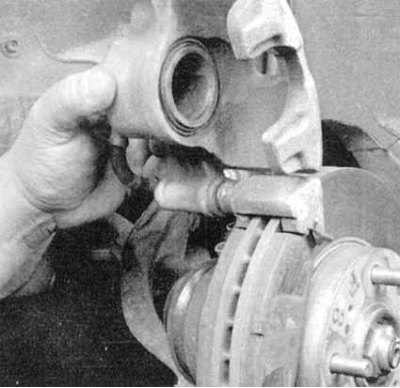

Note: This requirement only applies to Civic…


2o. Lower the caliper to its normal position (if the piston rests against the inner shoe, press it into the cylinder with a clamp).
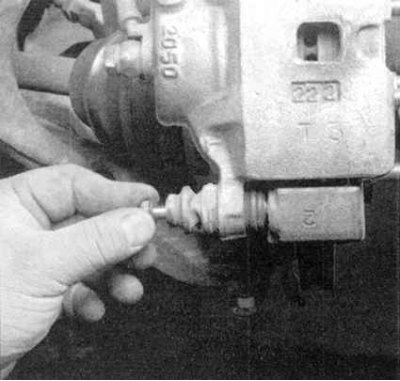
2o. Lower the caliper to its normal position (if…


2p. Screw in the lower caliper bolt and tighten it to the required torque.

Rear wheel brakes
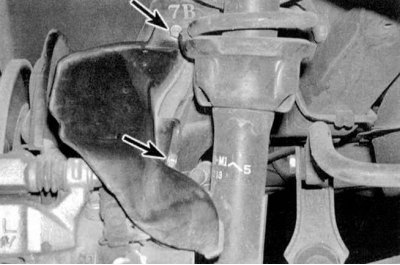


Rear wheel brakes


1a. Unscrew the mounting bolts and remove the caliper protective screen.
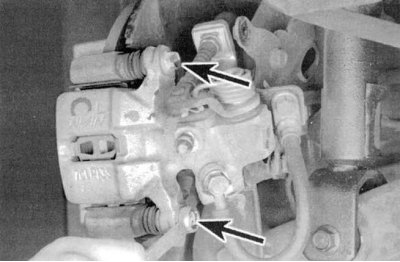
1a. Unscrew the mounting bolts and remove the…


1b. Remove the two caliper mounting bolts.
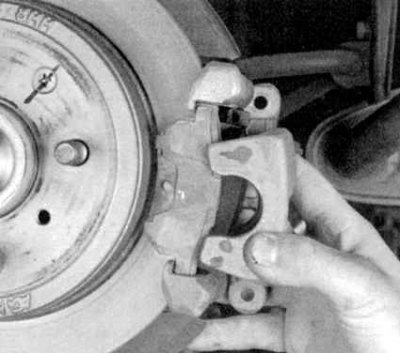
1b. Remove the two caliper mounting bolts.


1c. Remove the caliper from the anchor bracket and tie it with wire to the suspension element - try not to allow the brake hose to become stretched.
1c. Remove the caliper from the anchor bracket…


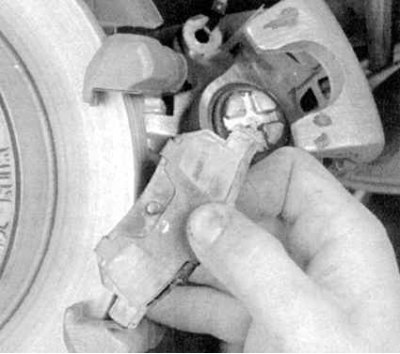
1d. Remove the outer shoe with the adjusting shim.
1d. Remove the outer shoe with the adjusting shim.


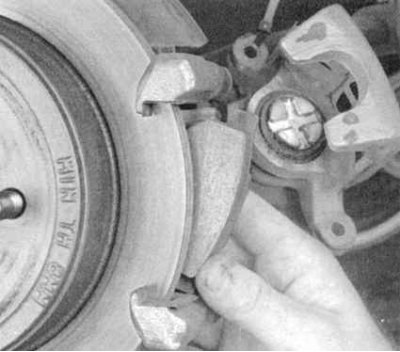
1e. Remove the inner shoe with the adjusting lining.
1e. Remove the inner shoe with the adjusting…


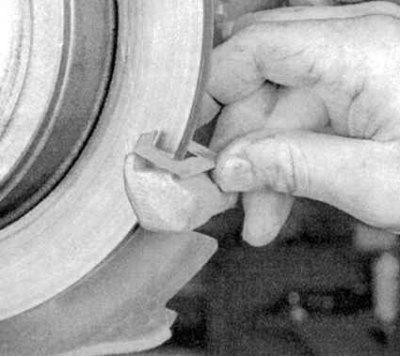
1f. Remove the pad holders from the caliper (the lower holder is shown, the upper one looks and is installed similarly).
1f. Remove the pad holders from the caliper (the…


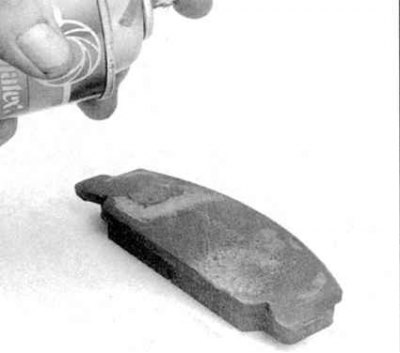
2. Coat the back of the new pads with a special anti-squeal compound (see accompanying illustration). Instructions for using the product are usually printed on the side of the can.

3. Install your adjusting shims onto the pads.

4. Install the pad holders into the caliper anchor bracket. Lubricate the pad holders with a thin layer of silicone grease.

5. Install new brake pads with adjusting shims into the caliper anchor bracket.
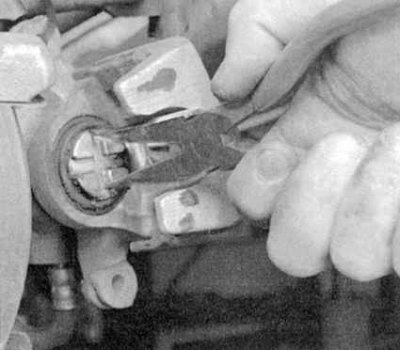
5. Install new brake pads with adjusting shims…


6. Using needle-nose pliers, turn the piston, pressing it into the caliper cylinder to provide the necessary free space for installing new brake pads (see accompanying illustration). First, push the piston to the bottom of the cylinder, turn it back so much that when installing the inner shoe, its lug gets into one of the grooves on the end surface of the piston. Make sure that the dust boot is not deformed as a result of the piston rotation.

7. After completing the assembly of the brake mechanism, install its protective screen in place.

Braking mechanisms of the front and rear wheels


1. Replace the wheels, lower the vehicle to the ground and tighten the wheel nuts to the required torque (see Specifications to the Chapter Routine maintenance).

2. Press the brake pedal several times and (if the rear pads were changed) the parking brake lever to seat the pads on the disc.

3. Check the brake fluid level and make the appropriate adjustments if necessary (see Chapter Routine maintenance). Before you begin normal operation of the vehicle, make sure that the brake system is functioning properly.

(Original published on this resource: Hondabook.ru)
This article is available at: russian, bulgarian, belarusian, ukrainian, serbian, croatian, romanian, polish, slovak, hungarian
This information has been verified: Timofey Goryachev
Share with friends:
◀ Previous
Civic 6: Brake system
Next ▶

Anti-lock Brake System (ABS) — General Information and Error Codes
Brake system specifications
Brake system — general information
Removal, repair and installation of disc brake calipers
Checking the condition, removing and installing the brake disc
Replacing the shoes of the rear wheel drum brake mechanisms
Removal and installation wheel cylinders
Removal and installation the master brake cylinder
See also other articles from Honda manuals:
Replacement of brake pads of disc brake mechanisms Honda Accord 6 (1997-2002)
Replacing the front brake pads Honda Fit 1 (2001-2008)
Front disc brake pads Honda CR-V 1 (1995-2001, petrol)
Front Brake Pads — Checking and Replacing Honda HR-V 1 (1998-2006, petrol)
Front Brake Pads — Checking and Replacing Honda Avancier 1 (1999-2003, petrol)
Link in different formats to this article
Comments and feedback from visitors
No comments yet


How much will 46 + 30 ?


Civic 8 (2005-2011) 
  • General information
  • Technical data
  • Governing bodies
  • Driving and maintenance
  • Power unit
  • Gasoline engines (L13A)
  • Gasoline engines (R18A)
  • Diesel engines (N22A)
  • Cooling and lubrication (L13A)
  • Cooling and lubrication (R18A)
  • Cooling and lubrication (N22A)
  • Injection system (gasoline)
  • Injection system (diesel)
  • Toxicity reduction system
  • Troubleshooting
  • Transmission
  • Clutch and drive shafts
  • Mechanical gearbox
  • Chassis and running gear
  • Suspension and wheels
  • Steering
  • Brake system
  • Body and interior
  • Exterior (external elements)
  • Doors, locks and windows
  • Electrical equipment
  • Equipment and devices
  • Headlights and lighting
  • Power devices
  • Electrical circuits
Civic 7 (2000-2005) 
  • General information
  • User manual
  • Maintenance
  • Power unit
  • Engines D15B and D17A
  • K20A Engines
  • Overhaul engine
  • Cooling system
  • Lubrication system
  • Fuel injection system
  • Toxicity reduction system
  • Engine electrical equipment
  • Transmission
  • Clutch
  • Manual gearbox
  • Automatic gearbox
  • Variator (CVT)
  • Drive shafts
  • Chassis and running gear
  • Car suspension
  • Steering
  • Brake system
  • Body and interior
  • Exterior (external elements)
  • Interior (internal elements)
  • Doors, locks and windows
  • Heater and air conditioner
  • Manual air conditioner
  • Automatic air conditioner
  • Security system
  • Electrical equipment
  • Equipment and devices
  • Headlights and lighting
  • Windscreen wipers
  • Audio system
  • Electrical diagrams
Civic 6 (1995-2000) 
  • General information
  • Introduction to guide
  • User manual
  • Maintenance
  • Power unit
  • Engine in car (Civic)
  • Engine in car (Integra)
  • Engine overhaul
  • Cooling and heating
  • Power and exhaust systems
  • Engine electrical equipment
  • Engine management systems
  • Transmission
  • Manual gearbox
  • Automatic transmission (AT/CVT)
  • Clutch and drive shafts
  • Chassis and running gear
  • Brake system
  • Car suspension
  • Steering
  • Body and interior
  • Exterior (external elements)
  • Interior (internal elements)
  • Doors, locks and windows
  • Electrical equipment
  • Equipment and devices
  • Electrical circuits
Civic 5 and 6 (1991-2000) 
  • Power unit
  • SOHC engines
  • DOHC engines
  • Engine overhaul
  • Cooling and lubrication system
  • Intake and exhaust system
  • Fuel injection system (SOHC)
  • Fuel injection system (DOHC)
  • Carburetor
  • Transmission
  • Clutch
  • Manual gearbox S4C
  • Manual gearbox S40
  • Automatic gearbox
  • Drive shafts
  • Chassis and running gear
  • Car suspension
  • Steering
  • Brake system
  • Body and interior
  • Body elements
  • Heater and air conditioner
  • Electrical equipment
  • Power devices
  • Equipment and instruments
  • Electrical circuits
Civic 3 and 4 (1983-1991) 
  • General information
  • Maintenance
  • Power unit
  • Engine in a car
  • Engine overhaul
  • Cooling system
  • Power and exhaust system
  • Engine electrical equipment
  • Emission control system
  • Transmission
  • Mechanical gearbox
  • Automatic gearbox
  • Clutch and drive shafts
  • Four-wheel drive
  • Chassis and running gear
  • Brake system
  • Car suspension
  • Steering
  • Body and interior
  • Body elements
  • Electrical equipment
  • Equipment and devices
  • Electrical circuits
HondaBook.ru © 2018–2026 • Mobile version • Sitemap: EN BG BY UA RS HR RO PL SK HU • Feedback • Driver Information • Search system • Bookmark
Accord 3 (1985-1989) • Accord 6 (1997-2002) • Civic 3 and 4 (1983-1991) • Civic 5 and 6 (1991-2000) • Civic 6 (1995-2000) • Civic 7 (2000-2005) • Civic 8 (2005-2011) • Fit 1 (2001-2008) • CR-V 1 (1995-2001) • CR-V 2 (2002-2006) • HR-V 1 (1998-2006) • Avancier 1 (1999-2003) •
 
This website uses cookies to ensure proper functioning. By clicking "OK," you agree.