HondaBook.ru
Auto companies Volkswagen Auto companies Ford Auto companies Lada Auto companies Skoda Auto companies BMW Auto companies Mazda Auto companies Peugeot
English Русский
Български
Беларускі
Український
Српски
Hrvatski
Română
Polski
Slovenský
Magyar
Bookmark Contacts Sitemap   


Accord Civic Fit / Jazz CR-V HR-V Others Articles
CR-V 1 (1995-2001, petrol) CR-V 2 (2002-2006, petrol)

Front disc brake pads (Honda CR-V 1)

  • Main
  • Honda CR-V
  • 1 (1995-2001, petrol)
  • Chassis and running gear
  • Brake system
  • Front disc brake pads
0
Contents: Removal ⇊ Installation ⇊
Checking the brake pads should be combined with changing the engine oil. If you hear a grinding noise when braking, check the condition of the brake pads immediately. The brake pads and linings are changed only in pairs per axle.

Removal


1. Drain half of the liquid from the tank.

2. Raise the car.

3. Remove the wheel.

4. If necessary, loosen the brake hose mounting bolts on the steering knuckle.

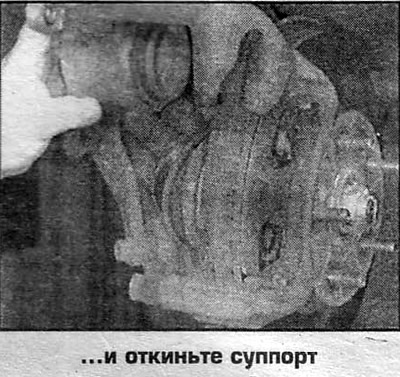
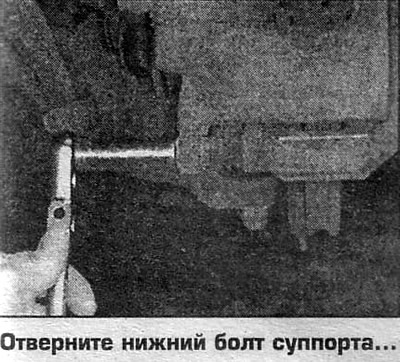
5. Unscrew the lower caliper bolt and tilt the caliper back. After lifting the caliper, do not press the brake pedal

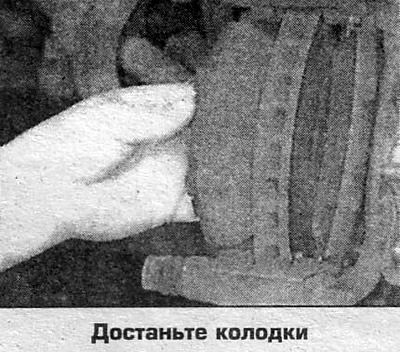
6. Remove the pads and adjusting shims.

Installation


7. Replace the pads if their thickness is less than the permissible value.

8. Clean and inspect the brake disc for wear and damage. Measure the thickness of the disc. If the thickness of the disc is less than that indicated on it (the maximum thickness is marked on the disk), then replace the disk.

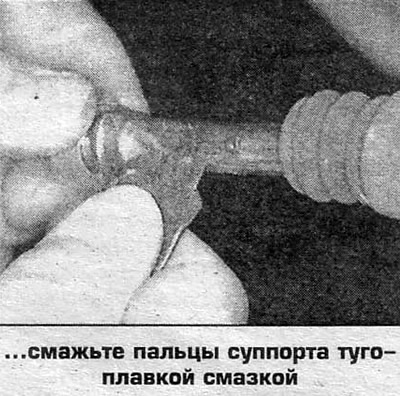
9. Clean the caliper brackets and lubricate the caliper pins with high-temperature grease.

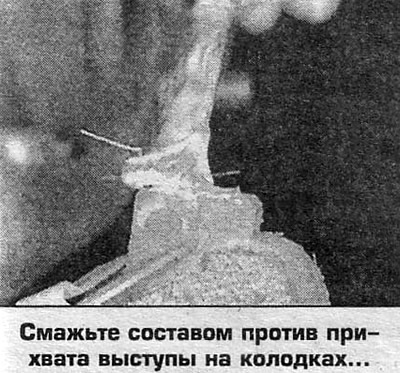
10. Lubricate the projections on the pads and the grooves in the caliper into which the pads are inserted with anti-seize compound.

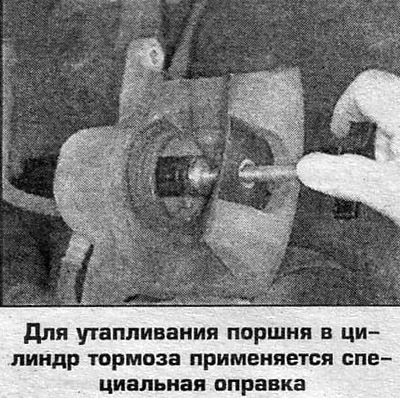
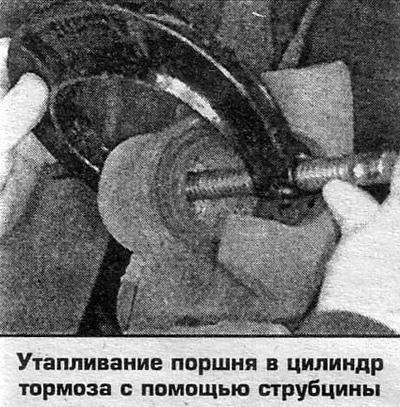
11. When replacing the pads, press the pistons into the caliper cylinder using a clamp or a special mandrel. If the piston sticks when recessed, the causes may be cylinder ovality, piston/cylinder wear, severe piston or cylinder corrosion, or dirt build-up.

12. After installing the calipers, press the brake pedal a little so that the pedal travel does not exceed 50 mm, until the pedal becomes "hard". Pressing harder on the pedal is highly discouraged, as the piston seals may be damaged due to friction against worn cylinder walls.


13. The brake pads are worn in to the disc after approximately 300 km of driving.
13. The brake pads are worn in to the disc after…

13. The brake pads are worn in to the disc after…

13. The brake pads are worn in to the disc after…

13. The brake pads are worn in to the disc after…
This article is available at: russian, bulgarian, belarusian, ukrainian, serbian, croatian, romanian, polish, slovak, hungarian
This information has been verified: Emil Safonov
Share with friends:
◀ Previous
CR-V 1: Brake system
Next ▶

Bleeding the brake system
Brake Hydraulic Hoses and Lines — Removal and Installation
Metering valve (rear brake pressure regulator)
Vacuum booster — removal and installation
Brake Master Cylinder — Removal and Installation
Rear disc brake pads
Support — removal and installation
Brake disc — removal and installation
Drum brakes — removal and installation
Drum brake shoes — removal and installation
See also other articles from Honda manuals:
Front Disc Brake Pads — Inspection Honda Accord 3 (1985-1989)
Replacement of brake pads of disc brake mechanisms Honda Civic 6 (1995-2000)
Replacing the front brake pads Honda Fit 1 (2001-2008)
Front Brake Pads — Checking and Replacing Honda HR-V 1 (1998-2006, petrol)
Front Brake Discs — Brake Disc Grinding Honda Avancier 1 (1999-2003, petrol)
Link in different formats to this article
Comments and feedback from visitors
No comments yet


How much will 43 + 24 ?


CR-V 2 (2002-2006, petrol) 
  • General information
  • User manual
  • Technical data
  • Maintenance
  • Power unit
  • Engine repair
  • Lubrication system
  • Cooling system
  • Exhaust system
  • Fuel system
  • Engine management
  • Engine electrical equipment
  • Transmission
  • Clutch
  • Manual gearbox
  • Automatic gearbox
  • Rear differential
  • Drive shafts
  • Chassis and running gear
  • Steering
  • Front suspension
  • Rear suspension
  • Brake system
  • Body and interior
  • Exterior (external elements)
  • Interior (internal elements)
  • Doors, locks and windows
CR-V 1 (1995-2001, petrol) 
  • General information
  • Maintenance
  • Tips for car owner
  • Power unit
  • Engine repair
  • Engine overhaul
  • Cooling and lubrication system
  • Engine electrical equipment
  • Control system
  • Fuel system
  • Transmission
  • Clutch and drive shafts
  • Car gearbox
  • Chassis and running gear
  • Front suspension
  • Rear suspension
  • Steering
  • Brake system
  • Body and interior
  • Body service
  • Exterior (external elements)
  • Interior (internal elements)
  • Electrical equipment
  • Equipment and devices
  • Electrical circuits
HondaBook.ru © 2018–2026 • Mobile version • Sitemap: EN BG BY UA RS HR RO PL SK HU • Feedback • Driver Information • Search system • Bookmark
Accord 3 (1985-1989) • Accord 6 (1997-2002) • Civic 3 and 4 (1983-1991) • Civic 5 and 6 (1991-2000) • Civic 6 (1995-2000) • Civic 7 (2000-2005) • Civic 8 (2005-2011) • Fit 1 (2001-2008) • CR-V 1 (1995-2001) • CR-V 2 (2002-2006) • HR-V 1 (1998-2006) • Avancier 1 (1999-2003) •
 
This website uses cookies to ensure proper functioning. By clicking "OK," you agree.