
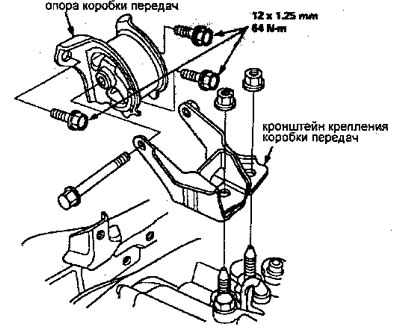
1. Install the transmission support and transmission mounting bracket, then tighten the mounting bolts to the body.
Note: Do not tighten the transmission mounting bolts.
CVT/HONDA MULTI MATIC
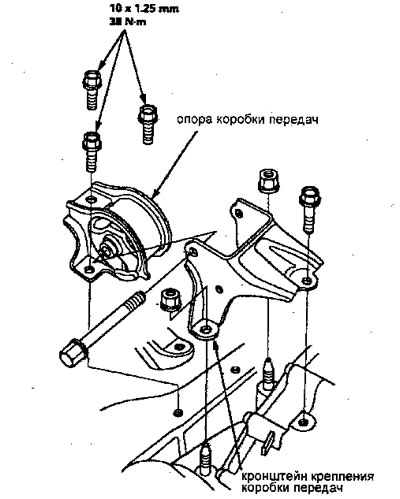
Except CVT/HONDA MULTI MATIC
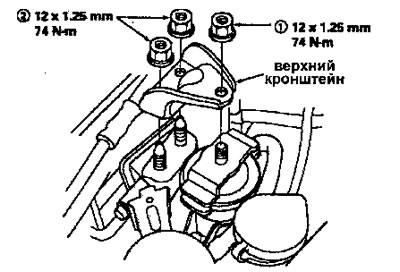
2. Install the upper bracket, then tighten the mounting nuts in the order shown in the figure.
3. Install the rear support, then tighten the mounting bolts in the order shown in the figure.
Engines B16A2, B16A4, B16A5, B16A6
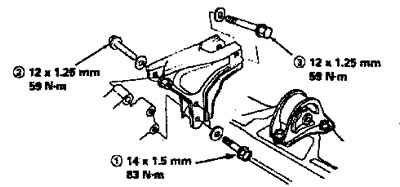
Engines D15Z4, D15Z5 (automatic transmission), D15Z7, D16Y5 (CVT/HONDA MULTI MATIC)
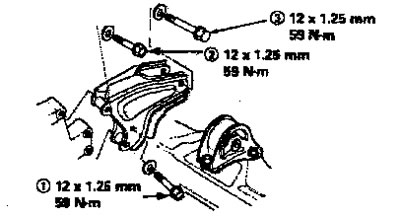
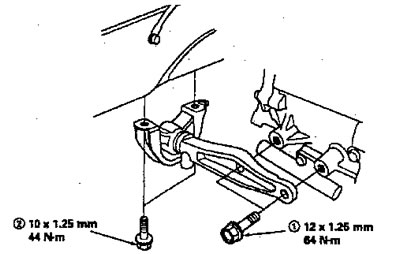
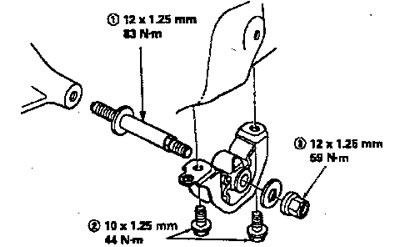
4. Tighten the transmission support bolts/nuts in the order shown in the illustration.
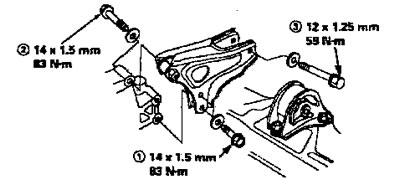
5. Tighten the right front support mounting bolts in the order shown in the figure.
CVT/HONDA MULTI MATIC
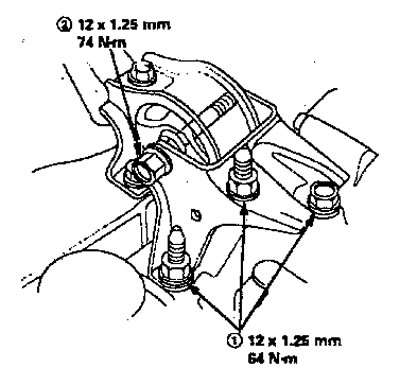
Except CVT/HONDA MULTI MATIC
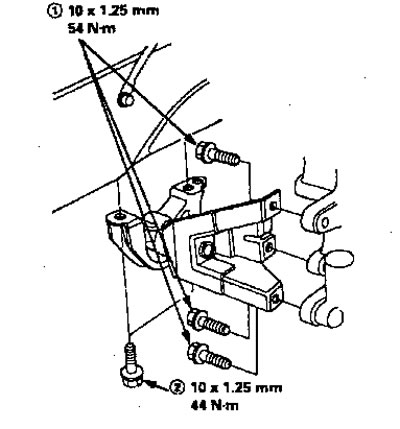
6. Tighten the left front support mounting bolts/nuts in the order shown in the figure.
7. Install the drive shafts.
Note: Clean contaminated surfaces. Use only new retaining rings when installing.
8. After installation, adjust the following:
- Control cable;
- Throttle cable;
- Cruise control cable.
9. Pour engine oil into the engine, working fluid into the gearbox and coolant into the cooling system.
10. Reconnect all connectors, tubes and hoses disconnected during disassembly.
11. Check for fuel, oil and coolant leaks.
12. Remove air from the cooling system with the heater valve open.
(The original is located on the website «hondabook.ru»)