


Car engine overhaul Honda Avancier 1

Replacing the crankshaft pulley and pulley bolt
Using the special tool and TQBX wrench, tighten the crankshaft pulley bolt to the required torque. Bolt - 16 x 1.5 mm : 245 N·m (25 kg·m) Caution: Do not use an impact wrench.
Using the special tool and TQBX wrench, tighten the crankshaft pulley bolt to the required torque. Bolt - 16 x 1.5 mm : 245 N·m (25 kg·m) Caution: Do not use an impact wrench.

Component Locations
Attention: During disassembly, do not use the top and bottom covers to store small parts. When installing the covers, remove any dirt with a cloth. Check for oil leaks from the crankshaft and camshaft seals and replace...
Attention: During disassembly, do not use the top and bottom covers to store small parts. When installing the covers, remove any dirt with a cloth. Check for oil leaks from the crankshaft and camshaft seals and replace...

Checking the timing belt
Caution. The crankshaft pulley bolt has a right-hand thread. When turning the crankshaft counterclockwise using the pulley bolt, the bolt may come loose. After completing the work, tighten the crankshaft pulley bolt...
Caution. The crankshaft pulley bolt has a right-hand thread. When turning the crankshaft counterclockwise using the pulley bolt, the bolt may come loose. After completing the work, tighten the crankshaft pulley bolt...

Checking the balance shaft belt
Caution: The crankshaft pulley bolt has a right-hand thread. When turning the crankshaft counterclockwise using the crankshaft pulley bolt, it may come loose. After completing the work, tighten the crankshaft pulley...
Caution: The crankshaft pulley bolt has a right-hand thread. When turning the crankshaft counterclockwise using the crankshaft pulley bolt, it may come loose. After completing the work, tighten the crankshaft pulley...
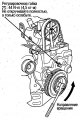
Adjusting the tension of the timing belt and balance shaft belt
Attention: Adjustment is performed on a cold engine (below 38°C). Before adjusting the belt tension, check the condition of the belts. Since the belts are tensioned automatically by springs, do not apply additional...
Attention: Adjustment is performed on a cold engine (below 38°C). Before adjusting the belt tension, check the condition of the belts. Since the belts are tensioned automatically by springs, do not apply additional...

Removal the timing belt and balance shaft belt
Caution: Before removing the timing belt, check the water pump (see below). 1. Disconnect the cables from the battery terminals. Attention: Disconnect the negative terminal first. Before connecting the cables, clean the...
Caution: Before removing the timing belt, check the water pump (see below). 1. Disconnect the cables from the battery terminals. Attention: Disconnect the negative terminal first. Before connecting the cables, clean the...

Installing the timing belt and balance shaft belt
Installation is performed in the reverse order of removal, as follows. If only the balance shaft belt is installed, perform the work starting from point 12. Caution: Before installing the top and bottom covers, be sure...
Installation is performed in the reverse order of removal, as follows. If only the balance shaft belt is installed, perform the work starting from point 12. Caution: Before installing the top and bottom covers, be sure...

Replacing the TDC/Crankshaft Sensor
1. Disconnect the cables from the battery terminals. Caution: Disconnect the cable from the negative terminal first. Before connecting the cables, clean the contact surfaces of the terminals with sandpaper and apply...
1. Disconnect the cables from the battery terminals. Caution: Disconnect the cable from the negative terminal first. Before connecting the cables, clean the contact surfaces of the terminals with sandpaper and apply...

Cylinder head component arrangement
To avoid thermal deformation, remove the cylinder head on a cold engine (below 38°C). Be careful not to damage the contact surface of the block and cylinder head gasket. Before removing the cylinder head, check the...
To avoid thermal deformation, remove the cylinder head on a cold engine (below 38°C). Be careful not to damage the contact surface of the block and cylinder head gasket. Before removing the cylinder head, check the...

Removal the cylinder head
Before removing the fuel supply hose, relieve the fuel pressure ( see chapter Engine power supply system ). Take fire safety measures. Do not open the radiator cap on a hot engine, as the coolant is under pressure and...
Before removing the fuel supply hose, relieve the fuel pressure ( see chapter Engine power supply system ). Take fire safety measures. Do not open the radiator cap on a hot engine, as the coolant is under pressure and...

Installing the cylinder head
Installation is performed in the reverse order of removal. Before installation, do the following:. Replace the cylinder head and manifold gaskets with new ones. Thoroughly clean the mounting surfaces of the cylinder...
Installation is performed in the reverse order of removal. Before installation, do the following:. Replace the cylinder head and manifold gaskets with new ones. Thoroughly clean the mounting surfaces of the cylinder...

Removal the engine
Attention: Before disconnecting the fuel supply hose, be sure to relieve the fuel pressure ( see chapter Engine power supply system ). Observe fire safety precautions. Do not open the radiator cap when the engine is...
Attention: Before disconnecting the fuel supply hose, be sure to relieve the fuel pressure ( see chapter Engine power supply system ). Observe fire safety precautions. Do not open the radiator cap when the engine is...
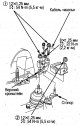
Engine installation
The engine is installed in the reverse order of removal. To reduce engine noise and vibration, and to increase the durability of the bushings, tighten the engine mounting bolts and nuts as follows. Tightening order of...
The engine is installed in the reverse order of removal. To reduce engine noise and vibration, and to increase the durability of the bushings, tighten the engine mounting bolts and nuts as follows. Tightening order of...

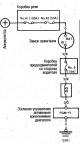

Active Engine Mount Control System Fault Diagnosis
Make sure that the vacuum hoses and tubes are installed correctly and are free of defects. Before performing the following tasks: see chapter Engine Management System .
Make sure that the vacuum hoses and tubes are installed correctly and are free of defects. Before performing the following tasks: see chapter Engine Management System .


Exhaust pipe/muffler replacement
After disassembly, replace the self-locking nuts and gaskets. 2WD models 4WD models
After disassembly, replace the self-locking nuts and gaskets. 2WD models 4WD models


Selection of main bearings for pistons, crankshafts, cylinders
Attention: When replacing main bearings, check the markings of the crankshaft main journal diameters, the diameters of the holes in the cylinder block, and select the required bearings according to the table. If the...
Attention: When replacing main bearings, check the markings of the crankshaft main journal diameters, the diameters of the holes in the cylinder block, and select the required bearings according to the table. If the...

Main journal selection table
Root necks No.1, 2 Root necks #3 Root necks No.4 Root necks #5 The oil clearance for main journals No.1, 2 is 0.025-0.049 mm, for journal No.3 - 0.021-0.045 mm, for journal No.4 - 0.013-0.037 mm, for journal No.5 -...
Root necks No.1, 2 Root necks #3 Root necks No.4 Root necks #5 The oil clearance for main journals No.1, 2 is 0.025-0.049 mm, for journal No.3 - 0.021-0.045 mm, for journal No.4 - 0.013-0.037 mm, for journal No.5 -...
This section is available on: russian, bulgarian, belarusian, ukrainian, serbian, croatian, romanian, polish, slovak, hungarian
Link in different formats to this section
TEXTHTMLBB Code
- General information
- Controls and instruments
- User manual
- Power unit
- Engine maintenance
- Engine repair
- Cooling system
- Engine management
- Power and exhaust system
- Transmission
- Automatic gearbox
- Drive shafts and differential
- Chassis and running gear
- Steering
- Car suspension
- Brake system
- Body and interior
- Doors, locks and windows
- Interior (internal elements)
- Exterior (external elements)
- Air conditioner
- Electrical equipment
- Power devices
- Equipment and devices
- Headlights and lighting
- Electrical circuits