
1. Insert the bearing shells into the cylinder block and connecting rods.
2. Install the crankshaft so that the connecting rod journals for cylinders No.2 and No.3 are directed strictly downwards.
3. Insert the crankshaft into the block, installing the crankpins into connecting rods No.2 and No.3, install the connecting rod caps and nuts and tighten by hand.
4. Turning the crankshaft clockwise, install the journals in connecting rods No.1 and No.4, install the connecting rod caps and nuts and tighten by hand.
Note: Install the caps so that the recess in the cap insert faces the same direction as the recess in the connecting rod.
5. Check the connecting rod bearing clearance with measuring plates, then tighten the nut.
Tightening torque:
Engines A16A2, B16A4, B16A5, B16A6: 40 Nm
Apply engine oil to the threaded portions of the bolts.
Other engines: 31 Nm
Apply engine oil to threaded parts.
Note: The numbers on the connecting rod are for identifying the size of the connecting rod's larger bore, and do not indicate the piston's position in the engine.
6. Install the thrust washers on journal No.4. Lubricate the surfaces of the thrust washer.
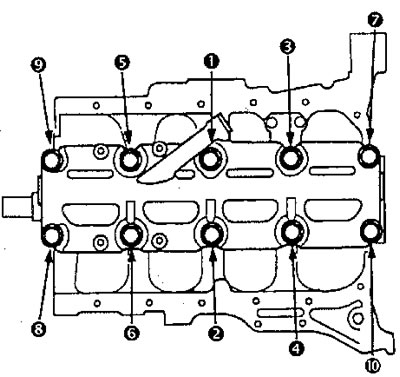
7. Install the main bearing caps. Check the clearance with a bearing clearance gauge, then tighten the bearing cap bolts in 2 stages.
First stage: 25 Nm
Second stage:
- engines B16A2, B16A4, B16A5, B16A6: 76 Nm
- engines D16Y4, D16Y5, D16Y6, D16Y7, D16Y8, D16Y9/D1626: 51 Nm
- engines D14A3, D14A4, D1524a D15Z5, D15Z6, D15Z7, D13B2, D15B2, D15Z1: 44 Nm
Caution: Coat the surfaces of the thrust half rings and the bolt threads with oil.
Caution: Whenever the crankshaft or connecting rod bearing requires replacement, the engine must be run at idle speed after assembly until it reaches normal operating temperature.
Attention:
- Use liquid gasket, #OY740-99986 or 08C70-XD134S.
- Ensure contact surfaces are clean and dry before applying liquid gasket.
- Apply liquid gasket evenly and carefully to cover the entire contact surface.
- To prevent oil leakage, apply liquid gasket to the internal threads of the bolt holes. Install the parts within five minutes after applying the liquid gasket. Instead, reapply liquid gasket after removing the old one.
- After assembly, wait at least 20 minutes before filling the engine with oil.
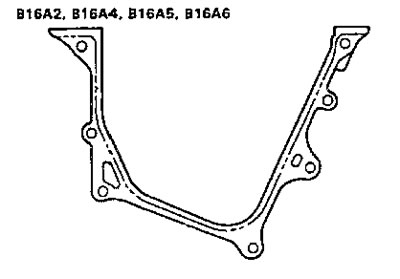
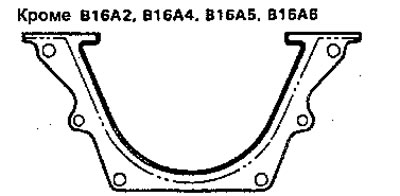
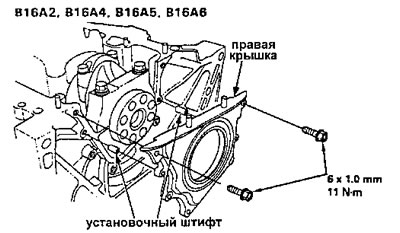
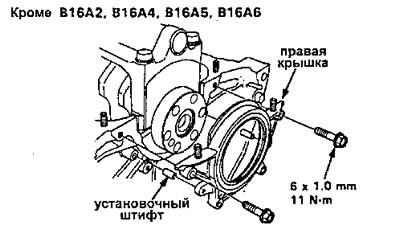
8. Apply liquid gasket to the contact surface of the right side cover block, then install it on the cylinder block.
 |
 |
 |
 |
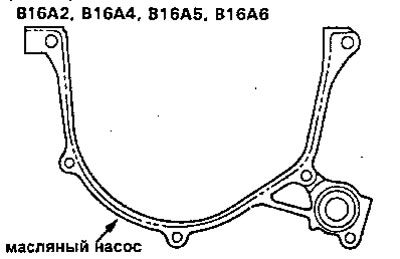
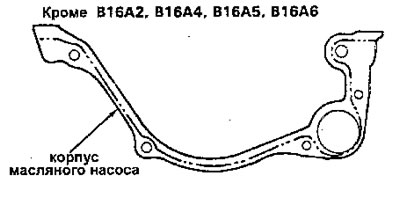
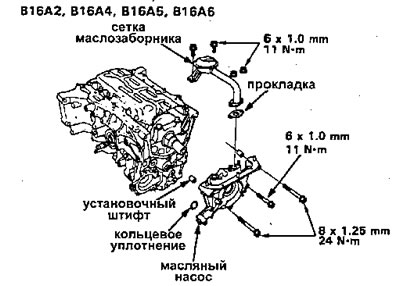
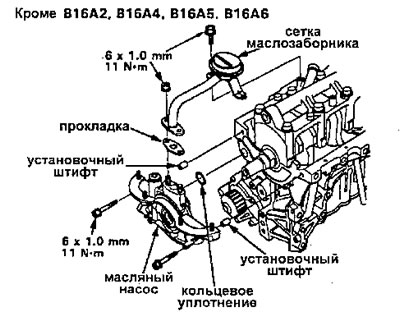
9. Apply liquid gasket to the contact surface of the oil pump and the block, then install the oil pump on the cylinder block. Apply lubricant to the protrusions of the oil seal. Then, install the oil pump while aligning the inner rotor with the crankshaft. After installing the pump, remove excess grease to prevent damage to the oil seal.
 |
 |
Attention:
- Apply a thin layer of oil to the crankshaft and to the seal protrusion.
- When using new O-rings, apply oil to them during installation.
 |
 |