
2. Disconnect the cardan shaft and take it to the 8th side (see Section 4).
3. Using a torque wrench, check the force required to turn the gear.
Record this value for future reference.
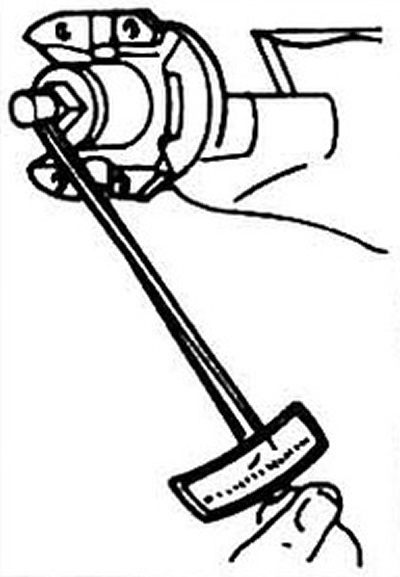
Pic. 10.3 Measuring the rotational force of the final drive gear
4. Mark the relative position of the pinion shaft, nut and flange.
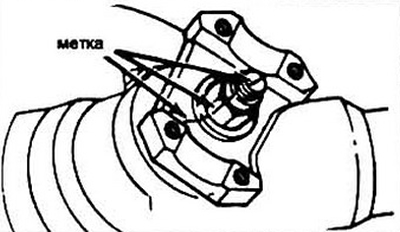
Pic. 10.4 Marking the relative position of the details of fastening the flange to the main gear
5. Count the number of threads coming out of the gear nut. Write it down for future reference.
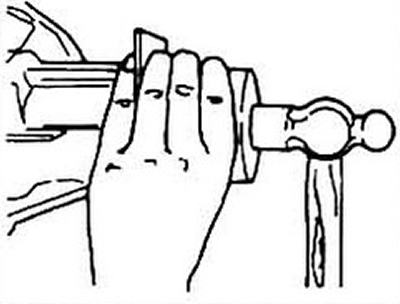
6. Holding the flange in one way or another from turning, unscrew the flange nut.
7. Remove the nut.
8. Remove the flange with a puller. Do not use leverage or hammer blows.
9. Remove the gland.
10. Lubricate the sealing lips of the new oil seal with refractory grease and, using a suitable piece of pipe, carefully hammer it into the final drive housing.
Pic. 10.10 Installing the final drive gear oil seal
11. Install the flange. If necessary, tighten it with a nut Do not use a hammer!
12. Apply sealant to the ends of the splines visible in the center of the flange
13. Install washer (if provided) and a nut. Tighten the nut the same number of turns as before removal.
14. Measure the force of rotation of the drive gear. Tighten the nut until the force is equal to that specified in the step.
15. To compensate for the resistance of the new gland, increase the tightening torque so that the rotational resistance exceeds the old value by 0.5 Nm.
16. Connect the cardan shaft and lower the car.