
Carburetor engines
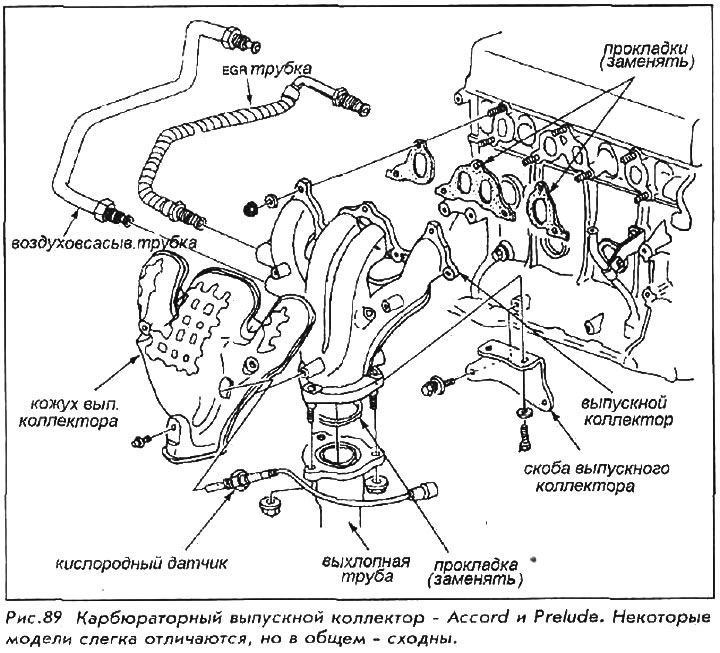
WARNING: DO NOT perform this procedure on a hot or even warm engine.
1. Raise and secure the vehicle.
2. Unscrew the nuts securing the manifold to the exhaust pipe, remove the pipe, move the pipe away from the manifold without letting it dangle by itself.
3. Disconnect and remove the oxygen sensor.
4. Remove the exhaust manifold shroud or heat shield.
5. Remove mounting post bolts.
6. In cross order (starting from the center) remove the nuts securing the exhaust manifold to the cylinder head, the exhaust manifold itself and the gaskets. (Do not reuse gaskets)
Removing the exhaust manifold bolts is a very laborious operation, as they are covered with a layer of soot and rust. The work is facilitated if the threads of the bolts are coated with oil or kerosene a few hours before installation.
7. Using a putty knife or other suitable tool, clean the surfaces in contact with the gasket. Check the surfaces with a ruler for possible distortion.
For installation:
8. Using new gaskets, place the manifold in place and, while supporting it, install the nuts on the rods.
9. Install the support legs below the manifold and tighten the mounting bolt to 28 Nm.
10. Starting with the inner, or center, nuts, cross-tighten them to the correct torque. For all carburetor engines, it is 32 Nm. This is necessary to prevent leakage, which is inevitable when the load is unevenly distributed on the manifold cover.
11. Install the thermal cover.
12. Attach the exhaust pipe using new gaskets and nuts. The nuts securing the pipe to the manifold are tightened with a tightening torque of 55 Nm.
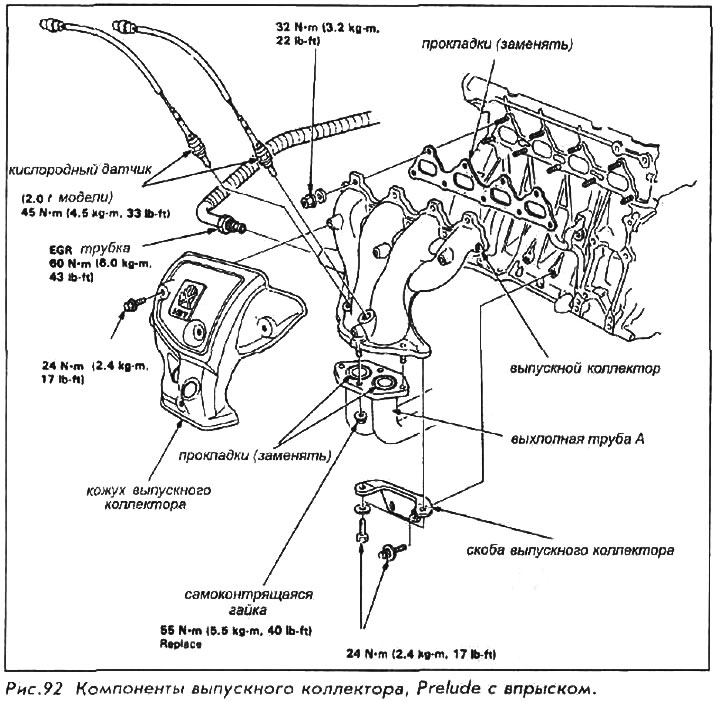
For fuel injected engines
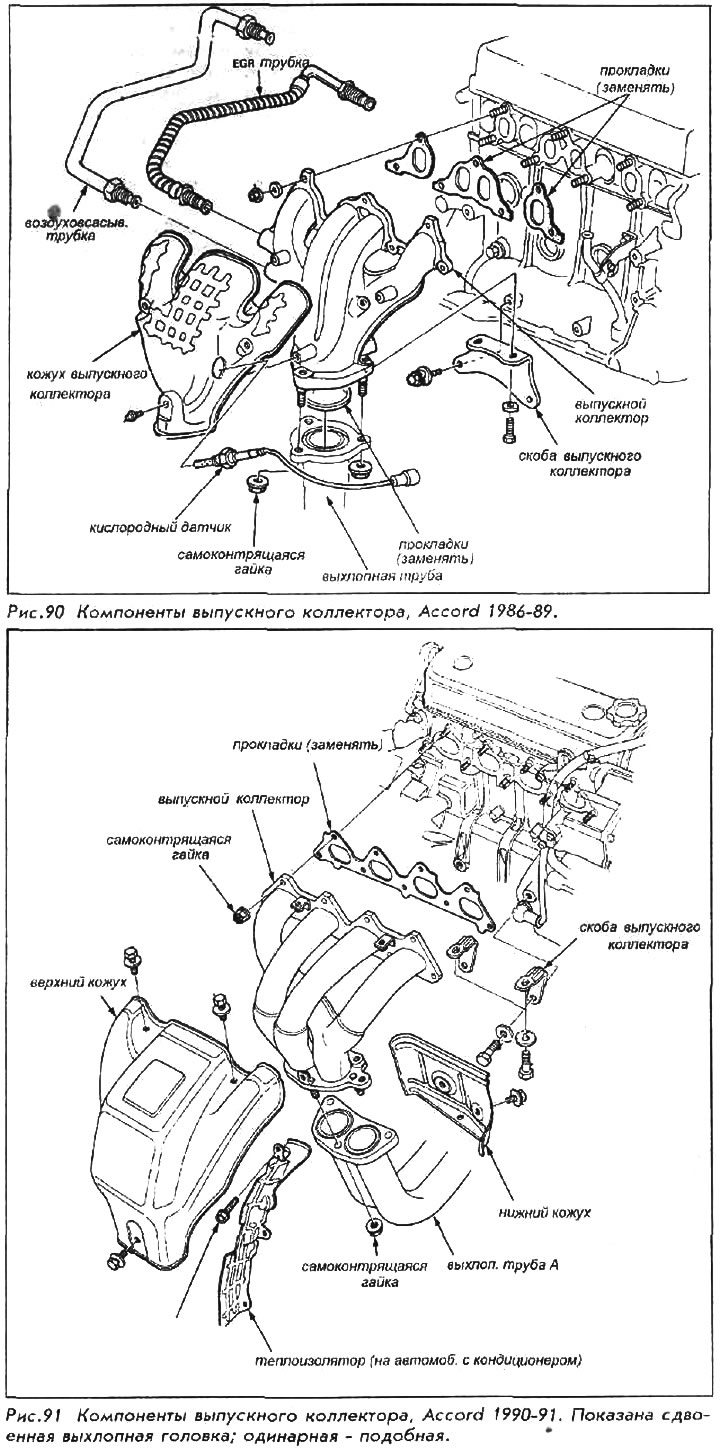
ATTENTION! Perform this manipulation only on a cold engine.
1. Raise and secure the vehicle.
2. For access, remove the front grille, disconnect the contacts from the oxygen sensor and remove the sensor itself from the exhaust manifold.
3. Remove the nuts securing the exhaust pipe to the exhaust manifold. Disconnect the exhaust pipe and remove the gasket.
4. Remove the bolt securing the heat shield to the exhaust manifold and the housing itself. Remove the bolts securing the exhaust manifold struts to the engine, the nuts securing the exhaust manifold to the cylinder head, their washers, manifold and gaskets (gaskets are not reused).
5. Clean the surfaces adjacent to the gasket. Using a ruler, check the curvature of the surfaces, if the surfaces in contact with the cylinder head are curved, then they need to be machined.
For installation:
6. Using new gaskets, install the manifold in place, and while supporting it, install the nuts on the rods.
7. Install the support stands under the manifold, tighten the bolt securing the stands to the manifold with a force of 28 Nm.
8. Starting with the center, or inner, nuts, tighten them in a criss-cross pattern with even torque across the manifold to prevent leaks. Required tightening torque 32 Nm for all vehicles.
9. Install the heat shield.
10. Attach the exhaust pipe to the manifold using new nuts and gaskets. The tightening torque of the nuts is 55 Nm.
11. Install the oxygen sensor by screwing it with a force of 45 Nm. Connect wires to it.
12. Install the EGR pipe (exhaust gas recirculation pipe), if it has been removed, use a new gasket.
13. Install the front grille.