
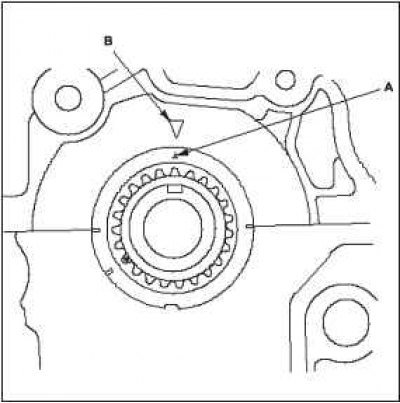
2. Set the camshaft to TDC. The "UP" mark A on the camshaft sprocket should be at the top, and the top dead center (TDC) marks B on the sprocket should be aligned with the top edge of the cylinder head.
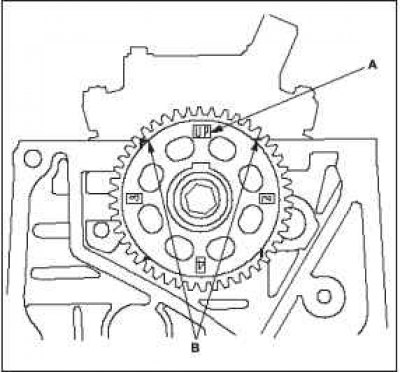
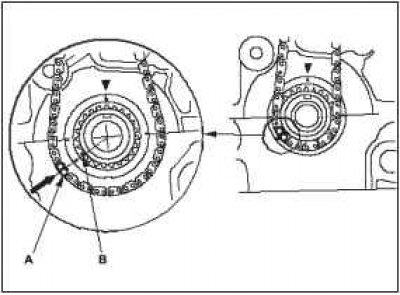
3. Install the timing chain onto the crankshaft sprocket so that the colored chain link A is aligned with the mark B on the crankshaft sprocket.
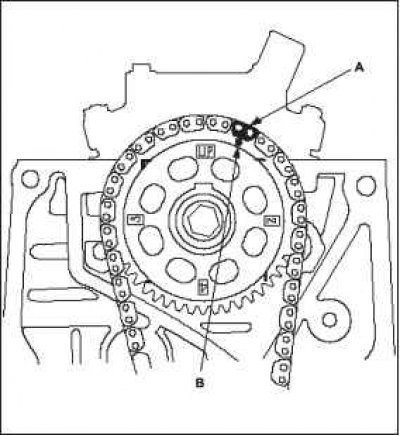
4. Install the timing chain onto the camshaft sprocket so that the colored chain link A is aligned with the mark B on the camshaft sprocket.
 |
 |
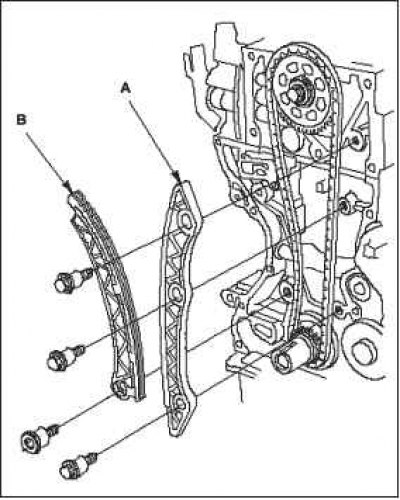
5. Install timing chain guide element A and timing chain tensioner lever B.
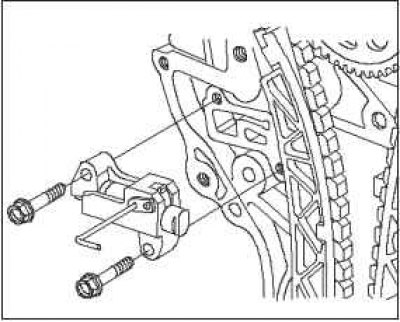
6. Install the automatic tensioner.
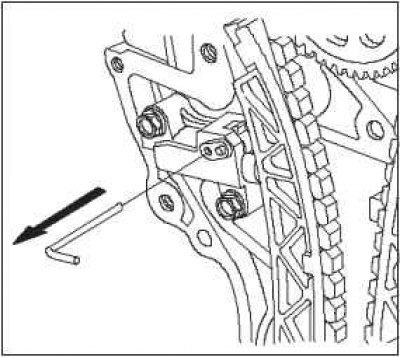
7. Remove the calibration or lock pin from the automatic tensioner.
 |
 |
8. Check if the oil pump gasket is damaged. If the oil gasket is damaged, replace it.
9. Remove any remaining old liquid gasket from the mating surfaces of the oil pump, bolts and their holes.
10. Clean and dry the mating surfaces of the oil pump.
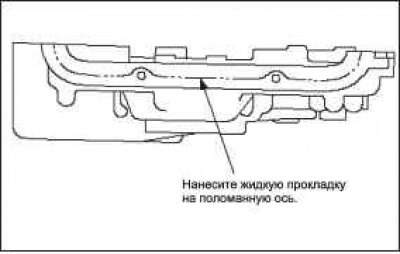
11. Apply an even layer of liquid sealant P/N 08C70-K0234M, 08C70-K0334M or 08C70-X0331S to the surface of the oil pump that is connected to the engine block.
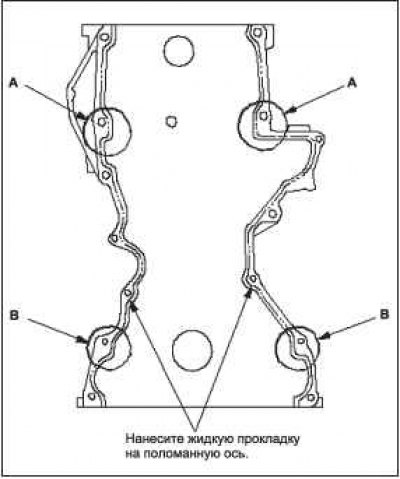
12. Apply liquid sealant to the oil pump mating surfaces on the top of cylinder block A and main bearing cap housing B.
13. Apply liquid sealant P/N 08C70-K0234M, 08C70-K0334M or 08C70-X0331S evenly to the oil pan mating surface of the oil pump.
Note: If 5 minutes or more have passed since applying liquid sealant, do not install components. Instead, remove the old layer of liquid sealant and apply a new layer.
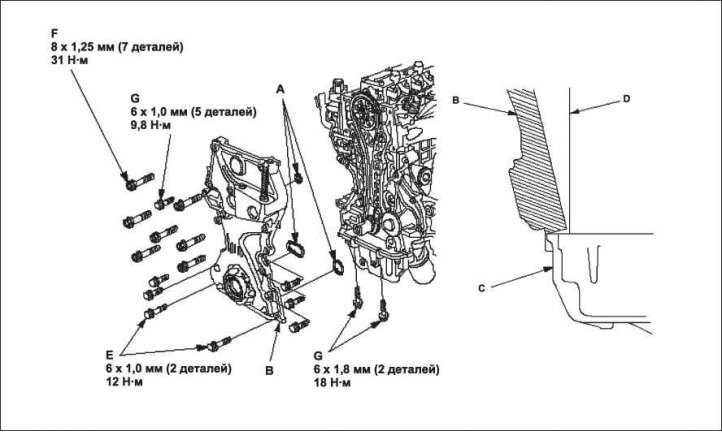
14. Install a new O-ring A onto the oil pump. Position the lip of the oil pump B onto the lip of the oil pan C, then position the pump onto the engine block D. Lightly screw in the mounting bolts E, then tighten the 8 mm bolts F. Tighten the 6 mm bolts G and the mounting bolts. Remove any excess liquid sealant from the mating surfaces of the oil pan and oil pump.
Note: When installing the oil pump, do not allow its bottom surface to slide on the mating surface of the oil pan.
Wait 30 minutes before adding oil to the engine.
Do not run the engine for at least 3 hours after installing the oil pump.
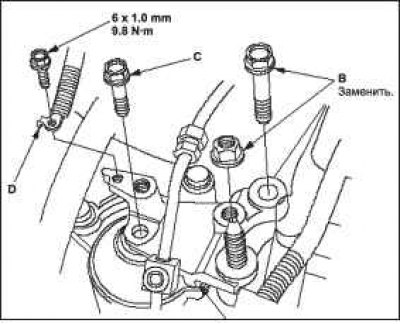
15. Install the side engine mount bracket A, then lightly tighten the new bolt and nut B and bolt C.
16. Install the body ground cable D.
17. Remove the air cleaner housing assembly.
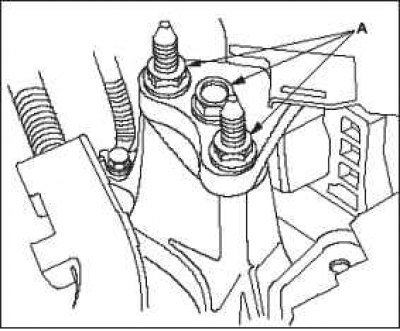
18. Loosen the transmission mounting bracket bolts and nuts A.
19. Raise the lift to maximum height.
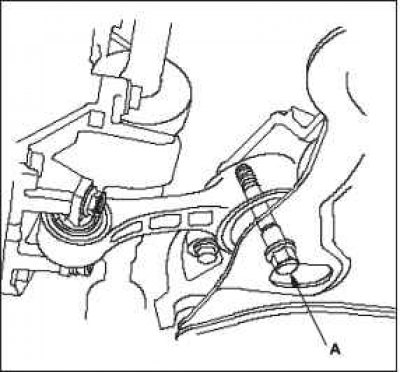
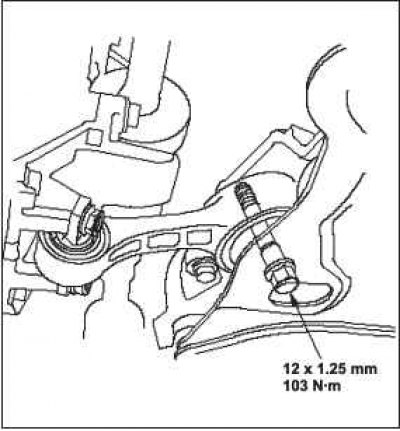
20. Loosen the lower reaction rod mounting bolt A.
 |
 |
21. Lower the car onto the lift.
22. Tighten the side engine mount bracket mounting bolts/nuts.
 |
 |
24. Raise the lift to maximum height.
25. Tighten the lower reaction rod mounting bolt.
26. Lower the car onto the lift.
27. Install the air cleaner housing assembly.
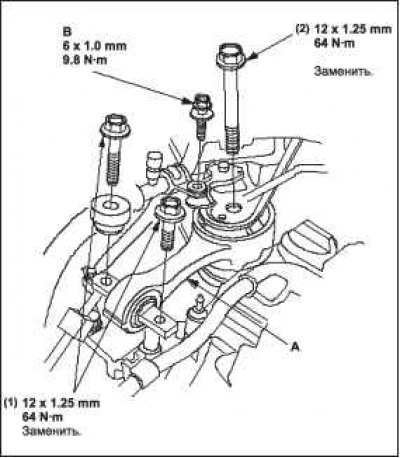
28. Install the upper reaction rod A, then tighten the new upper reaction rod mounting bolts in the numerical sequence shown.
29. Install bolt B of the air conditioner pipe fastening.
30. Install the crankshaft pulley in place.
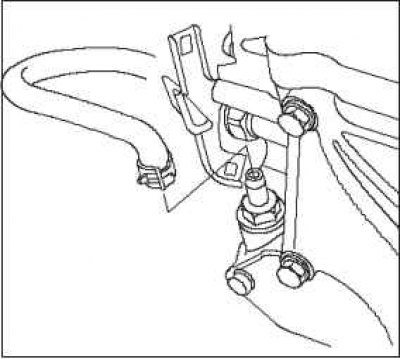
31. Install the positive crankcase ventilation (PCV) hose.
32. Install the cylinder head cover.
33. Install the automatic drive belt tensioner.
34. Install the lower engine cover.
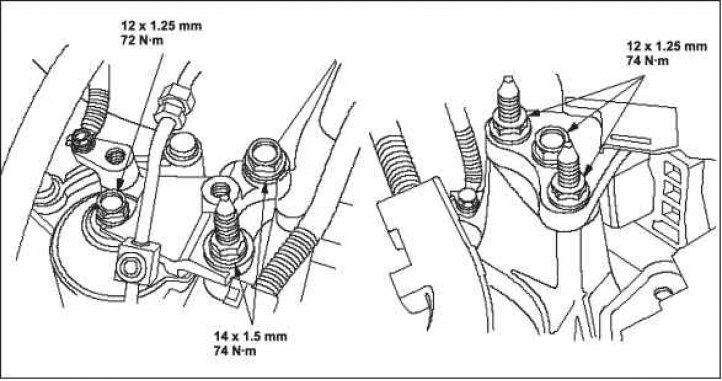
35. Install the front wheels.
36. Perform the Crankshaft Position (CKP) computer diagnostic procedure/CKP sensor reference position diagnostic procedure.
Refer to the original source on the website HondaBook.ru