
 |
 |
1. Completely remove old sealant from the mating surface of the oil pan, bolts and bolt holes.
2. Clean and dry the mating surfaces of the oil pan.
3. Apply new sealant to the oil pan.
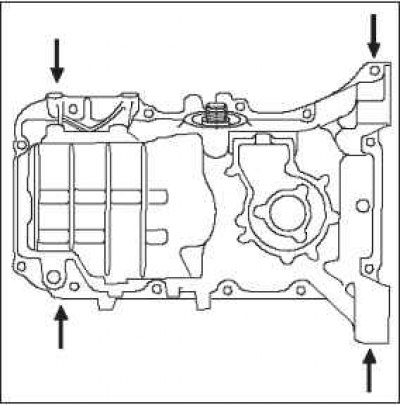
4. Apply sealant P/N 08C70-K0334M or 08C70- X0331S evenly to the contact surface of the cylinder block with the oil pan and to the internal threads of the bolt holes.
Note: Apply a 1.5mm wide layer of sealant along damage line A.
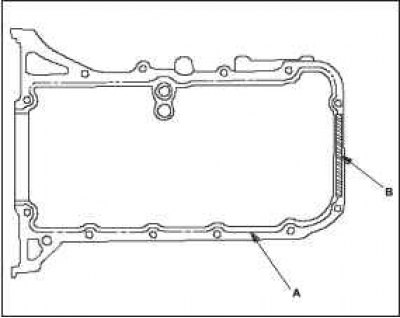
Apply a 0.5mm wide layer of sealant to the shaded areas B.
If 5 minutes or more have passed since applying the liquid sealant, do not install the components. Instead, remove the old layer of liquid sealant and apply a new layer.
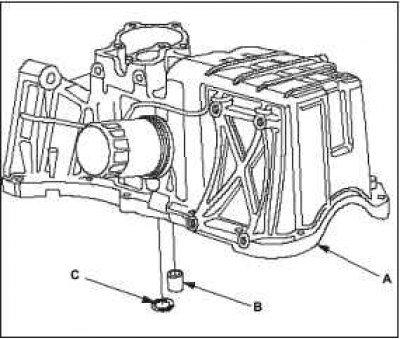
5. Install the oil pan A with the dowel pin B and new seal ring C.
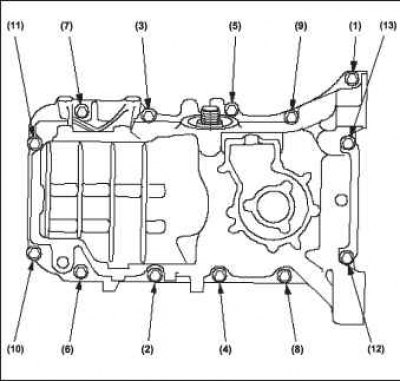
6. Tighten the bolts in two or three stages.
Recommended moment:
- 1: 24 Nm;
- 2-13: 12 Nm.
Note: Wait 30 minutes before adding oil to the engine.
7. Remove excess liquid sealant from each side of the crankshaft pulley and flywheel.
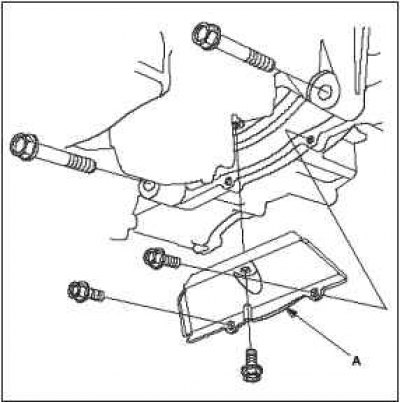
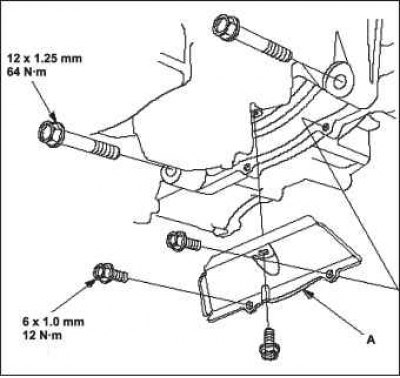
8. Install clutch basket A and tighten the two gearbox mounting bolts.
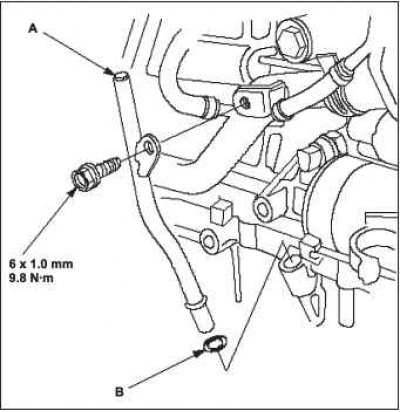
9. Install the dipstick tube A with a new O-ring B, then install the dipstick.
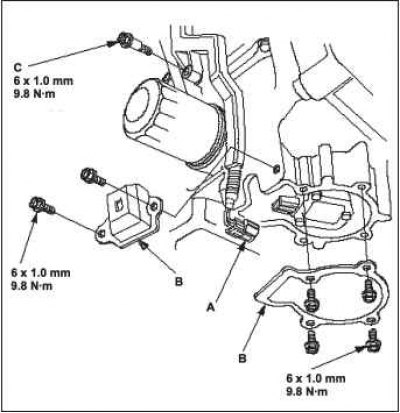
10. Connect the oil level sensor connector A, then install the oil level sensor caps B.
11. Tighten the wiring harness retainer mounting bolt C.
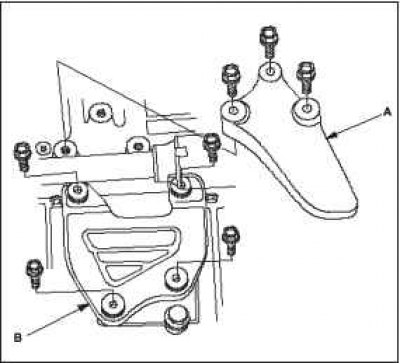
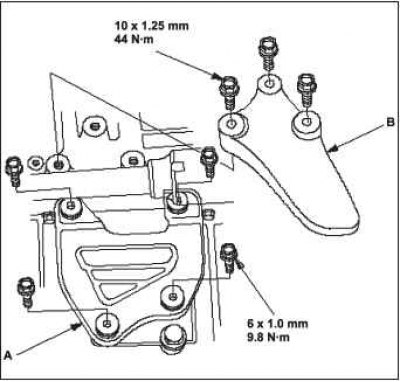
12. Install the oil pan cover A and engine lower protector B.
13. If the engine is still not removed from the vehicle, follow these steps:.
 |
 |
14. Install the lower reaction rod.
15. Install the lower engine cover.
16. Install the air conditioner compressor, then connect the air conditioner compressor electromagnetic clutch connector (with air conditioning).
17. Install the drive belt and adjust it (with air conditioning).
18. Fill the engine with engine oil.
(The article is based on information from the website: «www.HondaBook.ru»)