

1. Install the attachment brackets and tighten their attachment bolts to the correct torque.
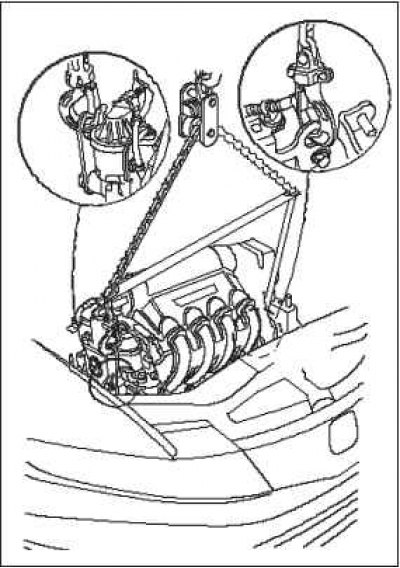
2. Place the engine/gearbox assembly under the vehicle. Make sure they are aligned properly. Carefully lower the vehicle until the engine and transmission are properly seated in the engine compartment. Make sure the vehicle is not resting on any part of the engine or transmission. Raise and support the engine with a chain hoist and carefully lift the engine/transmission assembly into place.
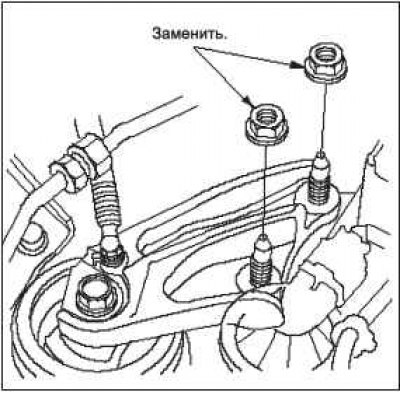
Note. Reinstall the mounting bolts/support nuts in the sequence shown. Failure to follow this sequence may result in increased noise and vibration levels and shorten the life of the motor mount.
3. Tighten the new engine side mounting bracket nuts.
 |  |
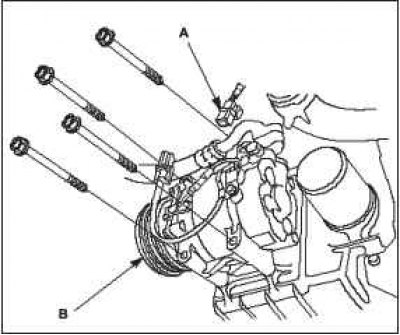
4. Tighten the new bolts and nuts of the gearbox mounting bracket A.
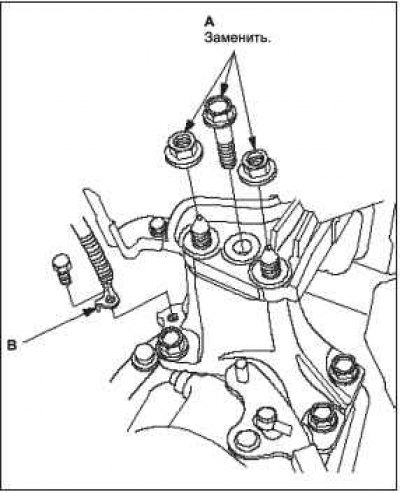
5. Install the connection cable with «weight» IN.
6. Make sure the lift mounts are properly positioned. Raise the lift to its maximum height.
7. Support the front subframe with a piece of wood and a jack and lift it up.
8. Tighten new mounting bolts.
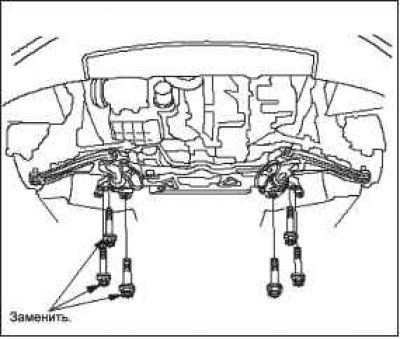
9. Install the lower torque rod, then tighten the new lower torque rod mounting bolts in the numerical sequence.

10. Make sure the lift mounts are properly positioned. Lower the car on the lift.
11. Disconnect the chain hoist from the engine/gearbox assembly.
12. Raise the machine to the full height of the lift.
13. Install the A/C compressor A, then connect the A/C compressor magnetic clutch connector B.
14. Install a new circlip on each end of the drive shaft, then install the drive shafts. Make sure each circlip ''clicks'' into place in the groove of the differential and countershaft.
15. Connect the lower suspension arms to the swing arms.
16. Connect the ball joints at the end of the tie rod to the cams.
17. Connect drafts of the stabilizer of cross-section stability.
18. Connect sockets to a steering reducer.
19. Install the three-way catalytic converter (TWC) A. Use new gaskets B and new self-locking nuts C.
20. Connect the connector D of the secondary heated oxygen sensor (secondary HO2S).
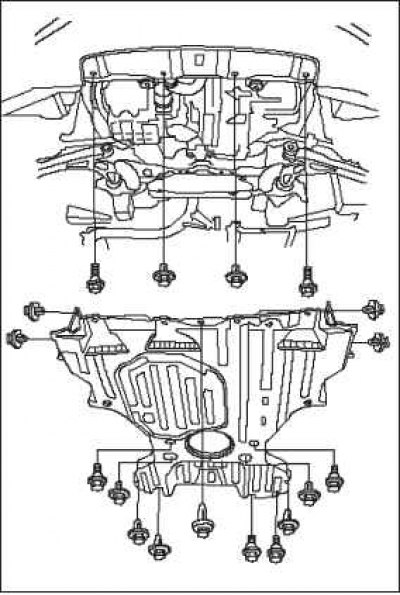
21. Install the bottom engine cover.
22. Lower the machine on the lift.
 |  |
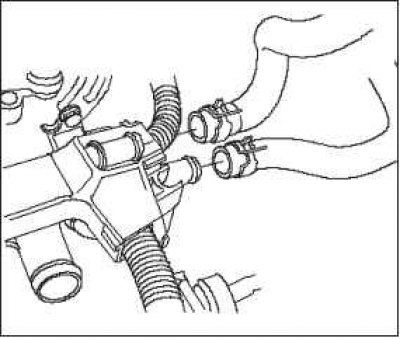
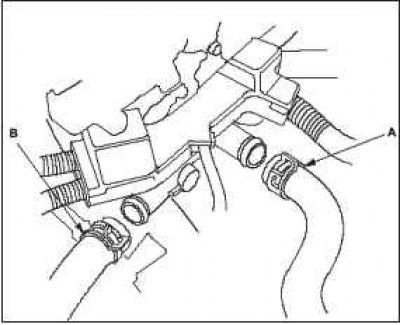
23. Install heater hoses.
24. Install the upper radiator hose A and the lower radiator hose B.
25. Install the drive belt, then adjust its tension.
26. Install the clutch slave cylinder and the bolt securing the bracket holding the clutch hydraulic tube.
 |  |
27. Install the shift cable.
28. Align mark A on the steering joint and steering gear shaft. Connect the steering joint B to the steering gear shaft C. Tighten the steering joint bolt.
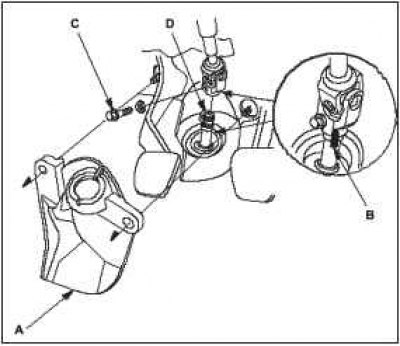
29. Install steering joint cover D.
30. Install the steering wheel.
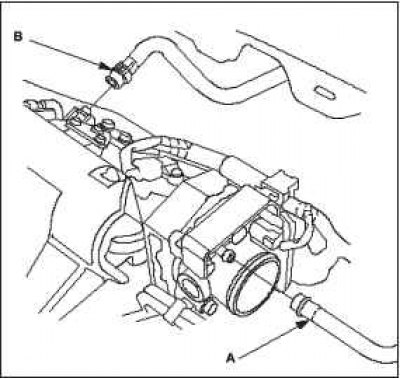
31. Install hose A of the fuel vapor canister (EVAP) and brake booster vacuum hose B.
 | 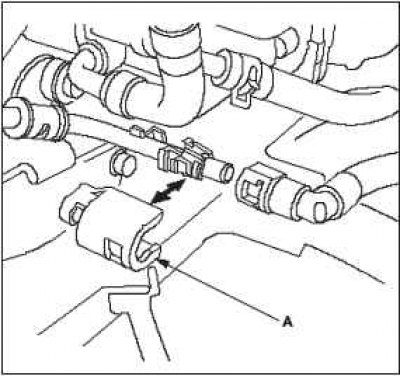 |
32. Connect the fuel supply hose, then install the quick coupling cover A.
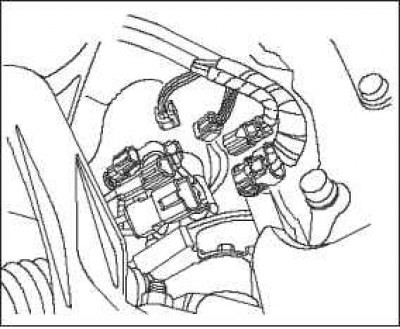
33. Connect connectors A of the engine control unit (ECM) and connectors B of the engine wiring harness.
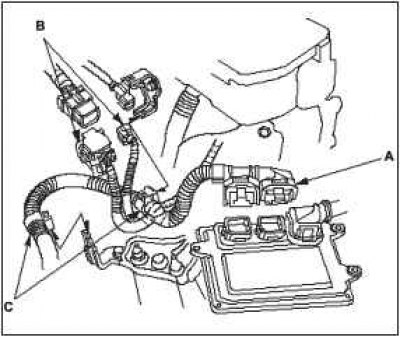
34. Install wire harness clamps C.
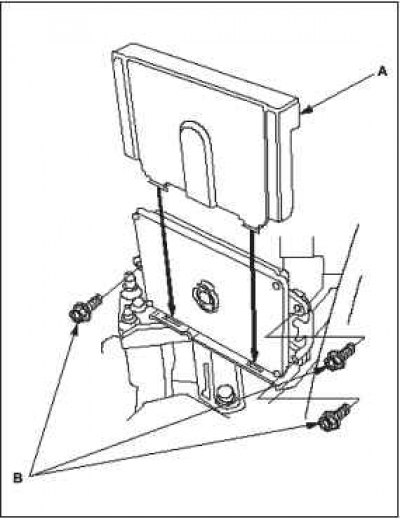
35. Install ECM A, then ECM B shroud.
36. Install battery cables A to the electrical fuse/relay box.
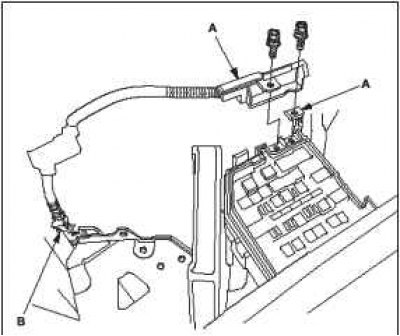
37. Install wire harness retainer B.
38. Install the intake pipe.
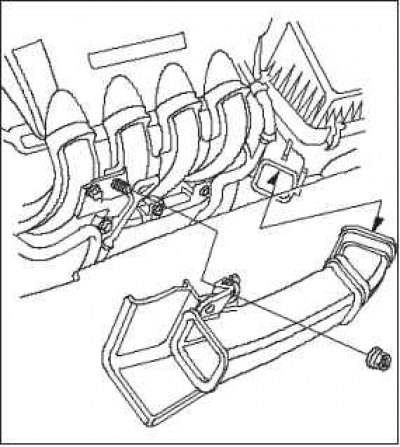
39. Install the air cleaner housing assembly.
40. Install the panel under the shield.
41. Install the battery.
42. Install the front wheels.
43. Install the battery. Clean the battery terminals and cable terminals with sandpaper, then connect them and apply a layer of anti-corrosion grease.
44. Check for smooth gear changes.
45. Check for fuel leaks: turn on the ignition (position «ON» (II)) (do not turn on the starter), so that the fuel pump runs for about 2 seconds and pressurizes the fuel line. Repeat this operation two or three times, then check to make sure there are no fuel leaks at all points in the fuel system.
46. Fill the engine with engine oil.
47. Refill the gearbox with transmission fluid:
48. Fill the radiator with coolant and bleed air from the cooling system with the heater valve open.
49. Perform the block data reset procedure (ECM).
50. Perform the computer diagnostic procedure for the position of the crankshaft (TFR) / diagnostic procedure based on the reference position of the TFR sensor.
51. Check the idle speed.
52. Check the ignition timing.
53. Check wheel alignment.
54. Carry out the procedure for initializing the power windows.
55. Set the correct time on the clock.