
Warning! Frequent inhalation of dust from brake pad surfaces, regardless of the composition of the material, can be hazardous to your health.
- Do not inhale dust.
- Do not clean brake surfaces with compressed air or a brush. Use a vacuum cleaner.
1. Slightly loosen the front wheel nuts, then raise the vehicle and secure it on the safety stands. Remove the front wheels.
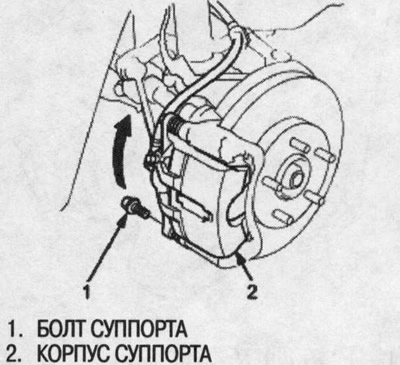
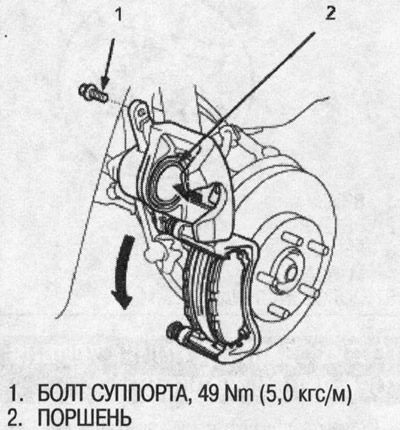
2. Remove the bolt from the caliper and swing it up and out of the way. Check hoses and finger boots for damage or wear.
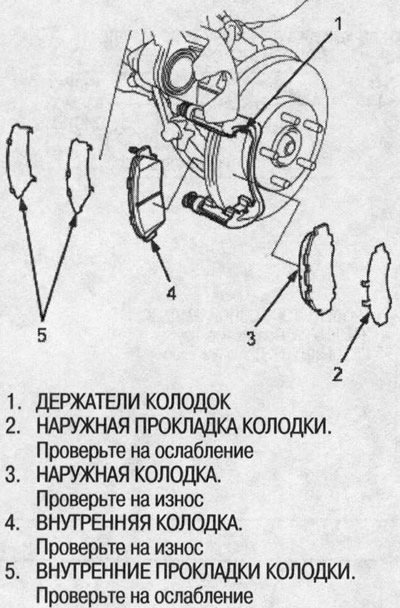
3. Remove shoe gaskets, shoe holders and shoes.
4. Using a caliper, measure the thickness of the friction material of the brake pads. This does not include the thickness of the metal substrate.
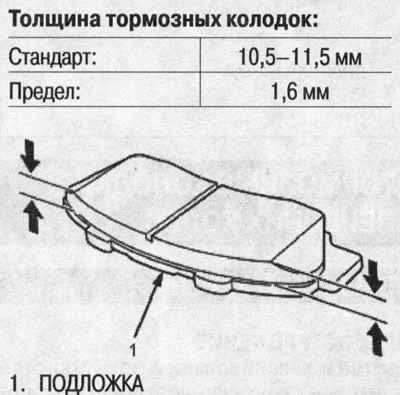
5. If the thickness of the brake pads is less than the limit value, replace the pads and gaskets at the same time.
6. Thoroughly clean the caliper; remove rust and check for grooves or cracks.
7. Check the brake disc for damage and cracks.
8. Install shoe holders.

9. Apply Molykote M77 or Daikal-ub 528D grease to the gaskets on the side of the pads and on the back of the brake pads. Wipe excess grease from gaskets.
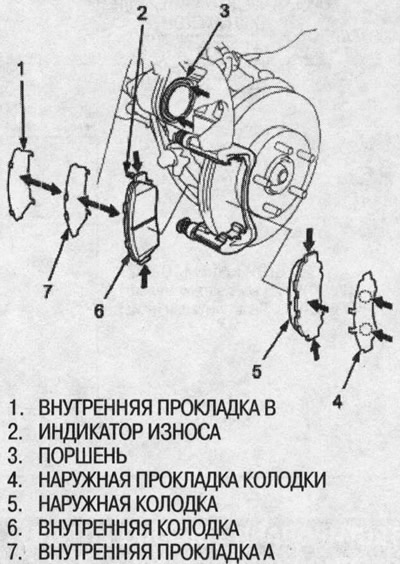
10. Install the brake pads and gaskets correctly. Install the pad with the wear indicator facing in.
Warning!
- When reusing the pads, always reinstall them in their original position to avoid loss of braking performance.
- Dirty brake discs or pads increase the stopping distance. Do not allow lubricant to get on discs and pads.
11. Push in the piston so that the caliper fits over the pads. Make sure the piston boot is in place to avoid damaging it when the caliper is tilted down.
12. Tilt the caliper down without damaging the finger boot. Insert a bolt into the caliper and tighten it.
13. Depress the brake pedal several times and check that the brakes are working, then carry out a road test.
Note: Immediately after replacing the brake pad assemblies, more pedal travel may be required to engage the brake. After a few depresses of the brake pedal, normal pedal travel will be restored.
14. After installation, check for leaks at the joints of hoses and tubes or fittings and tighten if necessary.