HondaBook.ru
Auto companies Volkswagen Auto companies Ford Auto companies Lada Auto companies Skoda Auto companies BMW Auto companies Mazda Auto companies Peugeot
English Русский
Български
Беларускі
Український
Српски
Hrvatski
Română
Polski
Slovenský
Magyar
Bookmark Contacts Sitemap   


Accord Civic Fit / Jazz CR-V HR-V Others Articles
Accord 3 (1985-1989) Accord 6 (1997-2002)

Replacement of brake pads of disc brake mechanisms (Honda Accord 6)

  • Main
  • Honda Accord
  • 6 (1997-2002)
  • Chassis and running gear
  • Brake system
  • Replacement of brake pads of disc brake mechanisms
0
Contents: Front wheel brakes ⇊ Rear wheel brakes ⇊ Braking mechanisms of the front and…⇊
Warning! Brake pads must be replaced simultaneously on both front/rear brake mechanisms. Remember that dust generated during operation of the brake mechanisms may contain asbestos, which is extremely harmful to human health. Never blow off dust with compressed air or inhale it - wear a protective mask or respirator when servicing the mechanisms. Never use gasoline or petroleum-based solvents to wipe brake system components - use only branded cleaning agents or methyl alcohol!


The procedure applies equally to disc brakes on both front and rear wheels.

1. Remove the cap from the brake fluid reservoir.

2. Loosen the nuts securing the corresponding wheels. Jack up the front/rear of the car and place it on supports.

3. Remove the front/rear wheels.

Note: All four brake shoes on both wheels of one axle must be replaced at the same time. To avoid confusion, work on each mechanism individually.


4. Carefully inspect the brake disc (see Section Checking the condition, removing and installing the brake disc). If it is necessary to perform a turning, remove the disk.

Front wheel brakes


Front wheel brakes


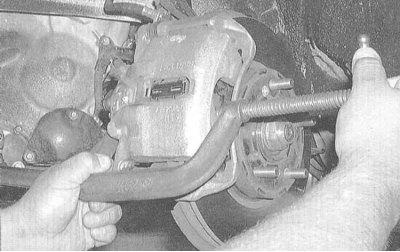
1. Using a clamp, press the piston into the caliper cylinder, thereby providing the necessary free space for installing new pads that have a greater thickness. When pressing the piston into the caliper, the fluid level in the master cylinder reservoir will rise - make sure that it does not start to overflow, if necessary, pump out the excess.


1. Using a clamp, press the piston into the…


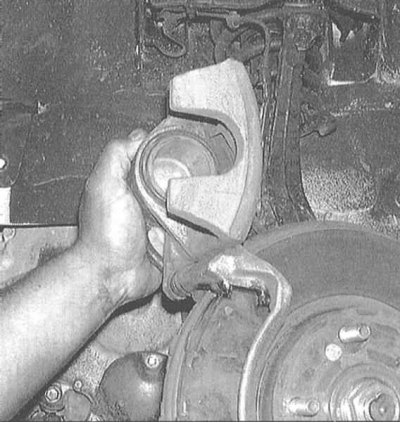
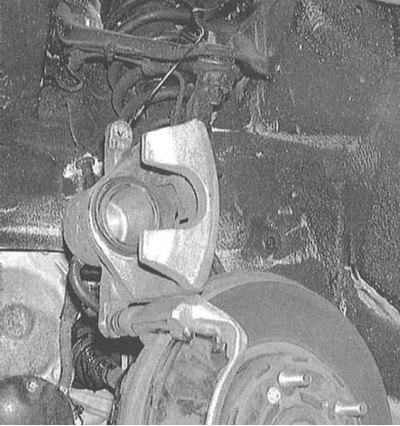
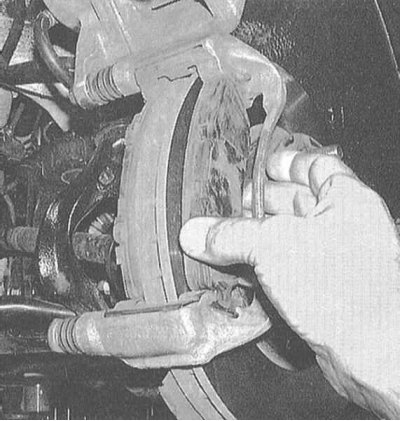
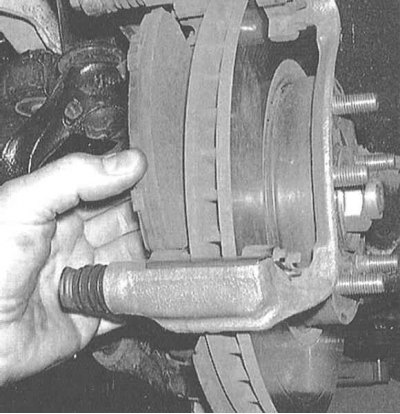
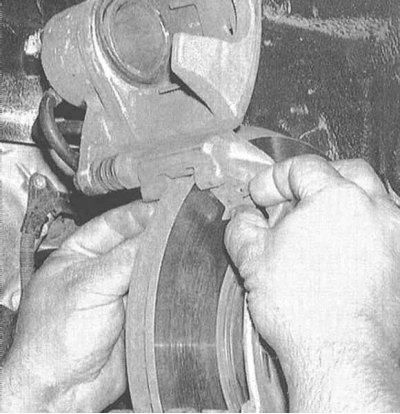
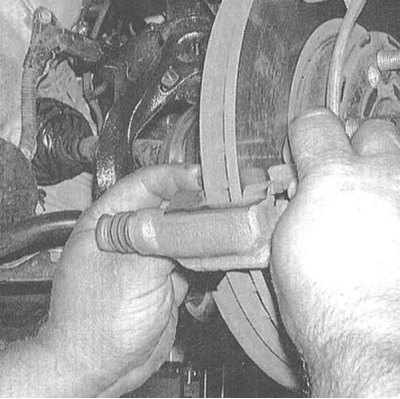
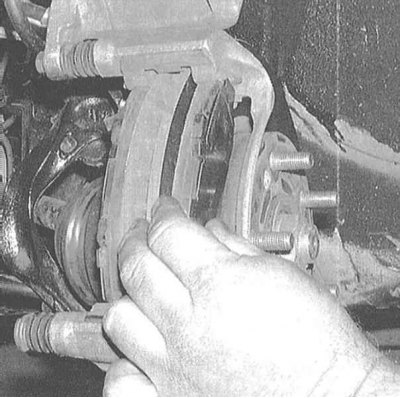
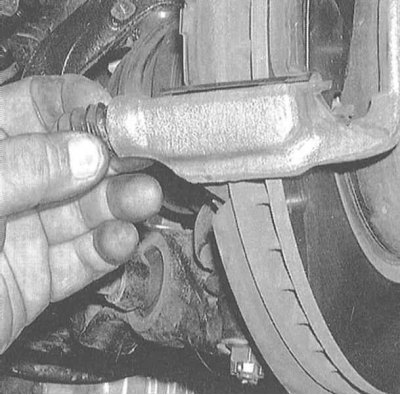
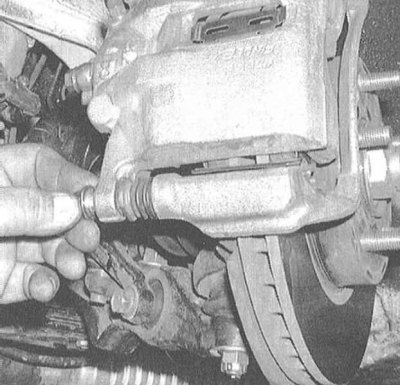
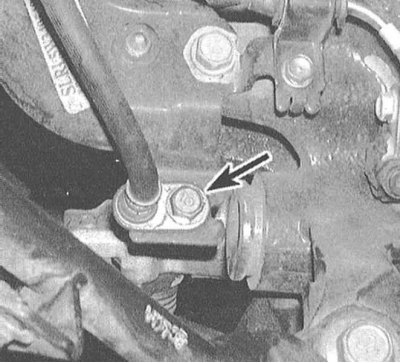
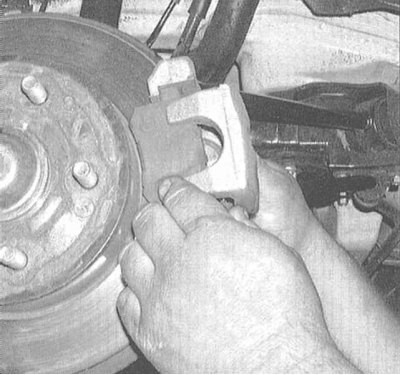
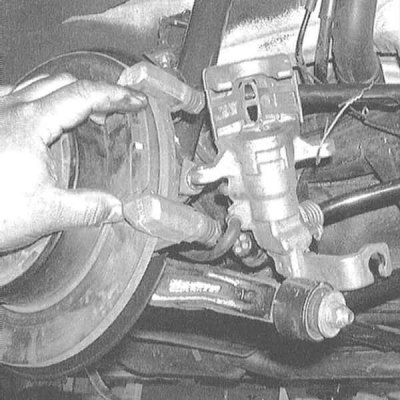
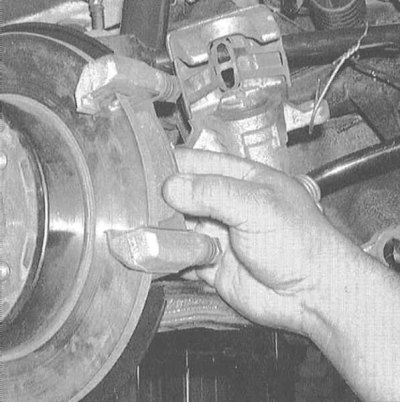
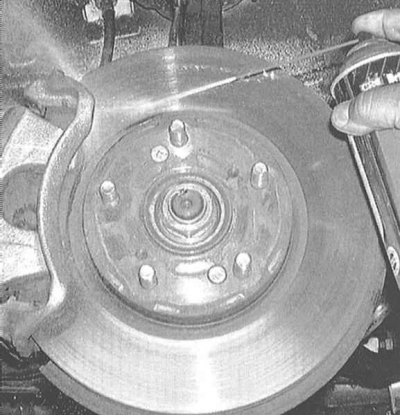
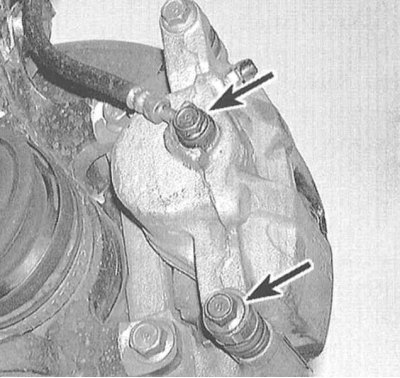
2. Before you begin dismantling the components, be sure to wash them with a special cleaner. Then follow the instructions in the illustrations below.
2. Before you begin dismantling the components,…

2. Before you begin dismantling the components,…

2. Before you begin dismantling the components,…

2. Before you begin dismantling the components,…

2. Before you begin dismantling the components,…

2. Before you begin dismantling the components,…

2. Before you begin dismantling the components,…


Rear wheel brakes


Rear wheel brakes


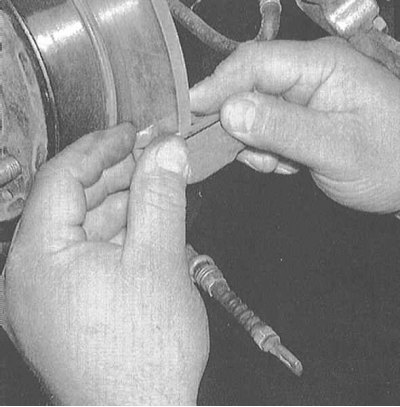
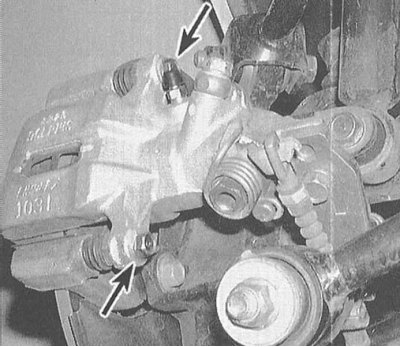
1. Wash the brake assemblies with a special cleaning agent. Then follow the instructions in the illustrations below, then proceed to the procedure described below in paragraph 1.
1. Wash the brake assemblies with a special…

1. Wash the brake assemblies with a special…

1. Wash the brake assemblies with a special…

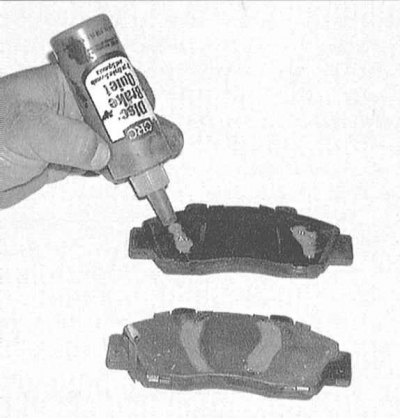
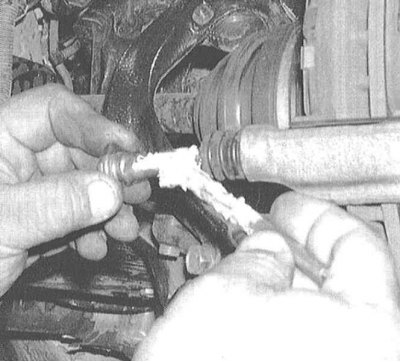
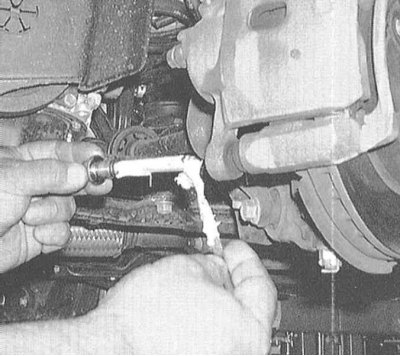
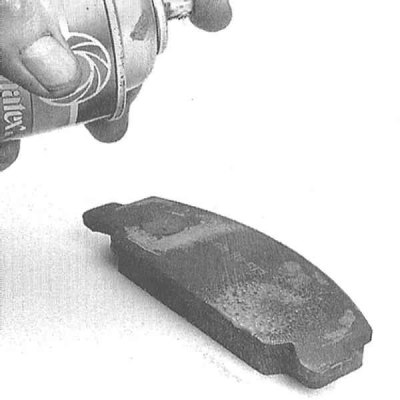
2. Cover the back of the new pads with a special anti-squeal compound. The instructions for using the product are usually printed on the side of the can.


3. Install the adjusting shims onto your pads.

4. Install the pad retainers into the caliper anchor bracket. Lubricate the pad retainers with a thin layer of high-temperature grease.

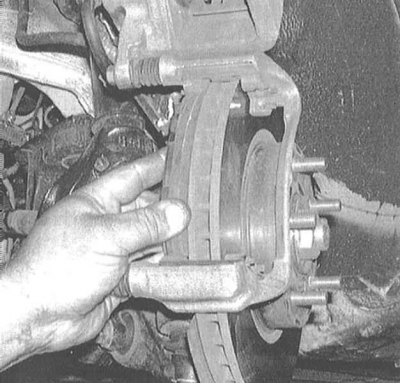
5. Install new brake pads with adjusting shims into the caliper anchor bracket.
5. Install new brake pads with adjusting shims…


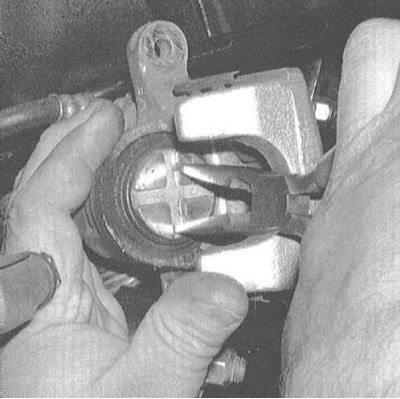
6. Using needle-nose pliers, turn the piston, pressing it into the caliper cylinder to provide the necessary free space for installing new brake pads.
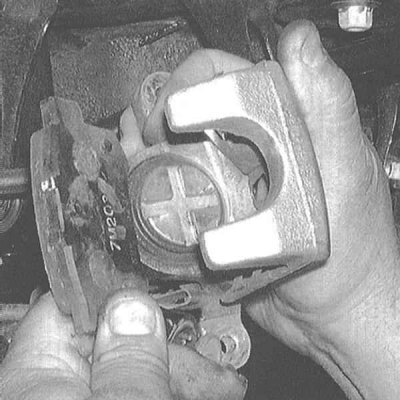
6. Using needle-nose pliers, turn the piston,…


7. First, push the piston to the bottom of the cylinder, then turn it back so far that when installing the inner shoe, the protrusion on its rear side gets into one of the grooves on the end surface of the piston. Make sure that the piston dust boot is not deformed as a result of rotation.

Braking mechanisms of the front and rear wheels


1. Reinstall the wheels, lower the vehicle to the ground and tighten the wheel nuts to the specified torque (see Specifications in Chapter Settings and ongoing maintenance).


2. Press the brake pedal/cock the parking brake lever several times (if you changed the rear pads) to seat the pads on the disc.

3. Check the brake fluid level and make the appropriate adjustments if necessary (see Chapter Settings and ongoing maintenance). Before you begin normal operation of the vehicle, make sure that the brake system is functioning properly.

(Full text available on the portal: «www.hondabook.ru»)
This article is available at: russian, bulgarian, belarusian, ukrainian, serbian, croatian, romanian, polish, slovak, hungarian
This information has been verified: Timofey Goryachev
Share with friends:
◀ Previous
Accord 6: Brake system
Next ▶

Anti-lock Brake System (ABS) — General Information and Error Codes
Brake system — general information
Brake system specifications
Removal and installation of disc brake calipers
Checking the condition, removing and installing the brake disc
Replacing the shoes of the rear wheel drum brake mechanisms
Removal and installation wheel cylinders
Removal and installation the master brake cylinder
See also other articles from Honda manuals:
Replacement of brake pads of disc brake mechanisms Honda Civic 6 (1995-2000)
Replacing the front brake pads Honda Fit 1 (2001-2008)
Front disc brake pads Honda CR-V 1 (1995-2001, petrol)
Front Brake Pads — Checking and Replacing Honda HR-V 1 (1998-2006, petrol)
Front Brake Pads — Checking and Replacing Honda Avancier 1 (1999-2003, petrol)
Link in different formats to this article
Comments and feedback from visitors
No comments yet


How much will 40 + 29 ?


Accord 6 (1997-2002) 
  • General information
  • Introduction to the guide
  • User manual
  • Maintenance
  • Power unit
  • Four-cylinder engines
  • Six-cylinder engines
  • Engine overhaul
  • Cooling system
  • Heater and air conditioner
  • Power and exhaust systems
  • Engine electrical equipment
  • Engine management
  • Transmission
  • Mechanical gearbox
  • Automatic gearbox
  • Clutch and drive shafts
  • Chassis and running gear
  • Brake system
  • Car suspension
  • Steering
  • Body and interior
  • Exterior (external elements)
  • Interior (internal elements)
  • Electrical equipment
  • Equipment and devices
  • Electrical circuits
Accord 3 (1985-1989) 
  • General information
  • Maintenance
  • Power unit
  • Engine adjustment
  • Engine repair
  • Engine electrics
  • Emission management
  • Engine management (carburetor)
  • Electronic injection
  • Programmable injection
  • Schematic of emission system
  • Fuel system
  • Feedback management
  • Transmission
  • Manual gearbox
  • Automatic gearbox
  • Clutch
  • Chassis and running gear
  • Front suspension
  • Rear suspension
  • Steering
  • Brake system
  • Electrical equipment
  • Ventilation and heating
  • Air conditioner
  • Cruise control system
  • Equipment and devices
HondaBook.ru © 2018–2026 • Mobile version • Sitemap: EN BG BY UA RS HR RO PL SK HU • Feedback • Driver Information • Search system • Bookmark
Accord 3 (1985-1989) • Accord 6 (1997-2002) • Civic 3 and 4 (1983-1991) • Civic 5 and 6 (1991-2000) • Civic 6 (1995-2000) • Civic 7 (2000-2005) • Civic 8 (2005-2011) • Fit 1 (2001-2008) • CR-V 1 (1995-2001) • CR-V 2 (2002-2006) • HR-V 1 (1998-2006) • Avancier 1 (1999-2003) •
 
This website uses cookies to ensure proper functioning. By clicking "OK," you agree.