
Note. Wash all parts in brake fluid and air dry; blow out all openings with compressed air.
 |  |
Before reassembly, check that all parts are free of dirt and other foreign particles.
If required, replace parts with new ones.
Use only genuine Honda DOT 3 or DOT 4 brake fluid. Use of non-Honda brake fluid may corrode components and shorten system life.
Do not mix different brands of brake fluid as they may not be compatible.
Replace the master cylinder if the inner walls of the cylinder are damaged or worn. The inner walls of the cylinder must not be honed or finished.
Lubricate all piston cups, grease fitting and inner walls of the brake master cylinder with clean brake fluid.
Use the recommended grease from the master cylinder overhaul kit.
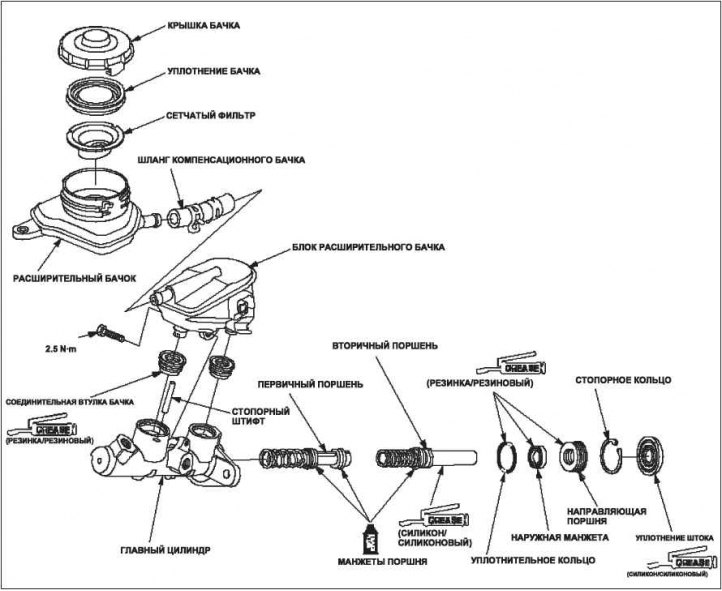
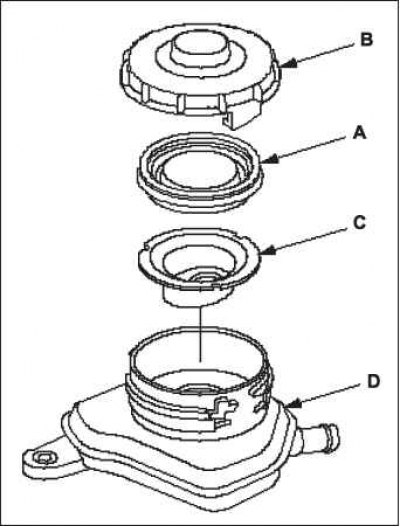
1. Insert the reservoir seal into the groove on the reservoir cap.
2. Install the strainer and reservoir cap assembly on the reservoir.
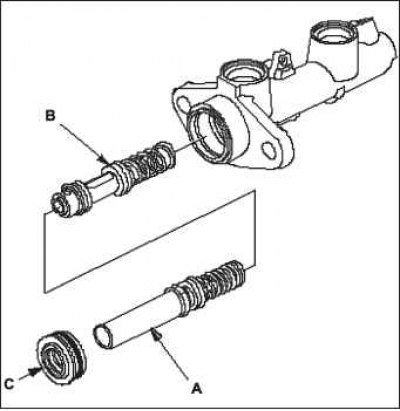
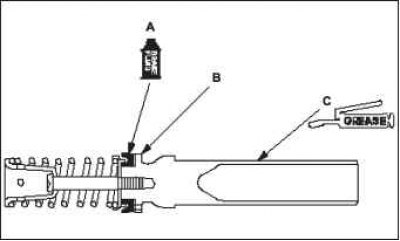
3. Lubricate the cups A of the new primary piston B with clean brake fluid, then insert the primary piston into the master cylinder.
Note. Check that valve C moves smoothly in the piston groove when pressed lightly.
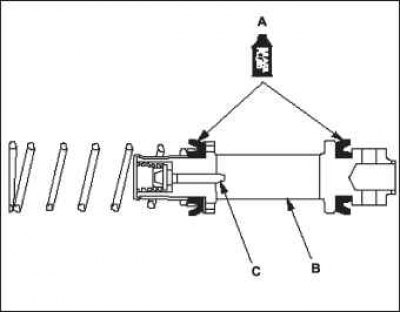
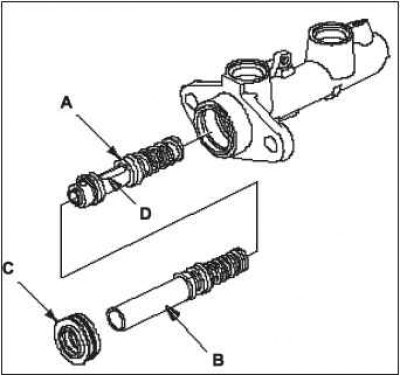
4. Lubricate the cup A of the new secondary piston B with clean brake fluid, then apply silicone grease to the surface of the piston C.
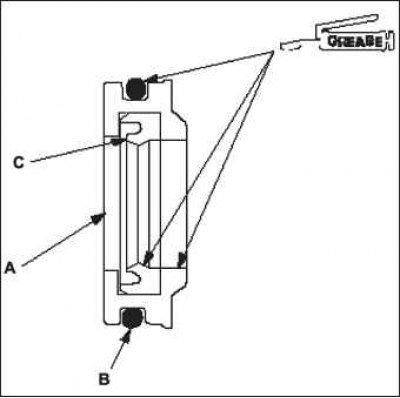
5. Apply rubber grease to the new piston guide A, o-ring B, and secondary seal C.
6. Install primary piston A, secondary piston B, and piston guide C to master cylinder. Do not confuse the direction of the piston guide.
Note. Install the primary piston in hole D of the brake master cylinder so that the slot in the piston aligns with the pin hole.
 |  |
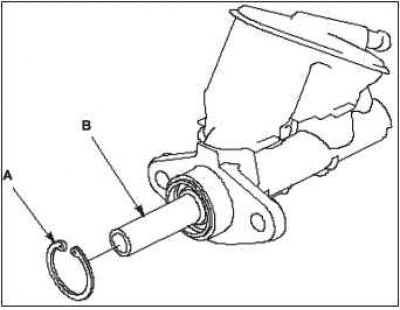
7. Align groove A of the primary piston with the hole for the end pin B, pressing the secondary piston into the cylinder, then install the end pin C.
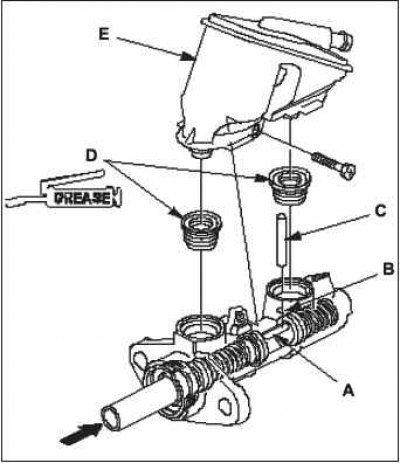
8. Apply rubber grease to the surface of the new tank bushings D, then install them and expansion tank block E on the master cylinder.
9. Install a new circlip A by pushing the secondary piston B inward. Be careful not to scratch the surface of the secondary piston when installing the retaining ring.
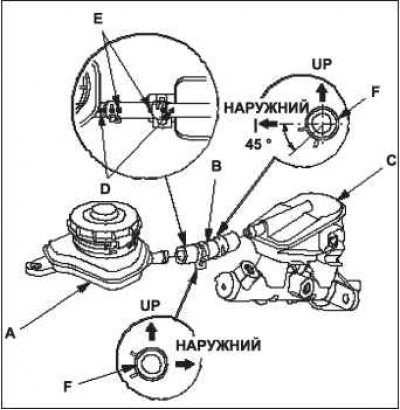
10. Install tank A and hose B on block C of the expansion tank.
Note. Align the D''[utri]'' marks on the reservoir and expansion tank block with the E mark on the hose.
Set the direction of the clamps F.
11. Lubricate the new rod seal with silicone grease from the master cylinder repair kit and install the seal in the master cylinder.