
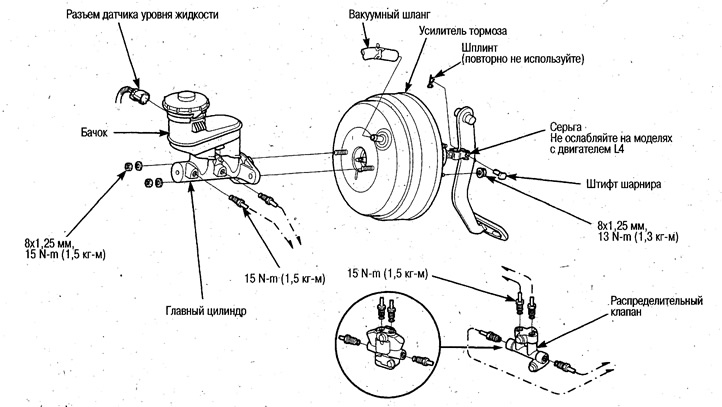
Attention:
- Make sure that brake fluid does not come into contact with paintwork. If the fluid does come into contact with paintwork, wash it off immediately with water.
- Do not damage or deform the brake pipes excessively during removal and installation.
- To prevent brake fluid from leaking, install plugs on the disconnected pipes.
- When replacing the master cylinder or brake booster, check and adjust the clearance in the push rod before installation.
- If you have loosened the clevis lock nut, adjust the clevis position (see below).
Removal and installation the master cylinder
1. Remove the air intake.
2. Disconnect the fluid level sensor connector and remove the reservoir cap.
3. Drain the brake fluid from the reservoir.
4. Disconnect the brake pipes from the master cylinder.
5. Loosen the mounting nuts (8 mm) and remove the master cylinder from the brake booster.
6. Install in the reverse order of removal.
7. After filling with brake fluid, bleed the air (see above).
8. Check the pedal height at engine idle speed and adjust if necessary.
Removal the brake booster
1. Remove the master cylinder (see above).
2. Disconnect the vacuum hose from the brake booster.
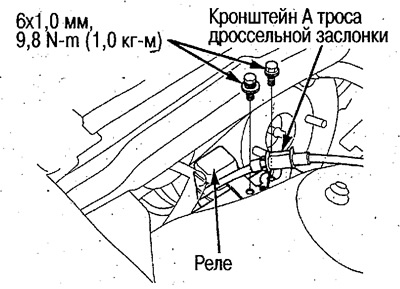
3. Remove the relay and throttle cable bracket A.
4. From the interior side, remove the clamp and hinge pin and disconnect the clevis from the brake pedal.
5. Unscrew 4 nuts (8 mm) and remove the brake booster.
6. Perform installation in the reverse order of removal.
7. Fill with brake fluid and bleed air (see above).
8. Check the height and free play of the brake pedal and adjust if necessary (see above).
The text can be found on the website: HondaBook.ru