
Warning! Frequent inhalation of the dust generated by worn brake linings, regardless of their material, can be hazardous to your health.
Attention! Avoid inhalation of dust particles resulting from worn brake pads.
Attention! Do not use compressed air or brushes to clean brake components. Use a suitable vacuum cleaner.
Examination
1. Raise the front of the vehicle and install safety supports in the appropriate places.
2. Remove the front wheels.
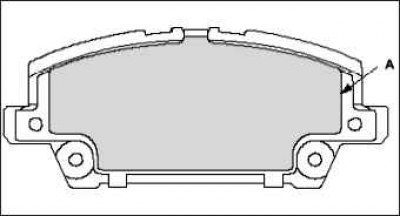
3. Measure the thickness A of the inner B and outer C of the brake lining. When measuring, do not take into account the thickness of the block itself.
The thickness of the brake lining.
- Standard: 11.0 mm.
- Operating range limit: 1.6 mm.
4. If the pad thickness is less than the maximum allowable value, then both front brake pads must be replaced.
Replacement
1. Raise the front of the vehicle and install safety supports in the appropriate places.
2. Remove the front wheel.
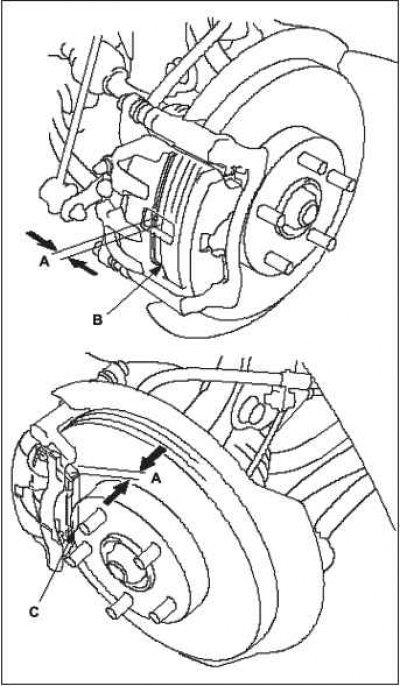
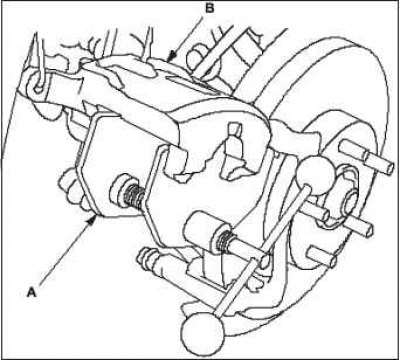
3. Remove flange bolt A while holding caliper pin B with a wrench. Be careful not to damage the seals of the steering axles and tilt the caliper C to the side. Check for damage and wear to the hose and cotter pin collars.
4. Turn away a fixing bolt of a brake hose D.
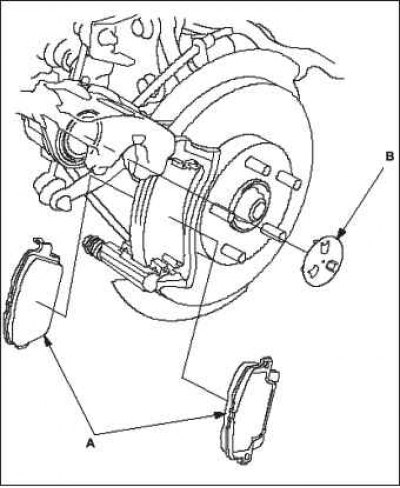
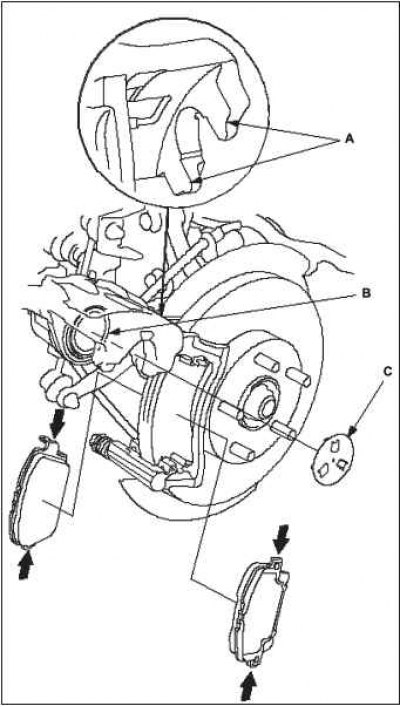
5. Remove pads A and piston gasket B.
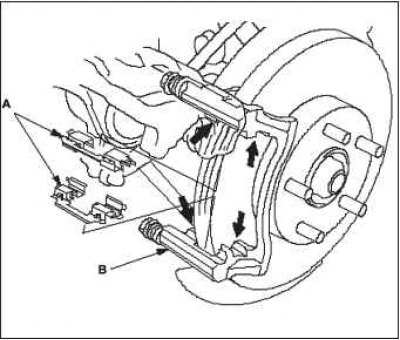
6. Remove the trim retainers A.
7. Thoroughly clean caliper bracket B, remove rust and check that there are no nicks or cracks on it.
8. Check up, that the surface of a brake disk has no cracks and damages.
9. Apply a light coat of Molykote M77 to the caliper bracket where they meet (indicated by arrows) opposite the fasteners.
10. Install the shoe fixing plates. Wipe off excess grease from retainers. Do not allow lubricant to get on the disc and lining.
11. Install the brake caliper with piston compressor A on the caliper body B.
12. Press the piston with the compressor to install the caliper on the pads. Make sure the piston collar is in the correct position, otherwise it will be damaged during the installation of the caliper.
Note. Be careful when pushing in the piston, brake fluid may spill out of the master cylinder reservoir.
13. Remove the compressor.
14. Completely clean the bracket from wear and corrosion products and carefully inspect it. It should not have any chips or cracks.
15. Peel off the paper from the adhesive pad A, stick and press it to the surface of the inner lining and outer lining.
Note. The adhesive pad is made from a stretchable material and is non-removable. Make sure it is carefully stuck.
Note. Make sure there is no grease on the gasket surface.
Note. Align the shape of the adhesive pad as shown in the picture.
16. Clean and remove grease from outer support side A, piston contact side B, and gasket C of the front caliper. Make sure there is no grease left.
17. Tear off the protective film from the adhesive pad that was stuck to the outer and inner plate.
18. Apply a light coat of Molykote M77 to the areas indicated by the arrows. Remove excess grease with a rag. Dirty brake discs or linings will reduce braking performance. Do not allow lubricant to get on the surface of the brake disc linings.
19. Install the piston gasket and properly install the brake linings.
If you do not change the brake pads, but install the old ones, then install them in the same position in which they were before removal. Otherwise, the braking efficiency will be reduced before they run in.
Note. Do not hold the adhesive pad when installing the brake lining.
Note. Do not let the adhesive pad get dirty.
Note. Fully return the piston to its place so as to avoid damaging the adhesive gasket.
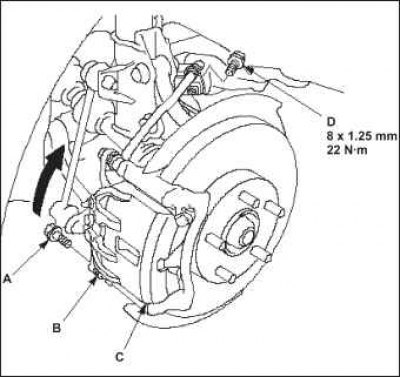
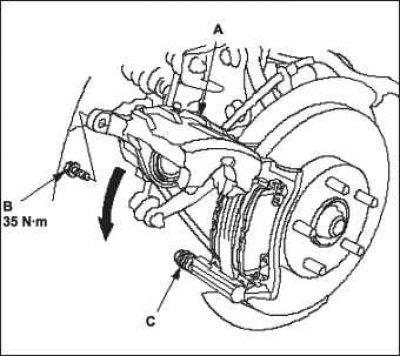
20. Lower caliper A into place. Install a new flange bolt B and tighten it to the recommended torque while holding the pin C of the caliper with a spanner wrench. Be careful not to damage the piston boot and pin boot.
21. Establish a bolt of fastening of a brake hose and tighten it to the specified moment.
22. Start the engine and depress the brake pedal for 10 seconds.
Note. This is necessary to install the adhesive pad.
23. Press the brake pedal several times and make sure that the brake system is in working order.
Note. Applying the brakes immediately after replacing the entire set of brake pads may require increased pedal travel. After a few presses on the brake pedal, normal pedal travel will be restored.
24. After installation, check the hose and pipe connections for signs of brake fluid leakage, tighten the connections if necessary. Carry out a test drive, then check the system for leaks.