
Withdrawal
1. Move the control lever to neutral position, raise the vehicle and place it on stands.
2. Remove the protection of the engine compartment.
3. Remove the front of the exhaust pipe (see chapter 4).
4. Remove the torque converter cover.
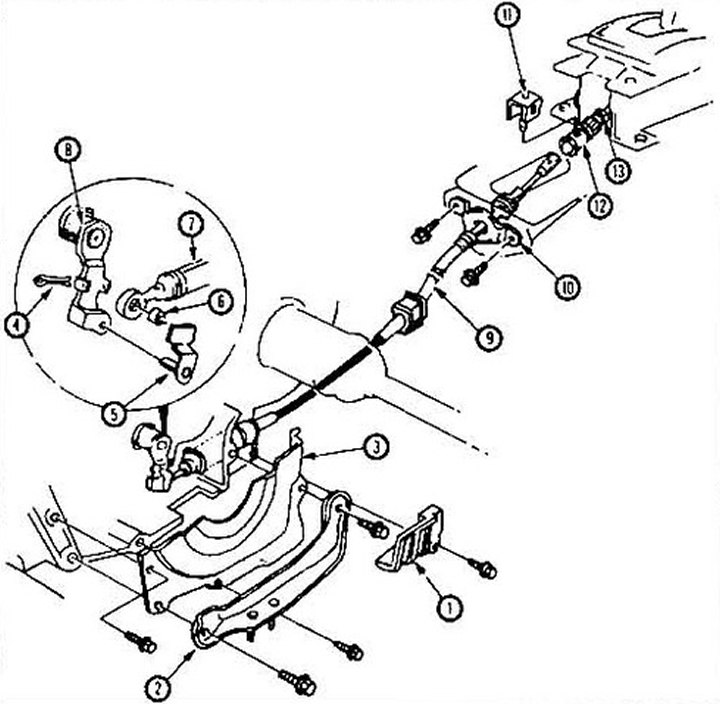
Pic. 4.4 Assembling the shift cable assembly: 1 - cable bracket; 2 - exhaust pipe bracket; 3 - torque converter cover; 4 - cotter pin; 5 - finger; 6 - roller; 7 - cable; 8 - switching lever; 9 - cable; 10 - bracket; 11 - emphasis; 12 - cable length regulator; 13 - locknut.
5. Remove the cotter pin from the finger, disconnect the cable from the box. Remember the order of fastening the end of the cables and do not lose spare parts.
6. If the shift cable passes through the engine shield (models since 1988), disconnect the cable bracket mounted on the shield.
7. Remove the center console (see chapter 11).
8. Pry the latch and disconnect the cable from the shift lever. On models prior to 1988, remove the cable through the floor hatch, on later models, the cable passes through the engine shield.
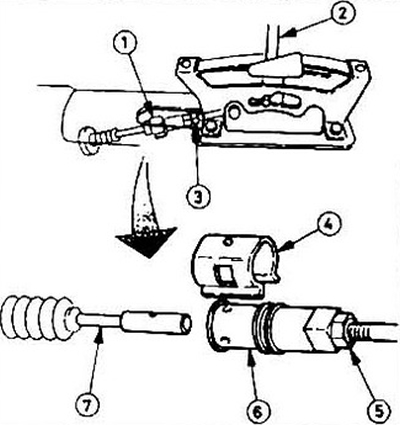
Pic. 4.8 Shift cable adjustment details: 1 - latch, 2 - lever, 3 - lock nut, 4 - latch, 5 - lock nut, 6 - length adjuster, 7 - cable.
Installation
9. Installation of a cable is made in the return order to removal. Don't forget to adjust the cable length.
Adjustment
10. Remove the center console (see chapter 11).
11. Move the shift lever to position O (models up to 1991) or N (1991 models) and remove the latch from the length adjuster (see fig. 4.8).
12. The holes in the adjuster and the end of the cable must match exactly. The regulator has two holes spaced 90 degrees apart to allow adjustment in ¼ turn increments.
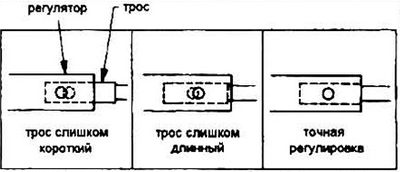
Pic. 4.12 Adjusting the shift cable length
13. If the holes in the cable and adjuster do not match, loosen the locknut and turn the adjuster until the holes match. Tighten locknut.
14. Install the latch on the regulator. Be careful not to bend the latch pin. Otherwise, the adjustment will be violated.
15. Install the center console (see chapter 11).