
If a wheel is damaged, stop immediately in a safe place. Stopping your vehicle to change a damaged tire on the road or on the side of a busy road can be dangerous. If a wheel is damaged, drive slowly and carefully along the shoulder or the rightmost lane to the nearest exit to a suitable area. The parking place of the car must be sufficiently removed from the carriageway.
Attention! When changing a wheel, use the jack supplied with the vehicle's tool kit. Attempting to use unsuitable jacks, or using the jack supplied with the vehicle's tool kit to change a wheel on another passenger vehicle, may result in jack failure or vehicle damage.
An unsecured vehicle can come off the jack and cause serious injury to a person next to or under the vehicle.
Strictly observe all precautions when replacing a damaged wheel. Never get under a jacked up vehicle unless there are adequate safety stands.
Spare wheel installation
Place the vehicle on a level area with a solid, non-slippery base at a sufficient distance from the carriageway. Engage the reverse gear of the manual transmission. Apply the parking brake.
If a trailer has been towed before, disconnect it from the vehicle.
Turn on the hazard warning lights and turn the ignition key to the steering lock position «LOCK» (0). Ask all passengers to get out of the vehicle.
 |  |
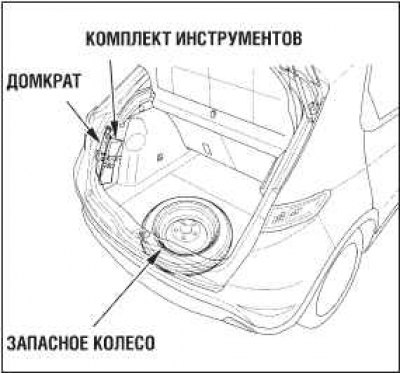
The tool is stored in the rear left corner of the luggage compartment.
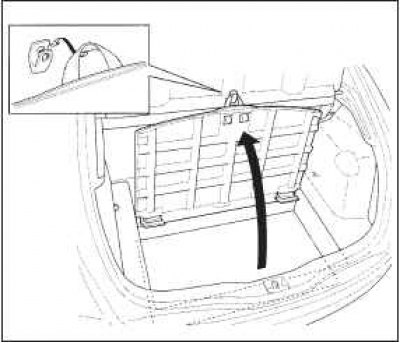
Open the back door. Grasping the sling, lift the floor cover of the luggage compartment.
Attach the sling to the hook located on the luggage compartment wall (if available).
Remove the tool bag from the luggage compartment.
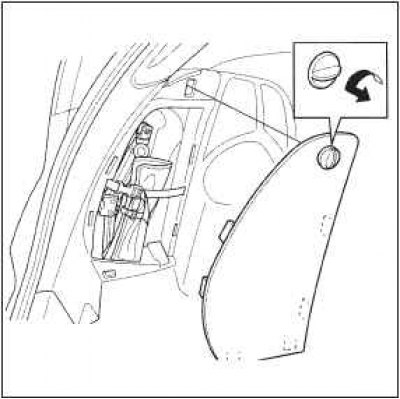
Turn the lock handle counterclockwise and remove the cover. Then press the latch and unfasten the sling.
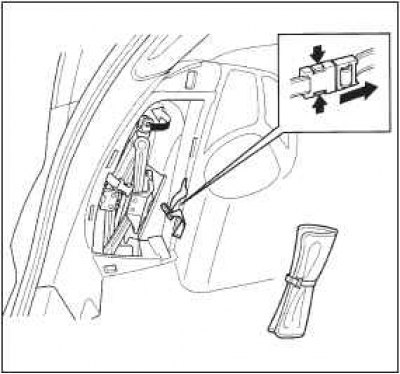
Rotate the jack end bracket counterclockwise, then remove the jack.
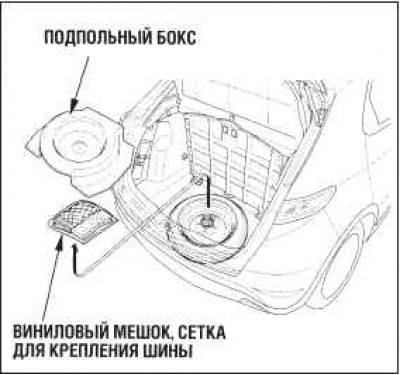 |  |
Remove the underfloor box and take out the vinyl bag and tire net.
Replace the underfloor box and lower the lid.
Loosen the wing head bolt and remove the spare wheel.
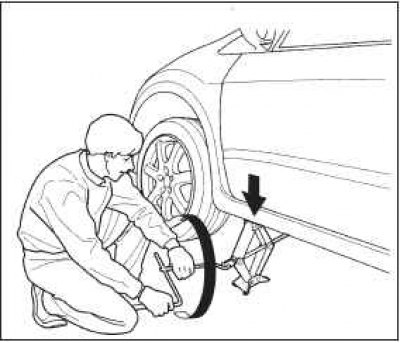
Insert on both sides (in the front and in the back) thrust pads under the wheel, which is located diagonally from the damaged one.
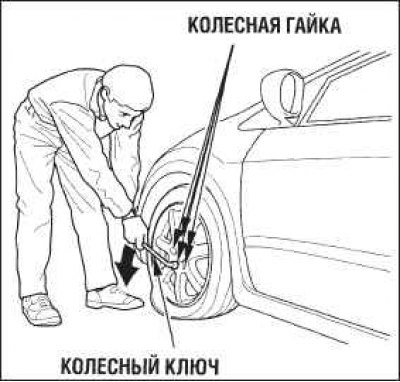
Using a wheel wrench, loosen all wheel nuts by half a turn.
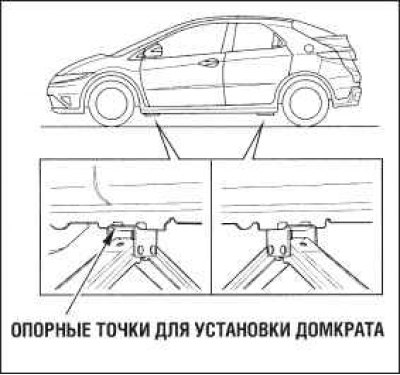
Find under the threshold of the body the place closest to the damaged wheel, provided for the support of the jack. Position the jack with the top head under the anchor point of the body. Rotate the jack screw clockwise to extend the jack to bring its upper head under the body support. Make sure that the rib of the body support enters the recess of the head of the jack.
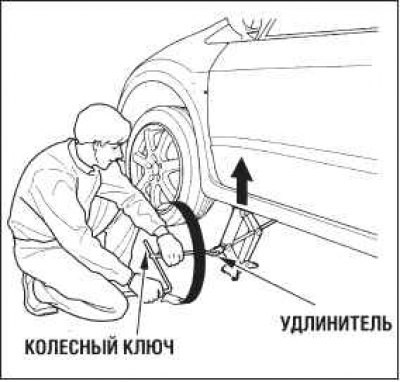
Turning the jack screw clockwise using a wheel wrench and extension, raise the vehicle until the damaged wheel is off the ground.
Loosen the wheel nuts and remove the damaged wheel. Please note that wheel nuts can be heated to high temperatures. Temporarily place the removed wheel on a platform near the car with the outer side up.
For some vehicle variants
Before loosening the wheel nuts, remove the trim cap using a flat-blade screwdriver as a lever. Place a piece of cloth under the screwdriver so as not to damage the cap. Do not press the screwdriver with great force.
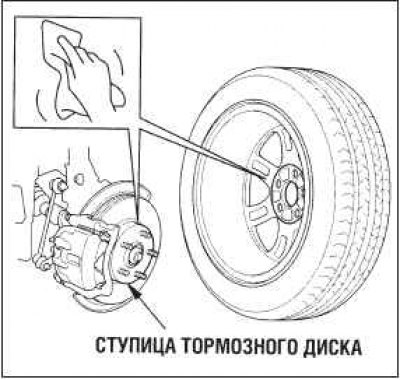
Before installing the spare wheel, carefully clean the adjoining surfaces of the wheel rim and hub from dirt using a clean rag. Be careful. As a result of braking, the wiped parts could heat up to a high temperature.
 |  |
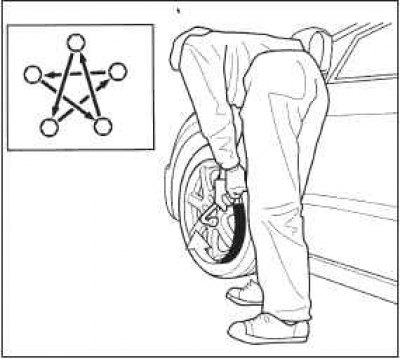
Install the spare wheel. Screw on and tighten the wheel nuts by hand. Then tighten the nuts with a wheel wrench. Tightening the nuts should be carried out gradually in the sequence shown in the figure. The wheel should be tightly and evenly attracted to the hub flange. Do not fully tighten the wheel nuts on a suspended wheel.
Lower the car and remove the jack.
Tighten the wheel nuts to the required torque. The nuts should be tightened in the sequence shown in the figure, gradually increasing the tightening torque to the nominal value. Have the wheel nuts checked at your nearest workshop.
The nominal tightening torque of the wheel nuts is: 108 Nm.
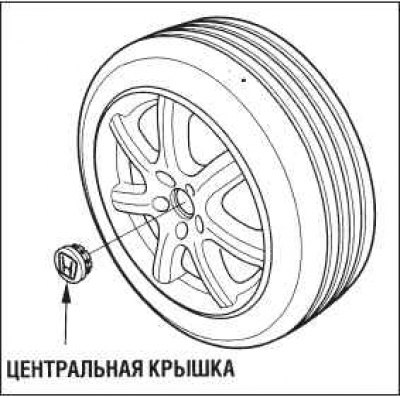
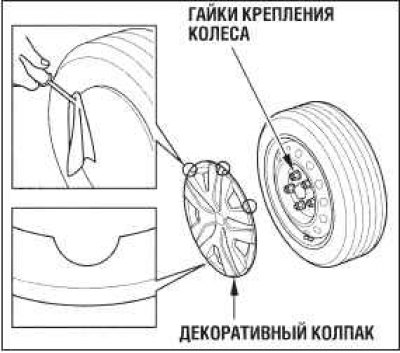
On some versions of the car, before putting the damaged wheel into the trunk, it is necessary to remove the central cover of the decorative cap from it.
Place the decorative cap or center cover in the luggage compartment. Take care that they are not damaged or scratched.
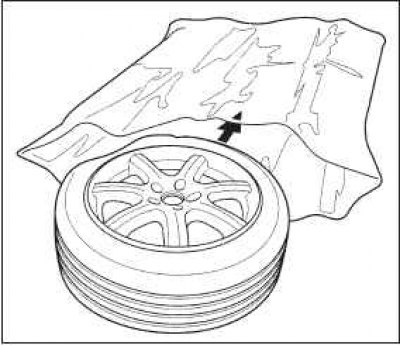
Pack the damaged wheel in the included vinyl bag.
Lay the damaged wheel on the luggage compartment floor.
Do not forget to install the luggage compartment lid in the upper position (if available), then place the damaged wheel on the cover.
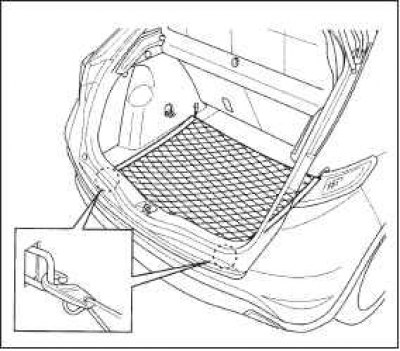
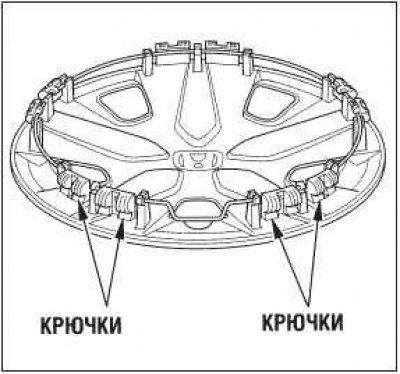
Lay the supplied net in the luggage compartment, hook the two hooks of the slings to the loops located in the opening of the rear door.
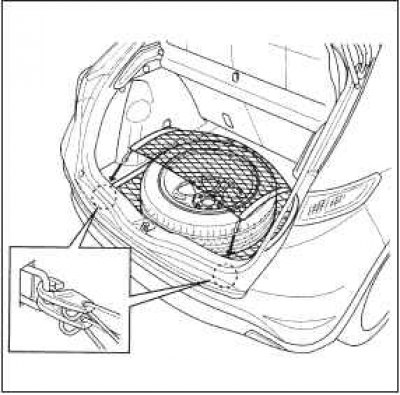
Wrap the net around the damaged wheel and hook two more sling hooks into the same loops (see picture).
Lay the jack in the niche of the left rear corner of the luggage compartment. Rotate the end bracket to secure the jack.
Put the tool bag back in place.
Warning! If tools and other items are not stowed in the stowed position, the driver and passengers may be seriously injured by these items in the event of an accident.
Before driving again after replacing a damaged wheel, stow and secure the removed wheel, jack and tools.
Close the tailgate.
 |  |
Installation of a decorative cap (for some vehicle variants)
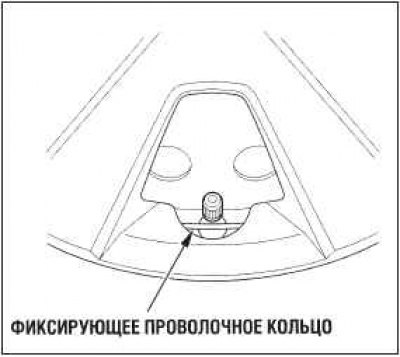
Make sure that the fixing wire ring is put on the hooks on the back of the decorative cap.
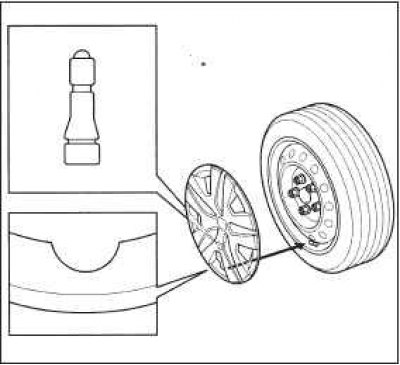
Align the valve location mark with the wheel valve, then install the cap.
Check that the wire ring runs outside of the valve as shown in the illustration.