
Checking the axial clearance in the hub bearing
1. Jack up the front of the car and place it on stands.
2. To hold the brake drum, tighten the nuts to the specified torque.
Tightening torque - 108 Nm
3. Install the dial indicator on the wheel hub as shown in the figure.
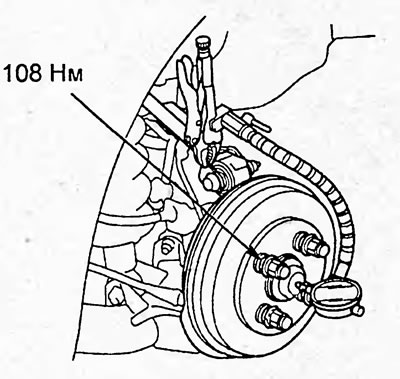
4. By pushing and pulling the wheel hub with your hands in the axial direction, measure the axial clearance in the wheel bearing.
Bearing clearance - 0-0.05 mm
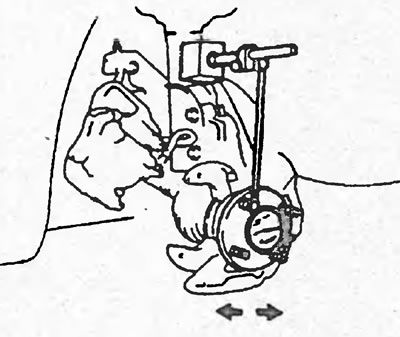
If the axial clearance of the wheel exceeds the established norm, first tighten the hub nut to the specified tightening torque and only then, if necessary, replace the bearing.
Removal and installation
1. Jack up the rear of the vehicle and place it on stands.
2. Loosen the nuts and remove the wheel.
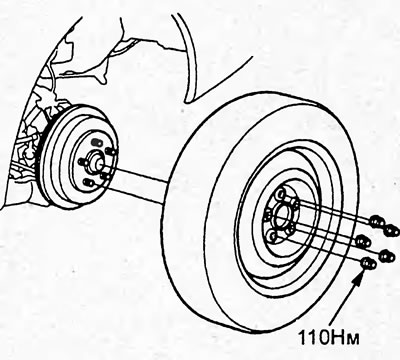
3. Remove the cap (A).
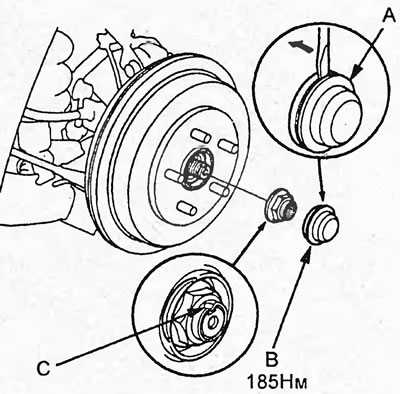
4. Unlock the rim (C) of the nut (B) and unscrew the nut.
Tightening torque - 185 Nm
5. Tighten two suitable bolts as shown in the figure to remove the brake drum.
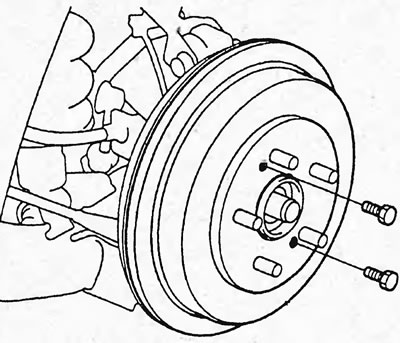
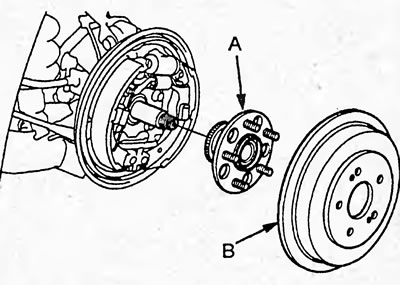
6. Remove the brake drum (B) and hub (A).
7. Disconnect the brake pipe (A) from the wheel cylinder (B), unscrew the bolts and remove the brake mechanism (C).
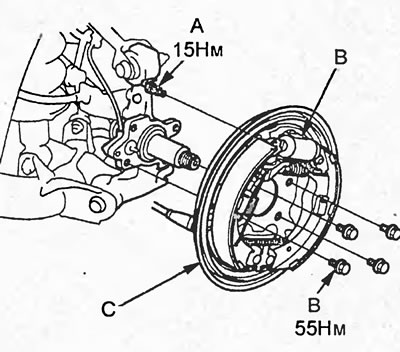
8. Loosen the bolts and remove the brake pipe bracket (A) and wheel speed sensor (B).
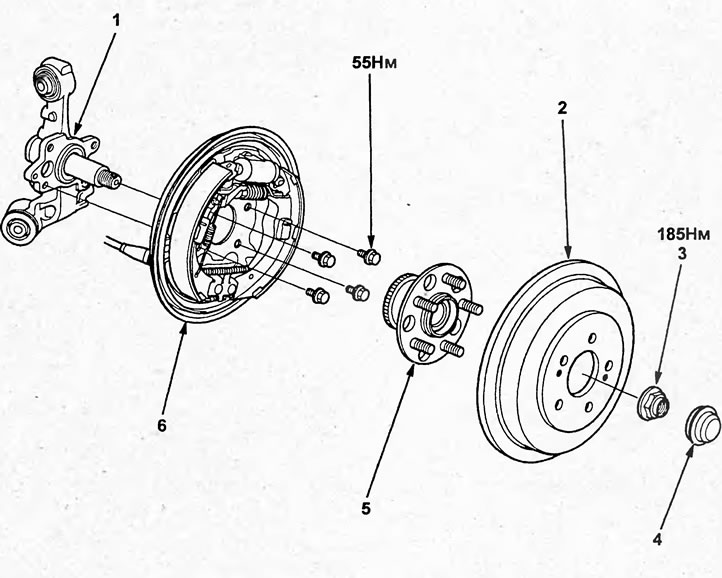
Removal and installation the rear wheel hub (2WD models with rear drum brakes). 1 - journal, 2 - brake drum, 3 - nut, 4 - cap, 5 - hub, 6 - brake mechanism.
Note: Do not disconnect the speed sensor connector.
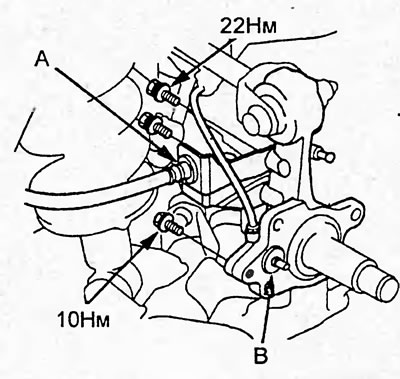
9. Jack up the trailing arm (C) as shown in the figure.
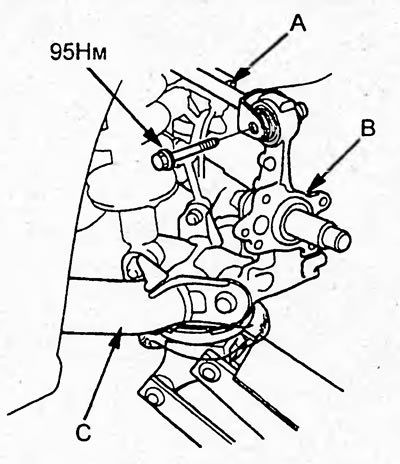
10. Loosen the bolt and disconnect the upper control arm (A) from the journal (B).
11. Place marks (B) on the adjusting bolt (A) and cam (C), then loosen the nut.
Tightening torque - 60 Nm
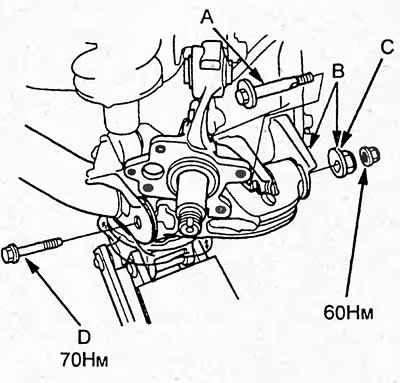
12. Loosen the bolt (D) and remove the trunnion.
Tightening torque: 69 Nm
Note:
- Installation is carried out in the reverse order of removal.
- When installing:
- align the marks on the adjusting bolt and cam;
- use new nuts and cap;
- lock the hub mounting nut;
- check and, if necessary, adjust the rear wheel alignment angles;
- check and, if necessary, adjust the travel of the parking brake lever.