
Removal and installation
1. Jack up the front of the car and place it on stands.
2. Loosen the wheel mounting nuts and remove the wheel.
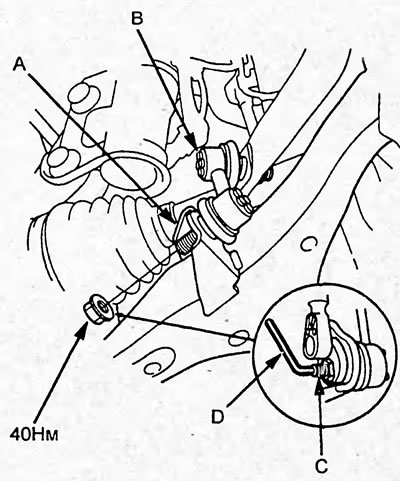
3. Hold the ball joint pin (C) with the Allen key (D), and loosen the stabilizer link mounting nut. Disconnect the stabilizer link (B) from the front suspension lower arm (A).
Tightening torque - 39 Nm
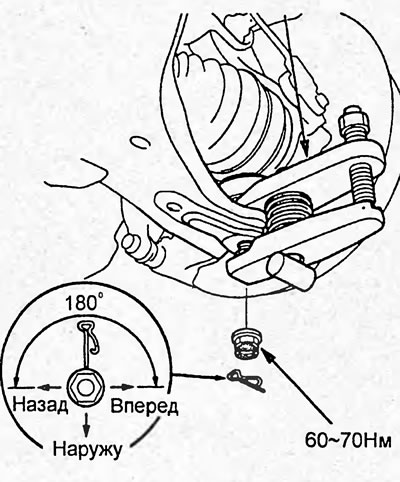
4. Remove the cotter pin and unscrew the nut. Using a special tool, disconnect the ball joint of the lower arm of the front suspension from the steering knuckle.
Note: When assembling, install the cotter pin as shown in the figure.
Tightening torque: 59-69 Nm
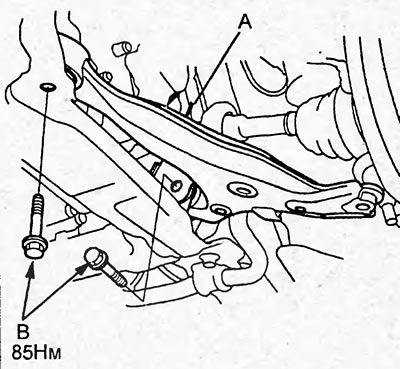
5. Loosen the bolts (B) and remove the lower arm (A) of the front suspension.
Tightening torque - 83 Nm
Note:
- Installation is carried out in the reverse order of removal.
- When installing:
- check the ball joints and dust boots for damage;
- tighten the bolts and nuts, lower the vehicle and tighten the bolts and nuts to the specified torques.
- After installation, check the front wheel alignment angles.