
Withdrawal
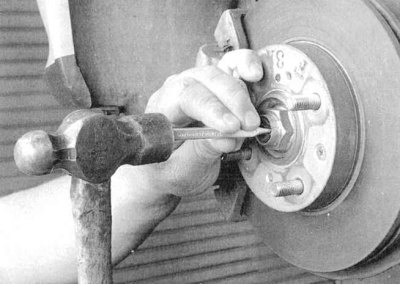
1. Remove the wheel cap. If the hub nut is caulked, use a center punch or chisel to pry back the lock collar/tongue (see accompanying illustration).
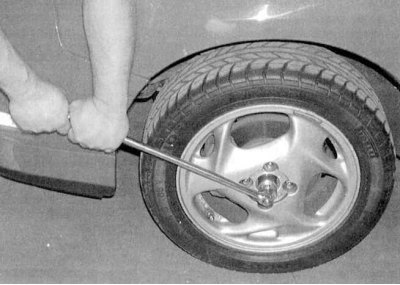
2. Loosen the hub nut with a socket wrench equipped with a long collar drive (see accompanying illustration).
3. Loosen the nuts on the appropriate front wheel, jack up the vehicle and place it on jack stands. Remove the wheel. Drain gear oil/ATF (see chapter Current service).
4. Disconnect damper fork from shock assembly and lower suspension control arm (see chapter Suspension and steering).
5. Release the lower suspension control arm from the steering knuckle (see chapter Suspension and steering). Now finally give the hub nut.
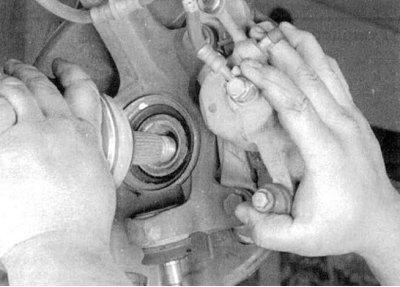
6. Tilt the hub assembly outward, releasing the drive shaft trunnion from it (see accompanying illustration).
Note. If the drive shaft "soured" and cannot be removed from the hub, tap on its end with a soft-faced hammer. Tie the outer end of the drive shaft with wire to any of the suspension elements, thereby eliminating unnecessary stress on the inner CV joint assembly.
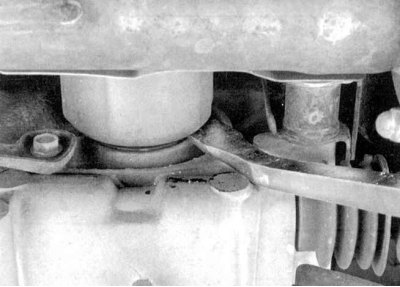
7a. Carefully pry the lever to release the inner end of the drive shaft from the main gear of the transmission, or (Integra models) from the intermediate shaft assembly. A pry bar is perfect as a lever, which should be inserted into the gap between the casing of the inner CV joint and the transmission housing / countershaft bearing support (see accompanying illustrations).
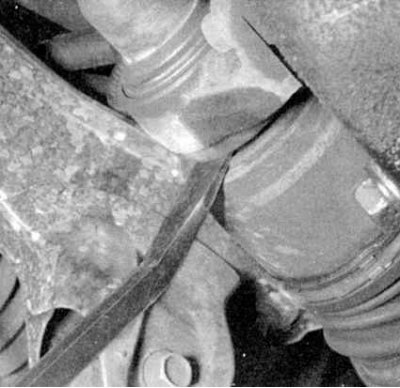
7b. Holding the CV joints, carefully remove the drive shaft assembly from under the vehicle. To avoid damage to the intermediate shaft/differential oil seal, try to keep the inner CV joint in a horizontal position until the shaft stud is completely released from the seat.
Installation
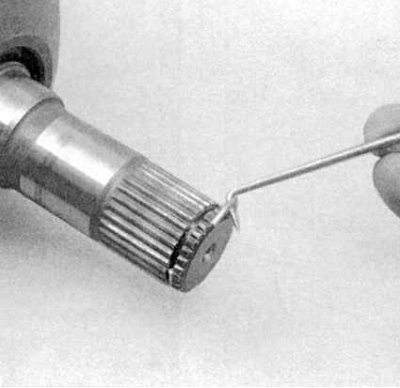
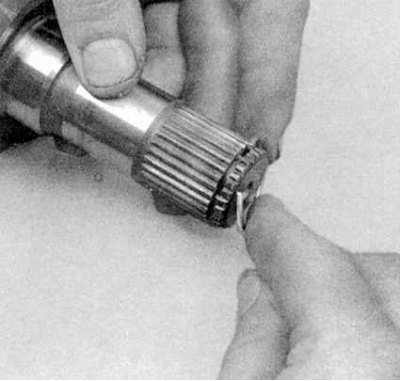
1a. Remove the snap ring from the inner end of the drive shaft and replace it with a new one (see accompanying illustrations).
1b. Lubricate the lips of the intermediate shaft/differential oil seal with multipurpose grease, then carefully drive the drive shaft into its original position, holding it by the CV joints.
2. Carefully tuck the splined trunnion of the inner CV joint into the seat in the transmission case or countershaft (Integra models). Make sure the circlip snaps securely into the groove.
3. Lightly lubricate the outer CV joint pin splines with multipurpose grease, pull the hub assembly outward, and carefully tuck the shaft end into it.
4. Insert the ball joint stud of the lower control arm into the steering knuckle and tighten the nut to the required torque (see Specifications to the head Suspension and steering). Don't forget to replace the pin. Install damper fork (see chapter Suspension and steering).
5. Screw on the hub nut (if necessary, do not forget to replace the lock washer) and tighten it firmly.
Note. The final tightening of the hub nut to the required torque is made after the vehicle is lowered to the ground.
6. Grasp the inner CV joint housing (not for the shaft) and pull it outward, checking that the trunnion is secure in the transmission.
7. Replace the wheel, secure it with nuts and lower the vehicle to the ground.
8. Torque tighten wheel (see Specifications to the head Current service) and hub nuts. Using a center punch, caulk the hub nut. Reinstall the wheel cap.
9. Fill the transmission with the required amount of oil of the required grade (see chapter Current service).