
Contents: Cleaning ⇊ Checking the status ⇊
A thorough cleaning of the cylinder head and valve train components followed by a detailed inspection of their condition will help determine the approximate scope of the upcoming restoration work.
Note: Severe engine overheating may result in deformation of the cylinder head and disruption of the flatness of its mating surface.
Cleaning
1. Scrape off all traces of old gasket material and sealant from the mating surfaces of the cylinder head, intake manifold and exhaust manifold – try not to damage the surfaces. The work will be significantly facilitated by using a special softener, which should be pre-soaked into the adhering deposits.
2. Remove all traces of scale from the walls of the water channels.
3. Using a stiff wire brush, thoroughly clean all accessible cavities and openings. If the channels are heavily contaminated, head cleaning should be entrusted to specialists.
4. "Run" each of the bolt holes with a tap of the appropriate size, removing corrosion products and traces of old sealant from the threads and restoring damaged threads. If you have access to a source of compressed air, blow out the holes, removing chips and small debris from them.
Caution! When using compressed air, do not forget to wear safety glasses!
5. Use a wire brush to clean the threads of the camshaft cover bolts.
6. Wash the head with solvent and dry it thoroughly. Using compressed air will significantly reduce the drying time and will guarantee the quality of cleaning of hard-to-reach cavities and holes.
Note: Various types of carbon deposit removers, which make the cleaning process much easier, can be purchased at many car accessory stores. Remember that these types of products are usually chemically aggressive and should be used with appropriate precautions – strictly follow the manufacturer's instructions, which are usually provided on the container label.
7. Wash the rocker arms of the valve drive and the camshaft bearing caps with solvent, then dry them thoroughly. Try not to mix up the components during the cleaning process - watch the markings of the parts belonging to their cylinders/valves. Using compressed air will make the procedure much easier (don't forget to wear safety glasses).
8. Wash in solvent and thoroughly dry the valve springs, their plates and split lock crackers. Try not to mix up the components.
9. Scrape off the bulk of the deposits that have formed on the valve surfaces, then use a wire attachment on an electric drill to finally clean the surfaces of the valve stems and plates - make sure that the valves are not mixed up.
Checking the status
Note: Before deciding whether to machine the cylinder head, perform a thorough inspection of its condition. After carefully studying the material presented in this subsection, make a list of components requiring special attention.
Cylinder head
1. Carefully check the cylinder head for signs of coolant leaks, cracks and other damage. A cracked head must be replaced. If you are not sure of the condition of the head, send it to a car service workshop for inspection. If repair is not possible, replace the defective head.
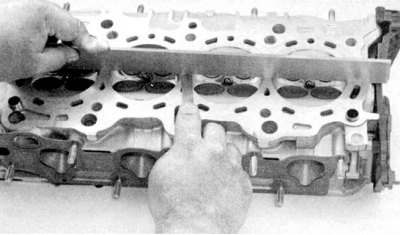
2. Using a flatness gauge and a blade-type feeler gauge, check the mating surface of the head for signs of deformation (see accompanying illustration). If the non-flatness exceeds the value permitted by the standards (see Specifications at the beginning of this Chapter), the head must be sent to a mechanical workshop for turning. 3. Check the condition of the valve seats in each of the combustion chambers. If cavities, cracks, or traces of burnout are detected, the head must undergo special restorative repairs, the implementation of which is beyond the qualifications of the average amateur mechanic and should be entrusted to car service specialists.
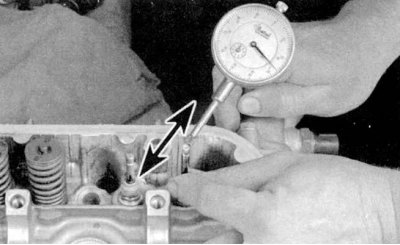
4. Using a DTI gauge, evaluate the amount of play in the valve stems in the guide bushings (see accompanying illustration). The valve should be raised above the seat by approximately 1.6 mm. The total valve lateral runout should then be divided by two to determine the valve seat clearance in the guide bushing. Compare the results of the calculations with the requirements Specifications. If there are any doubts about the correctness of the determination of the condition of the components, their inspection should be entrusted to specialists of the car service workshop.
Valves
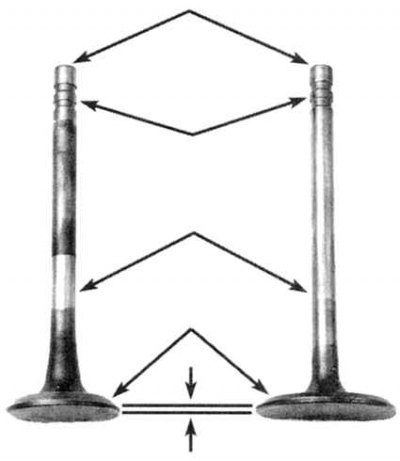
1. Carefully inspect the working surfaces of the valves for signs of uneven wear, deformations, cracks, cavities and traces of burnout. Assess the degree of operation of the valve stems. Check for cracks in the necks of the stems. By rotating the valves, check for bending of the stems. Make sure that there are no cavities and signs of excessive wear of the ends (see accompanying illustration). Identification of any of the listed defects requires delivery of the valves for restoration repair to the auto service workshop.
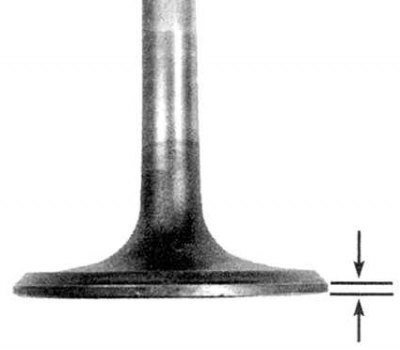
2. Measure the width of the cylindrical part (belt) of the plate of each valve (see accompanying illustration). If the width of the belt is less than that specified in Specifications value, replace the valve.
Valve components
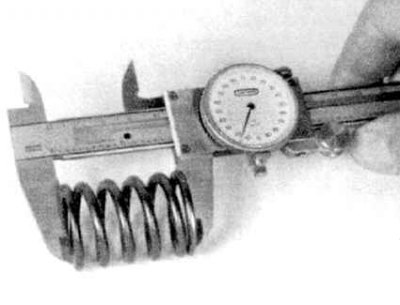
1. Assess the degree of wear of the end parts of each of the valve springs, check the springs for cavities. Measure the free length of the springs (see accompanying illustration) and compare the measurement results with the requirements Specifications. If the spring is shorter than the lower permissible limit, it is sagging and must be replaced. Also check the forces developed by the springs for compliance with regulatory requirements (it is better to entrust this work to specialists of the car service workshop).
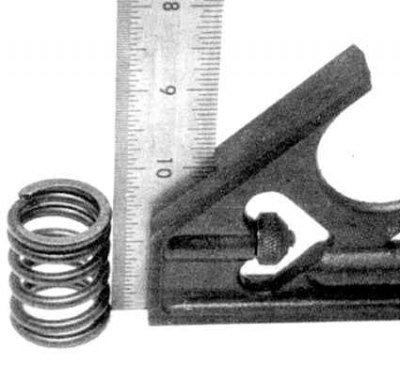
2. By placing each spring vertically on a flat surface, check that they are trimmed properly (see accompanying illustration). Springs with a faulty end face, as well as sagging ones, are subject to replacement. 3. Check the spring plates and crackers of their split locks for cracks and signs of wear. All parts in questionable condition should be replaced with new ones to avoid the development of defects in the future.
4. If the valve components are significantly worn, which is quite likely for an engine in need of major repair, assemble the valve assemblies, install them in their regular places in the head and proceed to perform the valve maintenance procedures (see Valve maintenance).