
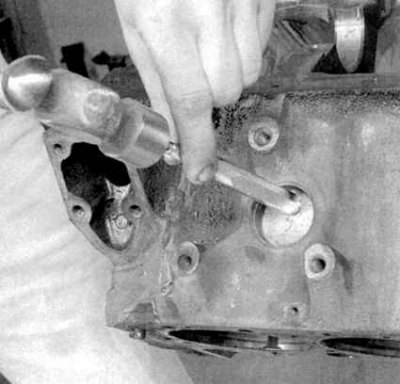
2. On Integra models equipped with a VTEC system, unscrew and remove the oil nozzles from the block (see accompanying illustration). The diameter of the spray nozzle is 1.27 mm and a 1 mm drill should be freely inserted into it. Insert the shank of the drill into the inlet of the sprayer and squeeze out the control ball with it. The ball must move freely and, when released, return to its original position due to the force developed by the spring. If there are signs of spring weakness, apply compressed air to the inlet. The ball must, overcoming the force developed by the spring, move away from the seat at a pressure of at least 1.96 kgf / cm2, otherwise the atomizer must be replaced.
3. Scrape off any traces of the old gasket material from the mating surface of the block - try not to leave burrs.
4. Remove all caps and oil gallery screw plugs from the block. Plugs are usually very tight, so they may need to be drilled out and re-threaded in the hole. When assembling the block, the plugs should be replaced with new ones.
5a. Now you should remove the squeeze plugs of the water jacket from the block. Using a hammer and a blunt drift, wrap one end of the plug inside the block, then grab the opposite edge that has turned out with tongs...

5b.... remove the plug from the engine (see accompanying illustrations).
Note. Try not to accidentally drive a plug into the engine. Remove all plugs.
6. If the external contamination of the engine is severe, it should be taken to a car service workshop for steam cleaning or heat treatment.
7. After returning the block from the workshop, thoroughly clean all its oil holes and galleries again - special cylindrical brushes of a special shape are produced for this purpose (ask at car accessories stores). Flush cavities and channels with warm water - continue flushing until clean water starts to flow from the opposite side of the block. Dry the block thoroughly, then lightly coat all machined surfaces with light oil to protect them from corrosion. If you have access to a compressed air source, use it to speed up the drying process of the block and blow out hard-to-reach cavities and channels.
Attention! Remember to wear protective goggles when working with compressed air!
8. If the unit is heavily soiled or slagged, brushing with hot soapy water should be resorted to. You should not try to save time by carelessly cleaning the unit. Regardless of the method chosen, follow the thoroughness of cleaning hard-to-reach cavities, channels and holes. Finally, dry the block and lubricate the machined surfaces with thin oil to protect them from corrosion.
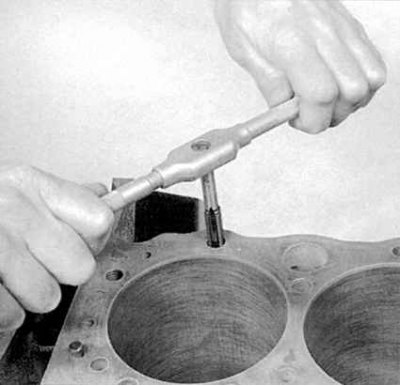
9. Drive all the bolt holes in the block with a tap of the appropriate size (see accompanying illustration) in order to ensure that the readings of the torque wrench indicator correspond to the actually developed fastener tightening forces during engine assembly. If possible, then blow out the holes with compressed air, removing all small debris and chips from them. After finishing the holes, go through the threaded part of the bolts with a lerka. 10. Reinstall the main bearing caps by hand-tightening their fasteners.
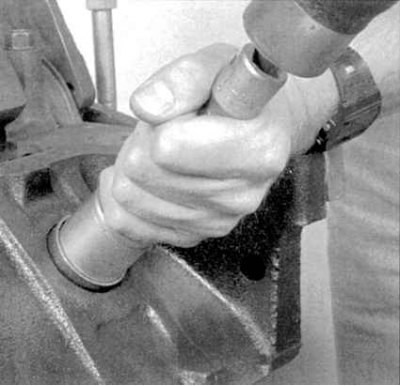
11. Lubricate the surfaces of the new squeeze plugs mating with the block with sealant (type Permatex No. 1) and seat them perpendicular to the engine. For planting squeeze plugs, special devices are produced, any of which can be successfully replaced with a suitable interchangeable socket head (see accompanying illustration). The head should fit snugly enough into the cork. 12. Lubricate the threads of the new plugs with a non-hardening sealant and plug the holes in the oil galleries with them. Check the tightness of the plugs.
13. If you are not going to assemble the engine immediately, place the block in a large plastic bag to protect it from contamination.