
Caution: To avoid damage to the cylinder head, wait until the coolant temperature drops below 38°C before removing.
Caution: Use new O-rings and gaskets when reassembling.
1. Disconnect the negative terminal from the battery.
2. Drain the coolant. Remove the radiator cap to speed up the drain.
3. Remove the rack retainer.
4. Remove the intake air duct and air filter housing.
5. Remove the adjusting bolt and mounting bolt, then remove the power steering pump belt and pump,
6. Loosen the idler pulley bracket bolt and adjusting bolt, then remove the A/C compressor drive belt.
7. Loosen the mounting nut and lock bolt, then remove the alternator drive belt.
8. Remove the lower power steering pump bracket.
9. Relieve the fuel pressure by loosening the fuel filter access bolt approximately one turn.
Warning: Do not smoke when working on the fuel system. Drain fuel only into a suitable container.
10. Disconnect the fuel vapor canister hose, fuel feed hose and crankcase ventilation hose.
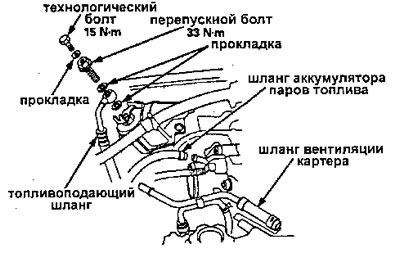
11. Remove the brake booster vacuum hose; fuel return hose and vacuum hose,
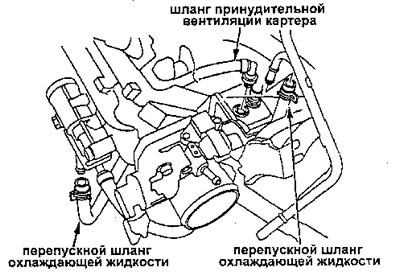
12. Remove the coolant bypass hose and the positive crankcase ventilation hose.
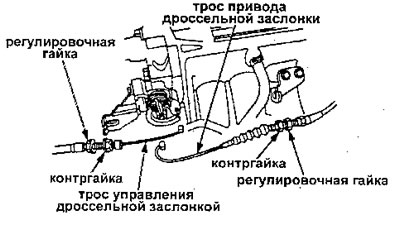
13. Remove the throttle cable and throttle control cable by loosening the lock nut, then remove the end of the cable from the throttle sector.
Attention:
- Do not bend the cable when removing. Always replace any damaged cable with a new one.
- Adjust the throttle cable during assembly.
- Adjust the throttle control cable during assembly.
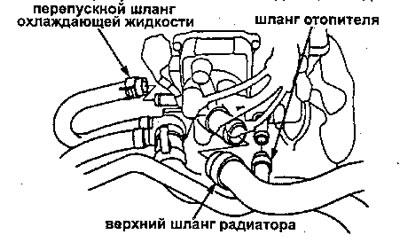
14. Remove the upper radiator hose, heater hose and coolant bypass hose.
15. Disconnect the engine wire harness connectors and wire harness clamps from the cylinder head and intake manifold.
- Four injector connectors
- Coolant Temperature Sensor Connector
- Coolant Temperature Gauge Connector
- Coolant Temperature Switch Connector
- Idle Air Control Valve Connector
- Manifold Absolute Pressure Sensor Connector
- Throttle Position Sensor Connector
- Heated Oxygen Sensor Connector
- VTEC Solenoid Valve Connector
16. Remove the spark plug caps and distributor from the cylinder head.
17. Remove the top bracket.
Attention:
- Use a jack to support the engine before removing the top bracket.
- Make sure to place a cushion between the oil pan and the jack.
18. Remove the cylinder head cover.
19. Remove the timing belt.
20. Remove the rear cover and camshaft sprockets.
21. Remove the exhaust manifold.
22. Remove the intake manifold.
23. Loosen the adjusting screws.
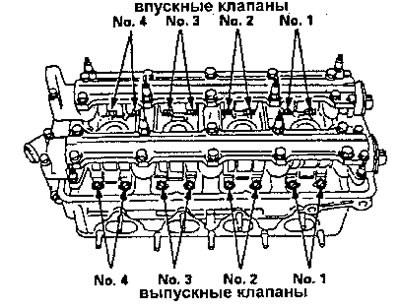
24 Remove the camshaft holder plates, camshaft holders and camshafts.
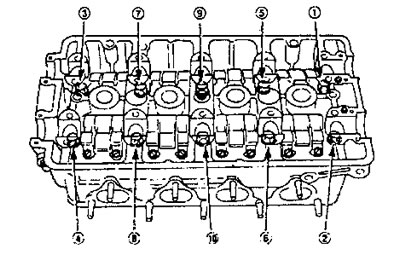
25. Remove the cylinder head mounting bolts, then remove the cylinder head.
Caution: To prevent warping, loosen the bolts in the sequence shown in the illustration no more than 1/3 turn at a time until all bolts are loosened.
Original material on the website hondabook.ru