
Note:
- The clearance between the pushrod and the master cylinder piston must be checked and adjusted, if necessary, before installing the master cylinder.
- ABS type is shown, standard brake type is symmetrical.
1. Install the special tool on the brake master cylinder body, push the center shaft until its upper part contacts the tip of the secondary piston by turning the adjusting nut.
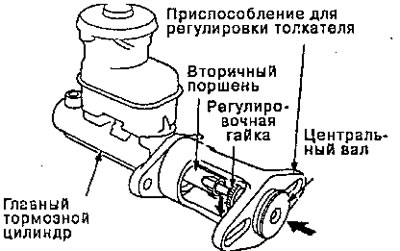
2. Without disturbing the position of the central shaft, install the special tool upside down on the amplifier.
3. Install the master cylinder nuts and tighten to the specified torque.
4. Connect the amplifier in line with the 0-101 kPa vacuum sensor (0-760 mm R.S.) and to the brake booster vacuum hose from the engine, and maintain engine speed to provide a vacuum of 66 kPa (500 mm R.S.).
5. Using a feeler gauge, measure the gap between the sensor housing and the adjusting nut as shown.
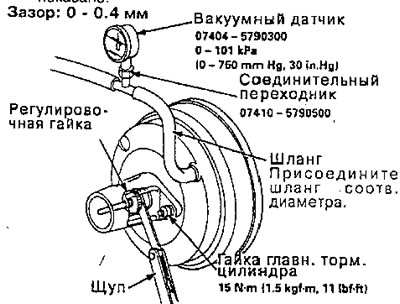
Note: If the clearance between the tappet adjusting device body and the adjusting nut is 0.4 mm, the clearance between the tappet and the piston is 0 mm. However, if the clearance between the tappet adjusting device body and the adjusting nut is 0 mm, the clearance between the tappet and the piston is 0.4 mm or more. Therefore, it should be adjusted and checked again.
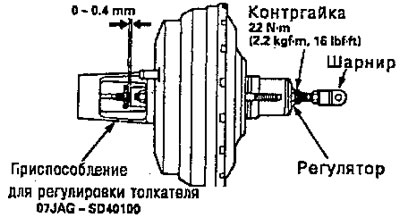
6. If the clearance is incorrect, loosen the lock nut and turn the adjuster inward or outward to adjust.
Note:
- Adjust the gap when nominal vacuum is applied to the booster.
- Hold the hinge while adjusting.
7. Tighten the lock nut securely.
8. Remove the special tool.
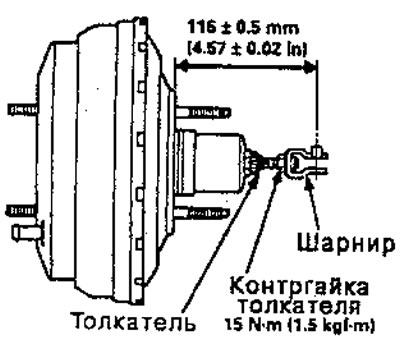
9. If the booster is removed, adjust the pushrod length as shown.
10. Install the brake master cylinder.
Refer to the original source on the website HONDABOOK.ru