
1. Place the special tool firmly on the master cylinder as shown in the figure.
2. Push in the central axle of the special tool until it slightly touches the end of the secondary piston and, turning the locknut in the direction of the arrow, fix the axle.
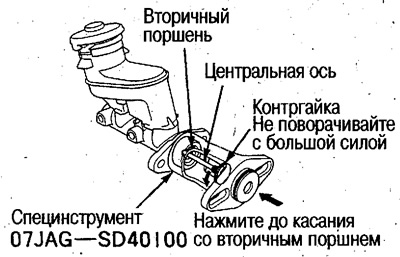
Attention. Take care not to create a gap between the special tool and the master cylinder as a result of excessive pressure on the central axis.
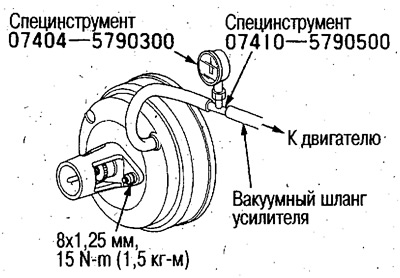
3. Without knocking down the position of the central axis, turn over the special tools and install on the brake booster.
4. Fasten the special tool with nuts (8 mm) and tighten them to the required torque.
5. Using a suitable hose, connect the vacuum gauge (special tool) between the brake booster and the brake booster vacuum hose.
6. Start the engine and warm up until the radiator fan operates twice.
7. Create a vacuum of 66.7 kPa (500 mmHg Art.) in the master cylinder and stop the engine.
8. Using a feeler gauge, measure the clearance between the adjusting bolt locknut and the housing.
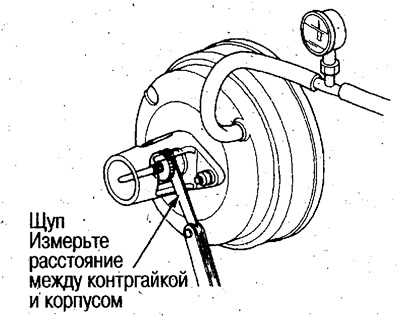
During the measurement, make sure there is a vacuum of 66.7 kPa in the amplifier (500 mmHg Art.).
- Gap: 0-0.2mm
If the gap in the special tool is 0.2mm, the actual push rod gap is 0mm. If the gap in the special tool is 0 mm, the actual push rod gap is 0.2 mm or more. Therefore, when the gap in the special tool is 0 mm, it may be that the gap of the push rod is very large, so be sure to adjust.
9. If the gap in the special tool is out of specification, adjust.
Adjustment is carried out with a vacuum in the brake booster of 66.7 kPa (500 mmHg Art.).
10. Remove the special tool.
11. While holding the booster push rod with pliers, turn the adjusting screw.
12. Reinstall the special tool and check the gap (see point 8).
13. Remove the special tool.
