
Inspection and Replacement
Warning. Never use an air hose or dry brush to clean brake components. Use a vacuum cleaner to prevent brake dust from entering your respiratory tract.
1. Block the front wheels» slightly loosen the rear wheel nuts» Support the rear of the car on safe stands, then remove the rear wheels.
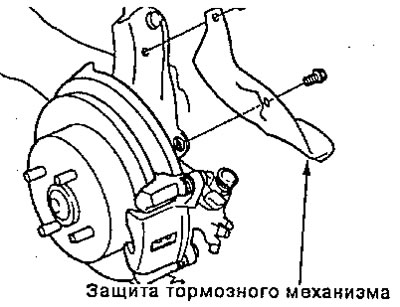
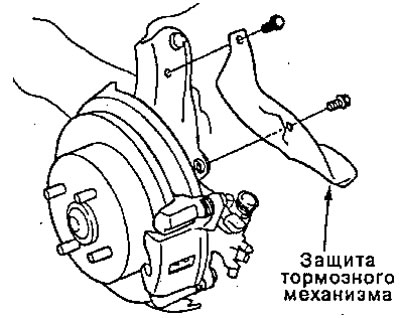
2. Release the parking brake and remove the brake protection.
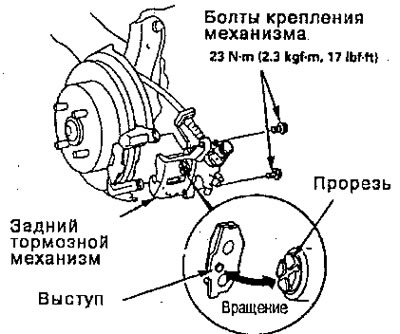
3. First remove the brake hose clamp bolt from the trailing rod, then remove the two brake mechanism mounting bolts and the brake mechanism from the bracket.
Attention:
- Thoroughly clean the outside of the brake mechanism to prevent dust and dirt from getting inside.
- Secure the brake mechanism with a piece of wire so that it does not hang on the brake hose.
Note: Check the hoses and axle boots for damage or wear.

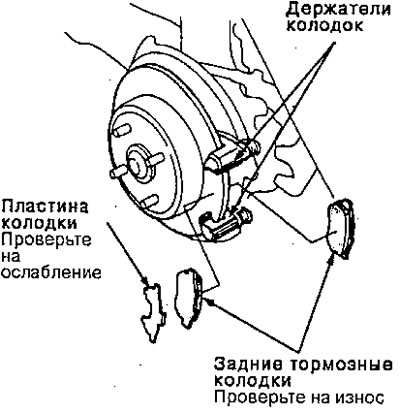
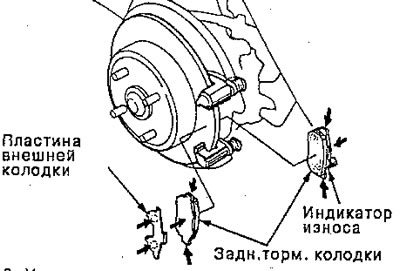
4. Remove the outer pad plate» pads and pad holders
5. Using calipers, measure the thickness of each brake pad.
Brake lining thickness:
- Standard: 7.0 - 8.0 mm
- Operational value: 1.6 mm
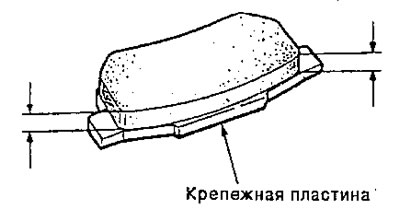
Note: The measurement does not include the thickness of the pad mounting plate.
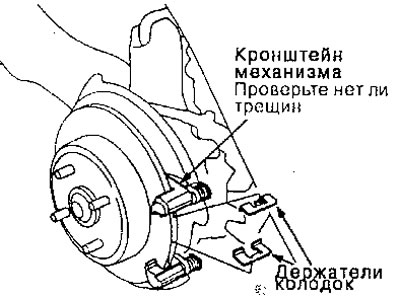
6. Clean the brake mechanism thoroughly; remove rust and check for grooves or cracks.
7. Check the brake disc for damage or cracks.
8. Make sure the shoe holders are installed in the correct positions.
9. Apply lubricant to the points indicated by arrows in the figure.
Note: Use the pad lubricant included in the pad kit or M77 lubricant (Molikot), and apply a thin layer of lubricant at the indicated points.
- Piston tip and inner pad contact surface
- Brake bracket pad and contact surface
- Pad plate and outer pad contact surface
- Pad plate and brake body contact surface
10. Install the brake pads and outer pad plate onto the brake bracket
Warning
- When reusing pads, always install the brake pads in their original position to prevent loss of brake performance.
- Dirty brake discs or pads will reduce stopping power. Remove grease from discs and pads.
Note: Install the inner pad with the wear indicator facing down.
11. Rotate the brake piston clockwise into place in the cylinder, then align the slot in the piston with the protrusion on the inner shoe while rotating the piston back.
Caution: Coat the boot with rubber lubricant to prevent the piston boot from twisting. If the piston boot is twisted, pull it out until it seats correctly.
12. Install the brake hose clamp on the longitudinal rod.
13. Install and tighten the brake mechanism mounting bolts.
14. Install brake protection.
15. After installation, check for leaks in the hose and line swivels and connections and tighten if necessary.
16. Press the brake pedal several times to make sure the brakes work, then test while driving the vehicle.
Note: Engaging the brakes may require more pedal travel immediately after replacing the pads as a set. A few presses on the brake pedal will restore normal pedal travel.
Checking the rear disc
The procedure for checking the rear brake disc is similar to the procedure for checking the front brake disc.
Brake disc runout:
- Operational value: 0.10 mm
- Max. turning limit: 8.0 mm
Brake disc thickness:
- Standard: 8.9-9.1 mm
- Max. turning limit: 8.0 mm
- Parallelism of disk planes: 0.015 mm