HondaBook.ru
Auto companies Volkswagen Auto companies Ford Auto companies Lada Auto companies Skoda Auto companies BMW Auto companies Mazda Auto companies Peugeot
English Русский
Български
Беларускі
Український
Српски
Hrvatski
Română
Polski
Slovenský
Magyar
Bookmark Contacts Sitemap   


Accord Civic Fit / Jazz CR-V HR-V Others Articles
Fit 1 (2001-2008)

Checking and adjusting the clearance in the valve drive (L1ZA) (Honda Fit 1)

  • Main
  • Honda Fit
  • 1 (2001-2008)
  • Power unit
  • Engine repair
  • Checking and adjusting the clearance in the valve drive (L1ZA)
0
Note: Checking the clearances should be carried out at an engine temperature of 10-40°C.


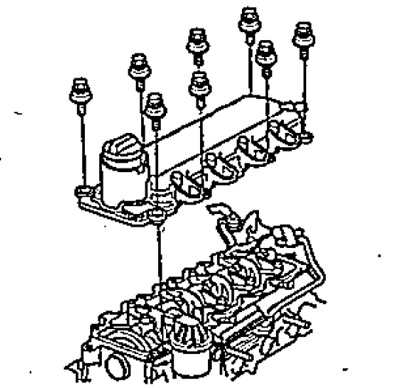
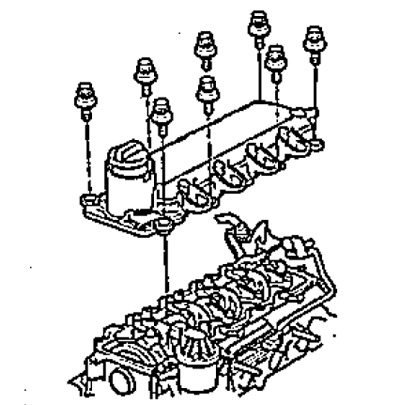
1. Remove the cylinder head cover.
  • a) Remove the intake manifold.
  • b) Remove the eight ignition coils.
  • c) Unscrew the wiring bracket mounting bolt, disconnect the crankcase ventilation hose and the ground wire.
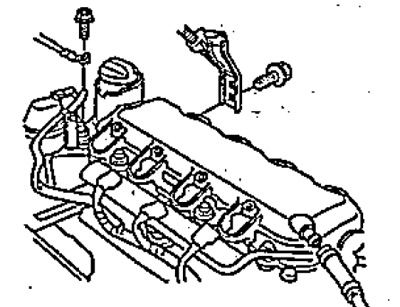
c) Unscrew the wiring bracket mounting bolt,…

  • d) Remove the cylinder head cover.

d) Remove the cylinder head cover.


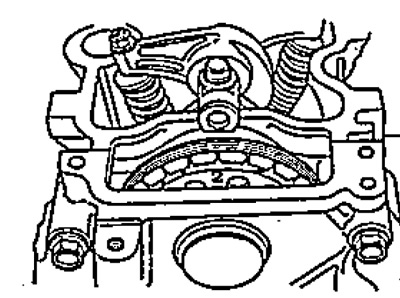
2. Set the piston of the first cylinder to TDC of the compression stroke. In this case, the "UP" mark on the crankshaft sprocket should be directed upwards, and the notches on the sprocket should lie in the plane of the cylinder head.
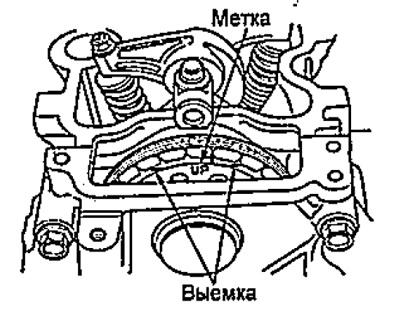
2. Set the piston of the first cylinder to TDC of…


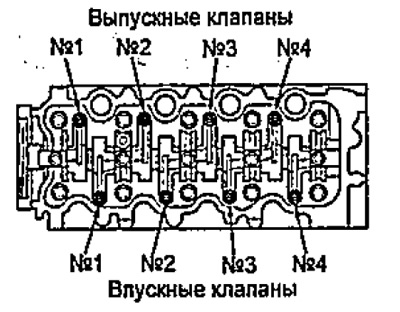
3. Place the feeler gauge between the adjusting screw and the end of the valve. Move the feeler gauge back and forth until you feel a slight resistance.


4. Select the appropriate feeler gauges to measure the valve clearance.

Feeler gauge for measuring clearances in the drive:
  • intake valves - 0.15-0.19 mm
  • exhaust valves - 0.26-0.30 mm

5. Place the feeler gauge between the adjusting screw and the end of the valve. Move the feeler gauge back and forth until you feel a slight resistance.

6. If there is a lot of resistance or no resistance, loosen the lock nut and adjust the clearance with the adjusting screw.
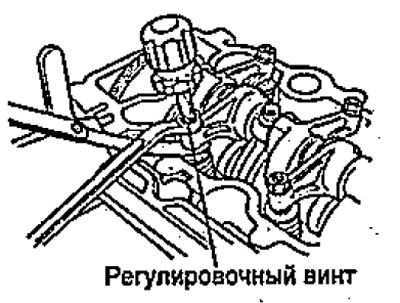
6. If there is a lot of resistance or no…

7. Tighten the lock nut and recheck the clearance. Adjust it if necessary.
  • Tightening torque - 14 Nm

Note: Apply fresh engine oil to the lock nut.


8. Turn the crankshaft 180° and set the piston of the third cylinder to TDC of the compression stroke. In this case, the mark "3" on the crankshaft sprocket should be directed upwards, and the recess on the sprocket should lie in the plane of the cylinder head.
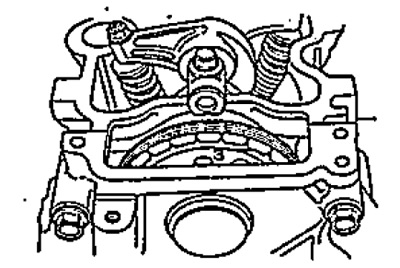


8. Turn the crankshaft 180° and set the piston of…


9. Check and, if necessary, adjust the clearance in the valve drive of the third cylinder.

10. Similarly, check the clearance in the drive of the fourth and then the second cylinders, setting the piston of the corresponding cylinder to TDC of the compression stroke.
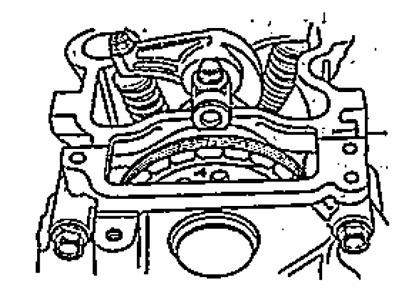
10. Similarly, check the clearance in the drive…

11. Install the cylinder head cover.


  • a) Thoroughly clean the gasket and gasket groove of the cylinder head cover.
  • b) Install the gasket into the cover.
  • c) Make sure that the contact surfaces are clean and dry.
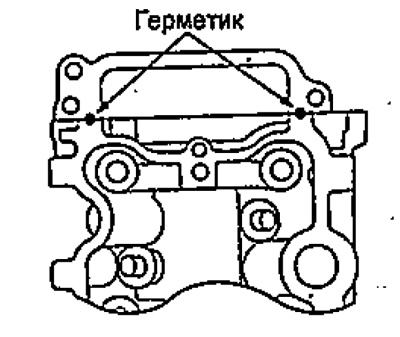
  • d) Apply a 3mm bead of sealant to the chain cover.

Note: The parts must be installed within the time specified in the sealant application instructions. Otherwise, the sealant must be removed and reapplied.
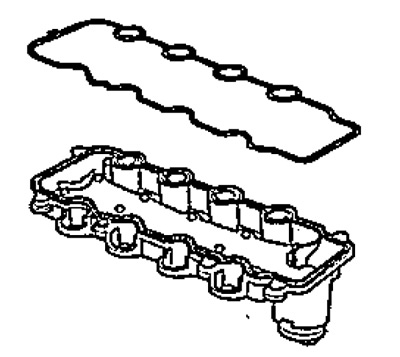

Note: The parts must be installed within the time…

  • d) Install the cylinder head cover. Move the cover back and forth to install the gasket in place.
  • e) Check the cover washers. Replace damaged ones.
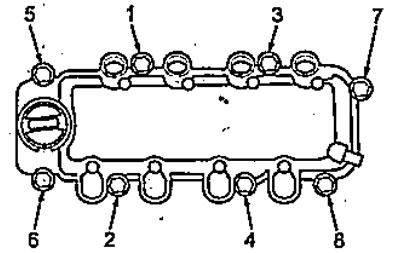
  • g) Tighten the bolts in 2-3 passes.

  • Tightening torque - 12 Nm

Tightening torque - 12 Nm

  • h) Tighten the wiring bracket mounting bolt, ground wire mounting bolt and install the crankcase ventilation hose.
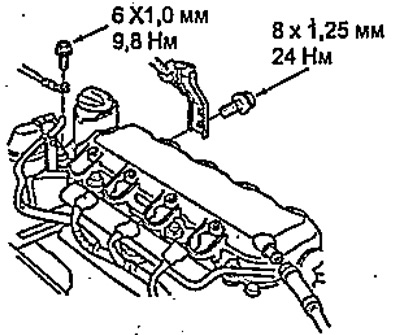
h) Tighten the wiring bracket mounting bolt,…

  • i) Install the ignition coils.
  • k) Install the intake manifold.
  • l) Make sure all hoses, tubes and connectors are connected correctly.
  • m) After assembly, wait 30 minutes before adding engine oil.
This article is available at: russian, bulgarian, belarusian, ukrainian, serbian, croatian, romanian, polish, slovak, hungarian
This information has been verified: Varvara Vereshchagina
Share with friends:
◀ Previous
Fit 1: Engine repair
Next ▶

 
Checking and adjusting the valve clearance (L15A)
Engine assembly — removal
Engine assembly — installation
Timing chain — removal
Timing chain — installation
See also other articles from Honda manuals:
Drive Belts — Checking and Adjusting Tension Honda Accord 3 (1985-1989)
Valve Drive Clearances — Checking and Adjusting Honda Civic 3 and 4 (1983-1991)
Checking the clearance between the valve stem and the valve guide Honda CR-V 2 (2002-2006, petrol)
Checking and adjusting the alternator drive belt Honda HR-V 1 (1998-2006, petrol)
Checking and adjusting the clearance of the push rod Honda Avancier 1 (1999-2003, petrol)
Link in different formats to this article
Comments and feedback from visitors
No comments yet


How much will 46 + 22 ?


Fit 1 (2001-2008) 
  • General information
  • User manual
  • Maintenance
  • Power unit
  • Engine repair
  • Cooling and lubrication system
  • Injection and power system
  • Control system
  • Engine electrical equipment
  • Transmission
  • Clutch
  • Mechanical gearbox
  • Automatic gearbox
  • Variator (CVT)
  • Drive shafts and gearbox
  • Chassis and running gear
  • Car suspension
  • Steering
  • Brake system
  • Body and interior
  • Exterior (external elements)
  • Interior (internal elements)
  • Doors, locks and windows
  • Heater and air conditioner
  • Safety system
  • Electrical equipment
  • Equipment and devices
  • Wiring diagrams (since 06.2001)
  • Wiring diagrams (since 06.2004)
HondaBook.ru © 2018–2026 • Mobile version • Sitemap: EN BG BY UA RS HR RO PL SK HU • Feedback • Driver Information • Search system • Bookmark
Accord 3 (1985-1989) • Accord 6 (1997-2002) • Civic 3 and 4 (1983-1991) • Civic 5 and 6 (1991-2000) • Civic 6 (1995-2000) • Civic 7 (2000-2005) • Civic 8 (2005-2011) • Fit 1 (2001-2008) • CR-V 1 (1995-2001) • CR-V 2 (2002-2006) • HR-V 1 (1998-2006) • Avancier 1 (1999-2003) •
 
This website uses cookies to ensure proper functioning. By clicking "OK," you agree.