
Attention: the air conditioning system is under high pressure. Do not attempt to fill the system yourself.
Air conditioning system
1. In fig. 13.1a shows the main components of the air conditioning system. For efficient operation of the air conditioner, perform the following work:
- A) inspect the compressor drive belt for wear or damage, replace it.
- b) check and, if necessary, adjust the belt tension (see chapter 1).
- V) check the condition of the hoses and connections for tightness.
- G) keep the air conditioner grille clean. Remove dirt from the grate by blowing with compressed air.
- d) make sure the system is sufficiently charged with refrigerant.
- e) if you hear the sound of dripping water or find liquid on the floor mats, drain the condensate from the evaporator housing (see fig. 13.16). cleaning the drain pipes.
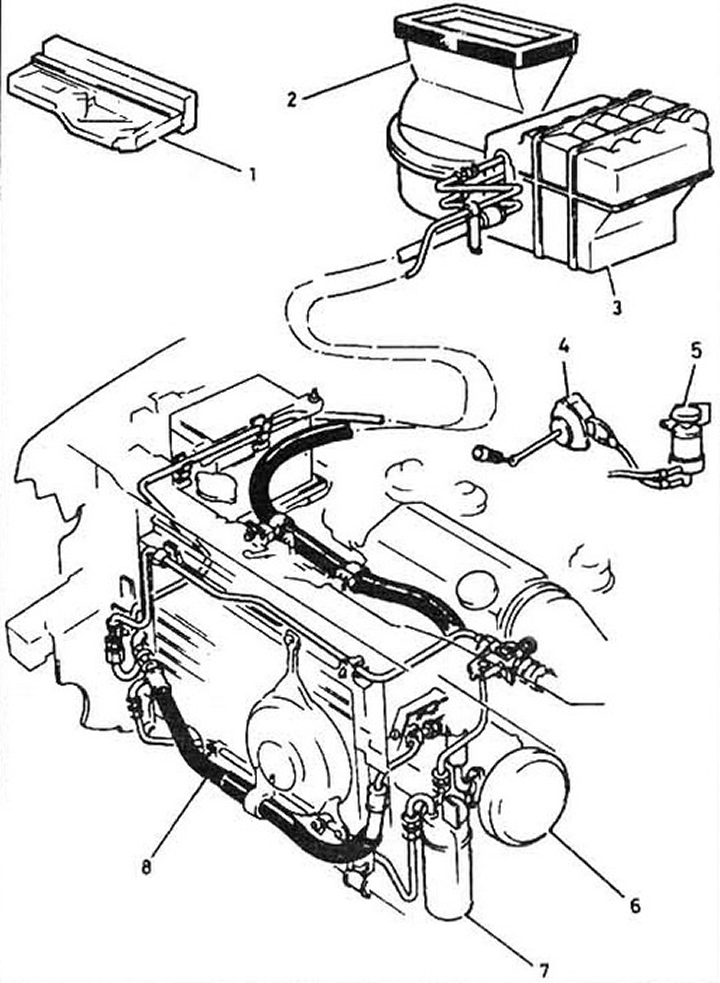
Pic. 13.1a Air conditioning system: 1 - control panel; 2 - fan casing; 3 - evaporator; 4 - filling diaphragm; 5 - electromagnetic control valve; 6 - compressor; 7 - receiver-drier; 8 - capacitor.
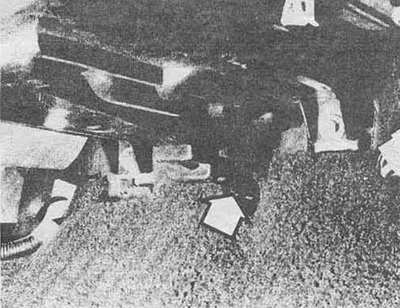
Pic. 13.16 Drain tube (arrow) located under the instrument panel in the center of the car
2. It is advisable to turn on the system for 10 minutes once a month. This is especially important during the winter months, since long periods of inactivity adversely affect the condition of the system components.
3. Serious repairs to the air conditioning system can only be carried out in a specialized workshop. However, minor repairs are possible and are described in this chapter.
4. In most cases, the poor performance of the air conditioner is due to the loss of refrigerant.
5. Look through the viewing window while the system is running (see fig. 14.3). If the refrigerant looks frothy, there is not enough refrigerant. Complete system (see below).
Pic. 13.5 The viewing window on most models is located on the left front corner of the engine compartment. On some models, it is located at the top of the receiver-dryer (see fig. 14.3)
Refrigerant additive
6. Buy a can of refrigerant. The can contains about 400 grams of refrigerant, a stopper-cock and a piece of pipe for connection to the low pressure system of the air conditioner.
Note: Never connect a can to the high pressure side. Since one can may not be enough for refilling, buy several refill containers at once. It is advisable to use red refrigerant for topping up, which will help you quickly identify potential leaks.
Caution: Use protective goggles when refueling.
7. Use the can according to the manufacturer's instructions.
8. Warm up the engine and turn on the air conditioner.
9. Install the thermometer 8 in the center of the air flow grille (see fig. 13.9) and add refrigerant until then. until the temperature shown by the thermometer is about 5-8 degrees Celsius.
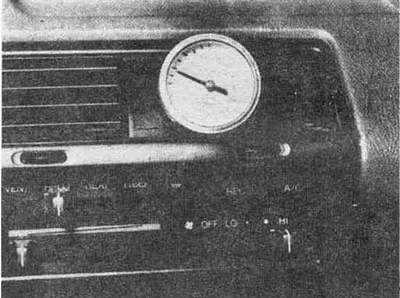
Pic. 13.9 Positioning the thermometer on the ventilation grille
Heating system
10. If the incoming air from the heater is cold, this may be due to the following reasons:
- A) The thermostat is fully open and prevents the engine from warming up normally. Replace thermostat (see Section 3).
- b) the hoses are pinched, thereby stopping the flow of coolant through the heater radiator. Feel the hoses. They must be warm. If they are cold, one of the hoses has flow resistance or the control valve is closed. Disconnect the hoses and flush the radiator. If the radiator core is clean but circulation has not been restored, remove both hoses and flush them.
- V) if it is not possible to flush the hoses, replace them.
11. If blower speed does not match switch position, check switch operation, motor resistance, motor, electrical targets and fuses.
A) first check the integrity of the fuses.
b) check the voltage at the motor terminals.
V) remove the heating/air conditioning control unit (see Section 12) far enough to have access to the heater fan switch contacts. If there is no voltage on the switch, trouble is in the circuit between the battery and the switch (see wiring diagram at the end of this manual).
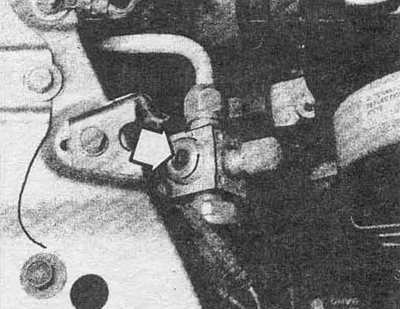
G) when checking the resistance of the motor, make sure that there is voltage on it. The resistor is located on the heater blower motor at the bottom of the glove compartment (see fig. 13.11).
- 1) if there is no voltage across the resistance, check the wiring.
- 2) if the wiring is ok, replace the switch (see section 12).
d) Using a voltmeter or test lamp, check for voltage at the motor. If there is no voltage, replace the resistor.
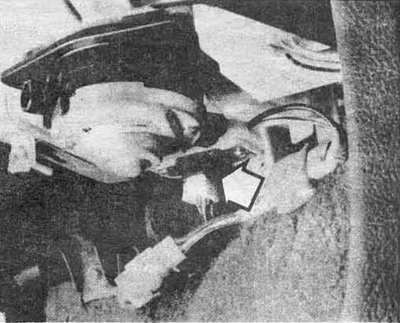
Pic. 13.11 Heater motor resistance (arrow) located below the right side of the dashboard at the rear of the engine
12. If air does not pass through the grilles:
- A) turn on the ignition and operate the blower motor. Most motors can be heard through the ventilation grills.
- b) if the engine is not tapped, there is a high probability of its malfunction (before that, you should have already made sure that the resistance of the motor and the switch are working) see Section 10.
Note: You can determine the condition of the fan motor by directly connecting it to the battery.
13. If the mat under the heater cover is wet or antifreeze vapors are coming through the heater grill, then the core of the heater radiator is clearly damaged (leaks).