
Contents: Removal ⇊ Installation ⇊
Removal
1. Loosen the wheel nuts, lift the front of the car and place it on stands. Remove the wheel.
2. Place the jack underneath the lever.
Note: The jack will bear the full torsion load after the ball joint is removed, so please install the jack securely.
3. Remove the cotter pin from the torque arm ball joint crown nut and unscrew the nut.
4. Use a puller to remove the ball pin from the steering knuckle.
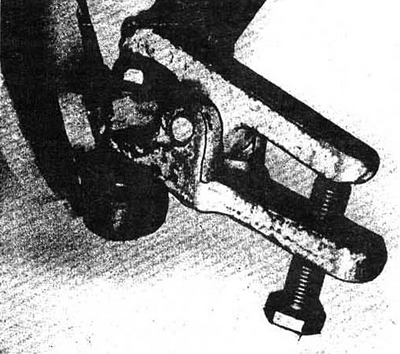
Fig. 7.4 Removing the ball joint using a puller
5. Unscrew the fastening of the reaction and lower arms.
6. Disconnect the stabilizer from the reaction arm (see section 9).
7. Remove the self-locking nut from the torque arm stud that passes through the arm bushing.
8. Carefully lower the jack and relieve tension in the torsion bar-torque arm assembly and provide sufficient space to remove the arm.
9. Remove the lever from the bushing by turning and moving it forward.
10. Inspect the control arm bushing. If it is worn or cracked, replace it. Inspect the ball joint. If it is damaged or worn, replace the control arm: the support cannot be replaced separately.
Installation
11. Installation is carried out in the reverse order. Replace the self-locking nut. Tighten the threaded connections with the force specified in specifications. The final tightening of the torque arm bushing nut must be done with the vehicle standing on its wheels.
[The original is located on the website: hondabook]