
2. Check the rack for leaks, cracks, and visible damage. Check springs for fatigue cracks, inspect spring seats.
Caution: Disassembling the rack is a potentially hazardous activity that could result in a serious accident. Use only a tested spring extractor and follow the instructions for it.
3. Secure the stand in a vise by lining the jaws of the vise with a block of wood. Do not overtighten the lips.
4. Compress the spring with a puller. The spring should move away from the saddles.
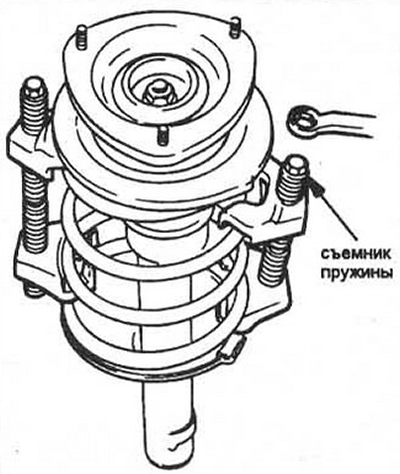
Pic. 3.4 Installing the puller on the strut spring
5. Using a spanner wrench and a hex wrench, remove the shock absorber nut.
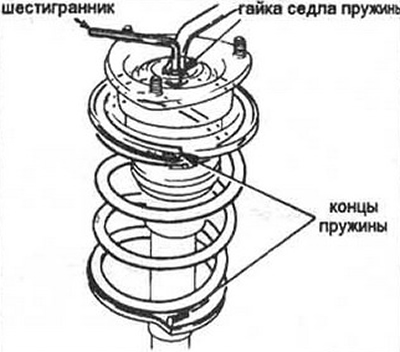
Pic. 3.5 Removing the shock absorber: 1 - spring seat nut; 2 - hexagon; 3 - ends of the spring.
6. Disassemble the shock absorber-spring assembly. Carefully remove the compressed spring and store it in a safe place.
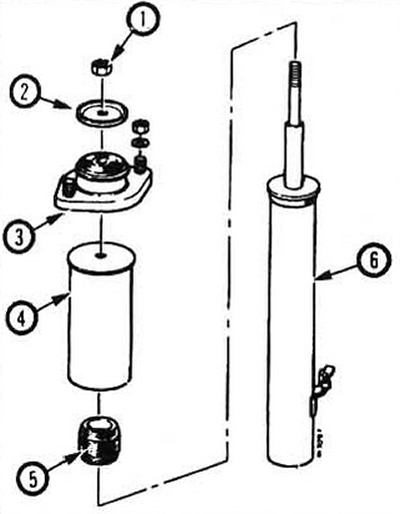
Pic. 3.6a Assembling the stand (release models 1984-1987 reptiles): 1 - shock absorber mounting nut; 2 - washer; 3 - spacer; 4 - casing; 5 - rubber travel limiter; 6 - stand.
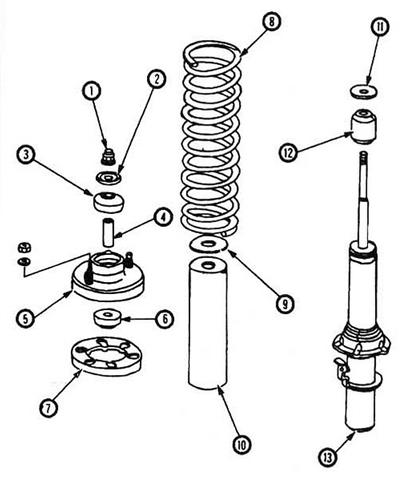
Pic. 3.6b Assembling shock absorber - spring (models since 1988): 1 - shock absorber mounting nut; 2 - washer; 3 - rubber cushion; 4 - spacer; 5 - spring seat; 6 - rubber cushion; 7 - spring insulator; 8 - spring; 9 - anther; 10 - casing; 11 - limiter washer; 12 - limiter; 13 - shock absorber.
Attention: do not hold the spring ends towards you. Pay attention to the order in which parts are removed.
7. Examine a rod and an epiploon of the shock-absorber. The stuffing box must not leak, and the stem must not have any damage. Pull out and push in the stem slowly at first. then quickly, use the full stroke of the stem. The movement should be smooth and resistance should be felt. If noise is heard, there is scuffing and there is no resistance, replace the shock absorber.
8. Reassemble in reverse order. Use a new shock absorber mounting nut.
9. Install the assembled rack on the car (see section 2).