
2. If the valves are already installed, skip to step 8.
3. Install the spring seats on the guide, install new seals on each valve guide. Keep in mind that the intake and exhaust valve seals are not interchangeable. The intake valve seals have a white spring, the exhaust valve seals have a black spring. Using a hammer and drift (a suitable deep head can be used instead), carefully press the seal until it is fully seated on the guide. Do not twist or distort the seal during installation.
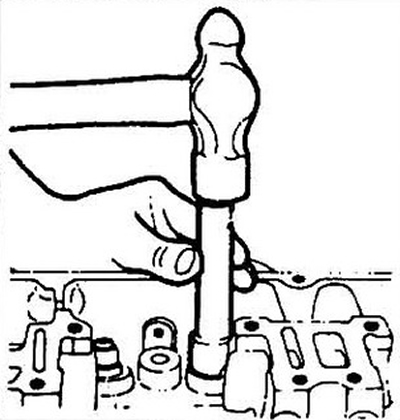
Fig. 11.3 Carefully press the valve stem seal onto the guide using a drift or deep socket
4. Lubricate the valve stem with engine oil and insert it into place.
5. Install the springs and retainers, keeping in mind that the intake and exhaust valve retainers are not interchangeable.
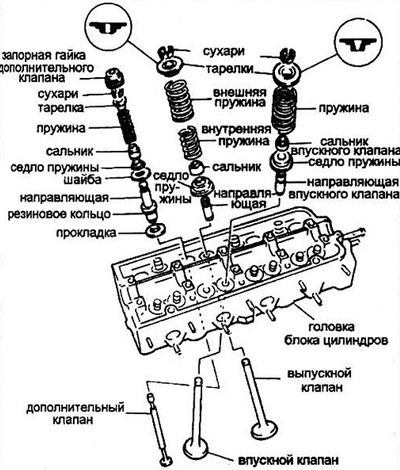
Fig. 11.5a Cylinder head of engines with additional valves (pre-chamber)
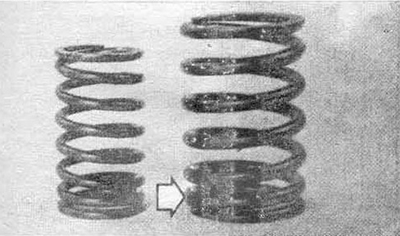
Fig. 11.5b Install the outer spring (right) with the narrow part (arrow) towards the cylinder head
The exhaust valve has two springs.
6. Compress the springs with a valve puller and install the crackers into the valve grooves, slowly release the spring and make sure the crackers are installed correctly. To make installation easier, lubricate the inside of the crackers with grease.
7. Repeat steps 4, 5, 6 for all valves. Put the valves in their place.
8. Check the height of the spring in the assembled state with a ruler or caliper. Measure from the top of the spring seat to the bottom of the plate. If the spring height is greater than recommended in the specification, put a shim underneath.
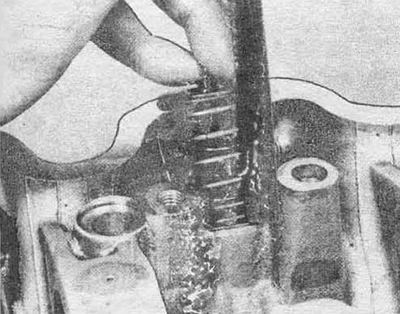
Fig. 11.8 Measuring the spring height
Caution: Never install a washer if the spring height is less than required.
9. Install the camshaft and rocker arm axle assembly (see part A).