
Note. When compressing the suspension spring, use a commercially available spring compressor (Branick MST-580A or Model 7200 or equivalent). Follow the manufacturer's recommendations.
Withdrawal
1. Raise the front of the vehicle and install safety supports in the appropriate places.
2. Remove the front wheels.
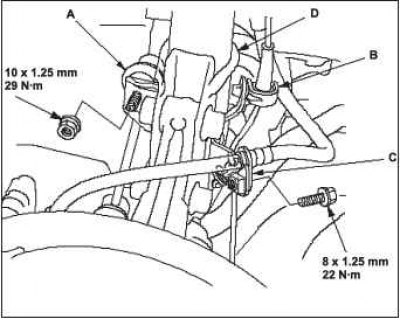
3. Disconnect the stabilizer link A from the shock absorber B.
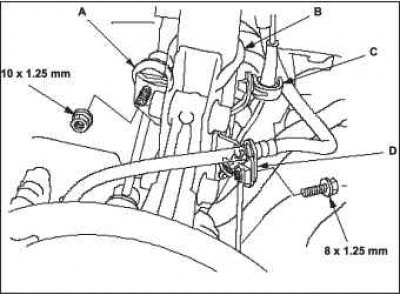
4. Remove the wheel speed sensor brackets C and the brake hose bracket D from the shock absorber. Do not disconnect the wheel speed sensor connector.
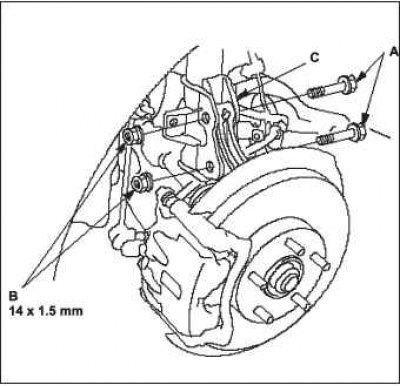
5. Remove shock absorber yoke bolts A and flange nuts B from shock absorber C.
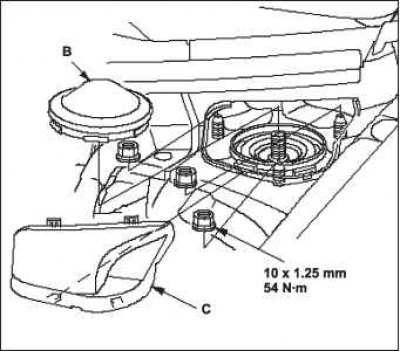
6. Remove cap A and cap B.
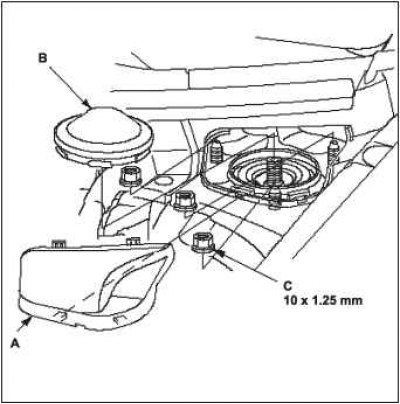
7. Remove the three flange nuts C from the top of the damper.
Note. The left and right shock absorber springs are different from each other. Before proceeding, mark the L and R springs.
Be careful not to damage the case.
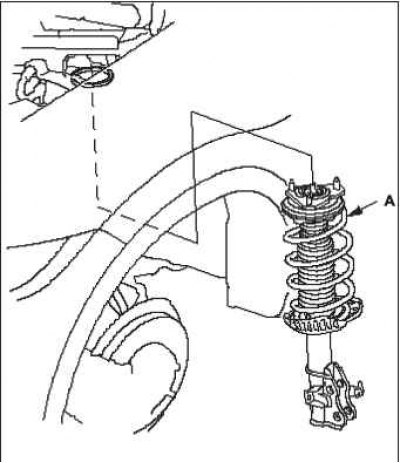
8. Remove shock absorber assembly A.
Disassembly and inspection

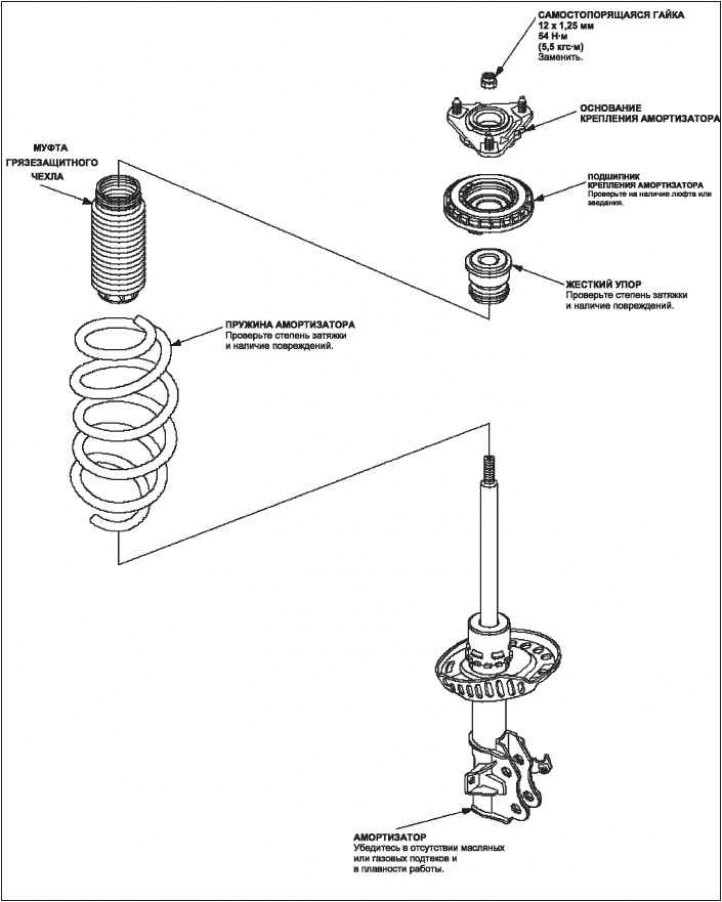
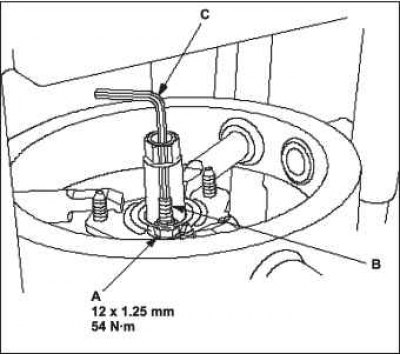
1. Compress the damper spring, then remove the self-locking nut A while holding the damper rod B with a hex wrench C. Do not compress the spring more than necessary to remove the nut.
2. Release the pressure of the spring compressor, then disassemble the shock absorber as shown in the figure (Disassembled).
3. Reassemble all parts except for the top spring seat, hard stop, and damper spring.
4. Squeeze the shock absorber block with your hands and check its operation at full stroke when compressing and unclenching. After cessation of compression, the shock absorber should expand evenly and smoothly. If it doesn't, the shock absorber is leaking gas and needs to be replaced.

5. During this check, make sure that there is no leakage of the working fluid, extraneous sounds and jamming.
Assembly
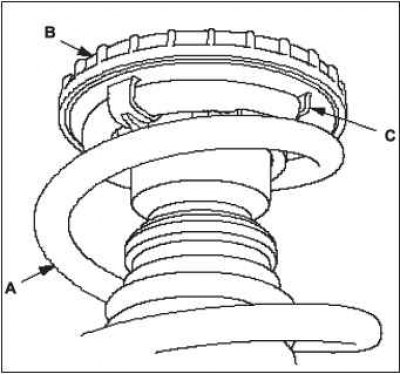
1. Install spring A on shock absorber support bearing B, aligning protrusion C.
2. Compress the suspension spring.
 | 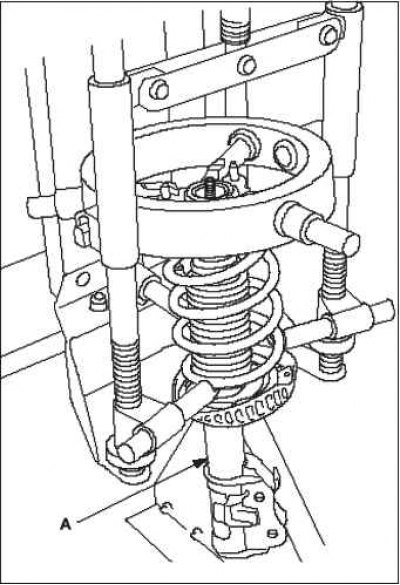 |
3. Install all parts, except for the self-locking nut, on shock absorber block A, referring to the strut exploded drawing.
4. Align the lower end of the spring with the stepped portion of the lower spring seat.
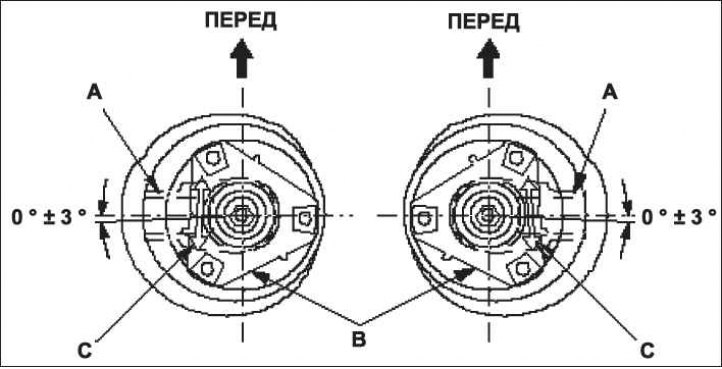
5. Align the corner of shock absorber bracket A and shock mount base B so that mark C points outward.
6. Install a new self-locking nut A.
7. Tighten the self-locking nut to the recommended torque while holding the damper rod B with a hex wrench C.
Installation
 |  |
1. Install shock absorber assembly A into the housing.
2. Install new flange bolts A by lightly tightening them.
Note. Tighten the flange nuts to the recommended torque, then install cap B and cap C.
 | 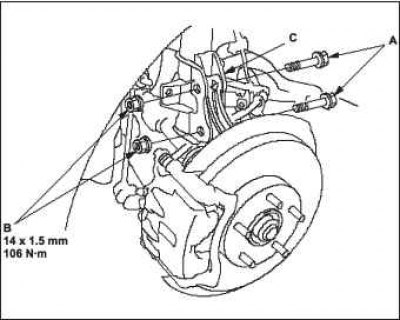 |
3. Install new shock absorber mounting bolts A and new flange nuts B on shock absorber C.
4. Install the stabilizer link A on the shock absorber without tightening it.
Note. Use a new flange nut.
5. Install clamp B of wheel speed sensor harness A and brake hose bracket C to shock absorber D.
6. Raise the front suspension with a jack so that it bears the weight of the vehicle.
7. Tighten the shock absorber mounting bolts to the recommended torque.
8. Tighten the shock absorber top flange nuts and stabilizer link flange nut to the recommended torque.
9. Install cap and cover.
10. Install the front wheels.
11. Check wheel alignment and adjust if necessary.