
Note. Always use a ball joint removal tool. When disassembling the hinge, do not hit the hinge body or other parts of it.
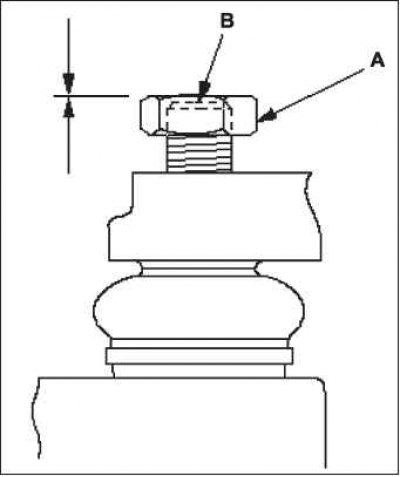 |  |
1. Screw nut A onto thread B of the pivot pin. Make sure that the nut does not protrude beyond the end of the ball joint pin so that when the joint is disassembled, the threads on the end of the pin will not be damaged.
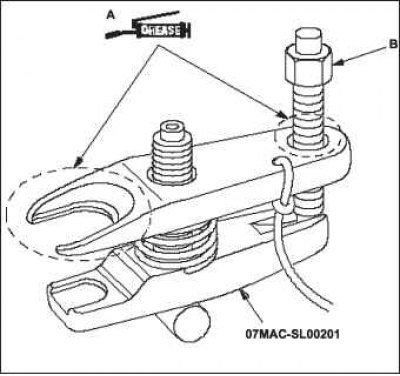
2. Apply grease to the designated areas A of the special tool. This will make it easier to install the tool and prevent damage to thread B of the puller's compression bolt.
3. Loosen the clamping bolt A and install the special tool as shown in the figure. Insert the hooks carefully so as not to damage the protective cover of the hinge. Set the position of the tool grips by turning the adjusting bolt B.
Note. Securely attach the seat belt C to the suspension arm or cross member D. Do not attach it to the brake pipe or wiring harness.
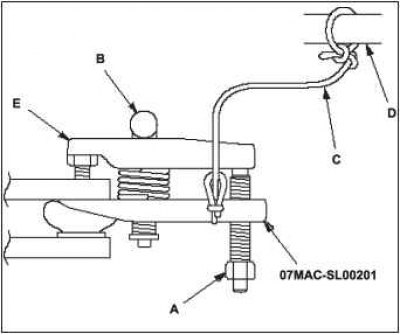
4. After adjusting the adjusting bolt, make sure that the head of the adjusting bolt D is positioned as shown in the figure to allow clamp E to rotate.
5. Turn the compression bolt with a wrench until the ball joint pin is free. If necessary, apply penetrating grease to the end of the ball stud to tie rod joint to facilitate disassembly of the joint.
Note. Do not use electric or pneumatic tools to rotate the compression bolt.
6. Remove the tool, then remove the nut from the end of the ball joint pin and push the ball joint out of the hole in the ball joint pin. Inspect the ball joint boot and replace if necessary.