
Removal and installation
1. Jack up the car and place it on stands.
2. Disconnect the valve block connector.
3. Drain the working fluid from the variator (see chapter "Maintenance and general check and adjustment procedures").
4. Loosen the bolts and remove the oil pan.
5. Remove the working fluid filter.
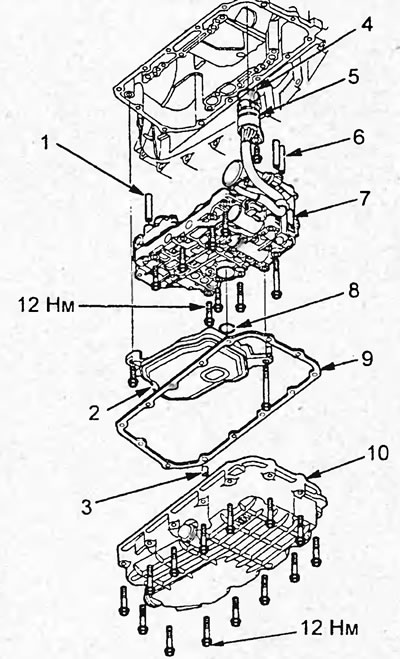
1 - tube, 2 - filter, 3 - pin, 4 - O-ring, 5 - valve block connector, 6 - tube, 7 - valve block, 8 - O-ring, 9 - gasket, 10 - oil pan.
6. Loosen the bolts and disconnect the valve block from the variator.
7. Remove the valve block connector from the variator and remove the valve block.
Note:
- Installation is carried out in the reverse order of removal.
- Fill the working fluid into the variator (see chapter "Maintenance and general check and adjustment procedures").
- Calibrate the starting clutch.
Disassembly and assembly
Disassemble and assemble using the assembly drawing "Valve Block".
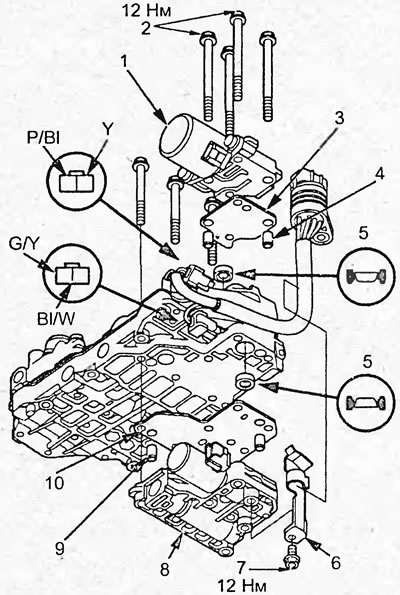
Valve block. 1 - starting clutch valve, 2 - bolt, 3 - plate, 4 - pin, 5 - filter, 6 - wire retainer, 7 - bolt, 8 - electromagnetic valves, 9 - pin, 10 - plate.