
Note:
- Valve adjustment should only be performed when the cylinder head temperature is below 38°C.
- After completing the adjustment, loosen the crankshaft pulley bolt, then tighten it again to 20 Nm (2.0 kgf/m) and turn it 90° further.
1. Disconnect the breather hose, then remove the air cleaner housing.
2. Remove the cylinder head cover.
Note: When installing the cylinder head cover, see section "Installation".
3. Remove the top cover.
4. Set the piston of cylinder #1 to TDC in the compression stroke. The "UP" mark on the camshaft pulley should be on top, and the TDC marks should be aligned with the top surface of the cylinder head.
5. Adjust the valves on cylinder #1:
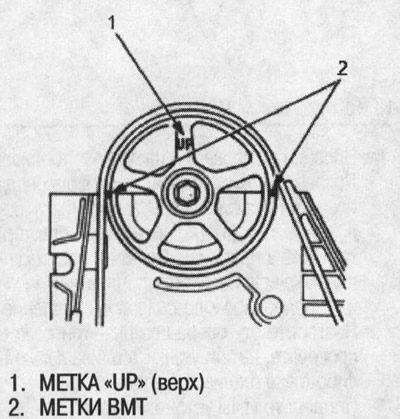
- Inlet: 0.20mm±0.02mm
- Issue: 0.25 mm±0.02 mm
6. Loosen the lock nut and turn the adjusting screw until the feeler gauge moves in and out with some resistance.
Note: Do not overtighten the locknuts as the rocker arms are made of aluminum.
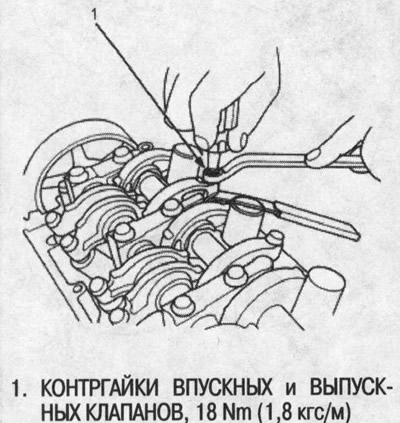 |
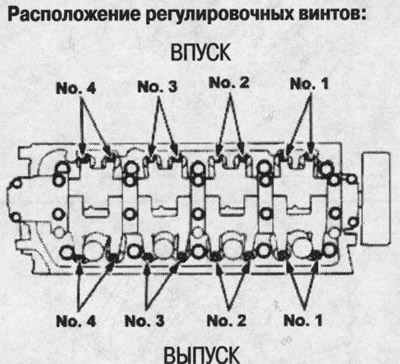 |
7. Tighten the lock nut and check the clearance again. Repeat the adjustment if necessary.
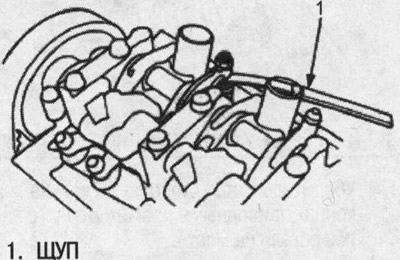
8. Turn the crankshaft 180" counterclockwise (the camshaft pulley turns 90°). The "UP" mark should be on the exhaust side. Adjust the valves on cylinder #3.
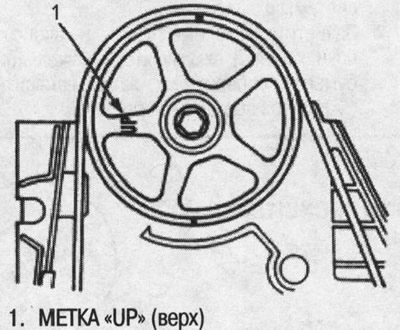
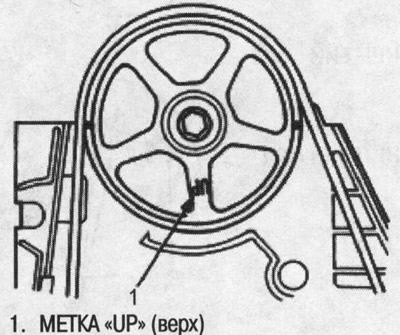
9. Turn the crankshaft 180° counterclockwise and bring the piston of cylinder #4 to TDC. Both TDC notches will appear again. Adjust the valves on cylinder #4.
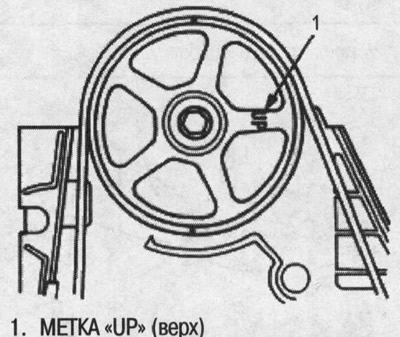
10. Turn the crankshaft 180° counterclockwise and bring the piston of cylinder #2 to TDC. The "UP" mark should be on the intake side. Adjust the valves on cylinder #2.
[The original text of the article is located on the website: www.hondabook.ru]