
Contents: Sedan ⇊ Hatchback ⇊
Sedan
Attention: components of the passive safety system are located in the area of the heater unit. Before starting work on removing the heater unit, read the safety precautions for operation and repair work (see chapter "Supplementary Restraint System (SRS)").
1. Disconnect the cable from the negative terminal of the battery.
2. Remove the refrigerant from the system.
3. Loosen the bolt and disconnect the refrigerant circulation pipes from the evaporator.
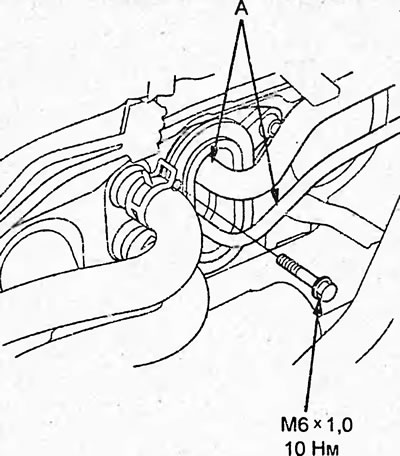
4. Disconnect the cable retainer (A), disconnect the heater valve cable (C) from the lever (B).
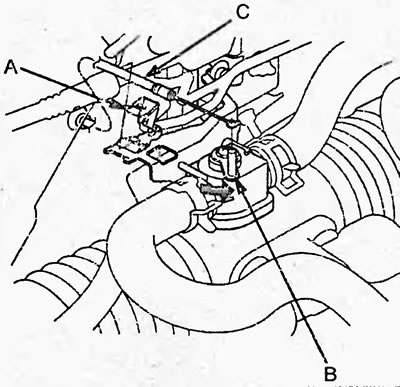
5. Drain the coolant (see chapter "Cooling system").
6. Loosen and move aside the clamps (A), disconnect the heater inlet hose (B) and the heater outlet hose (C).
Note:
- Drain any coolant that comes out after disconnecting the hoses into a clean pan.
- Do not allow coolant to come into contact with electrical components or painted surfaces. If coolant does come into contact with electrical components or painted surfaces, remove it immediately.
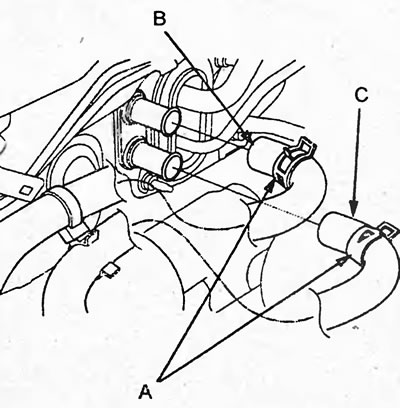
7. Loosen the bolt and remove the heater valve.
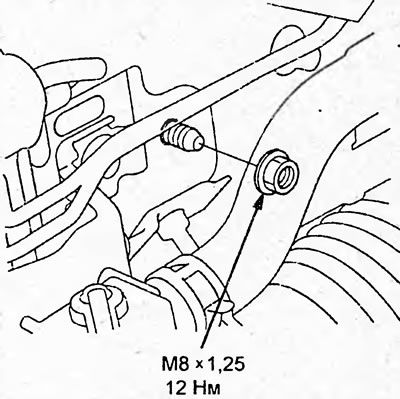
8. Remove the toolbar.
9. Remove the heater fan unit.
10. Disconnect the drain hose (A), unscrew the bolts and remove the heater unit (B).
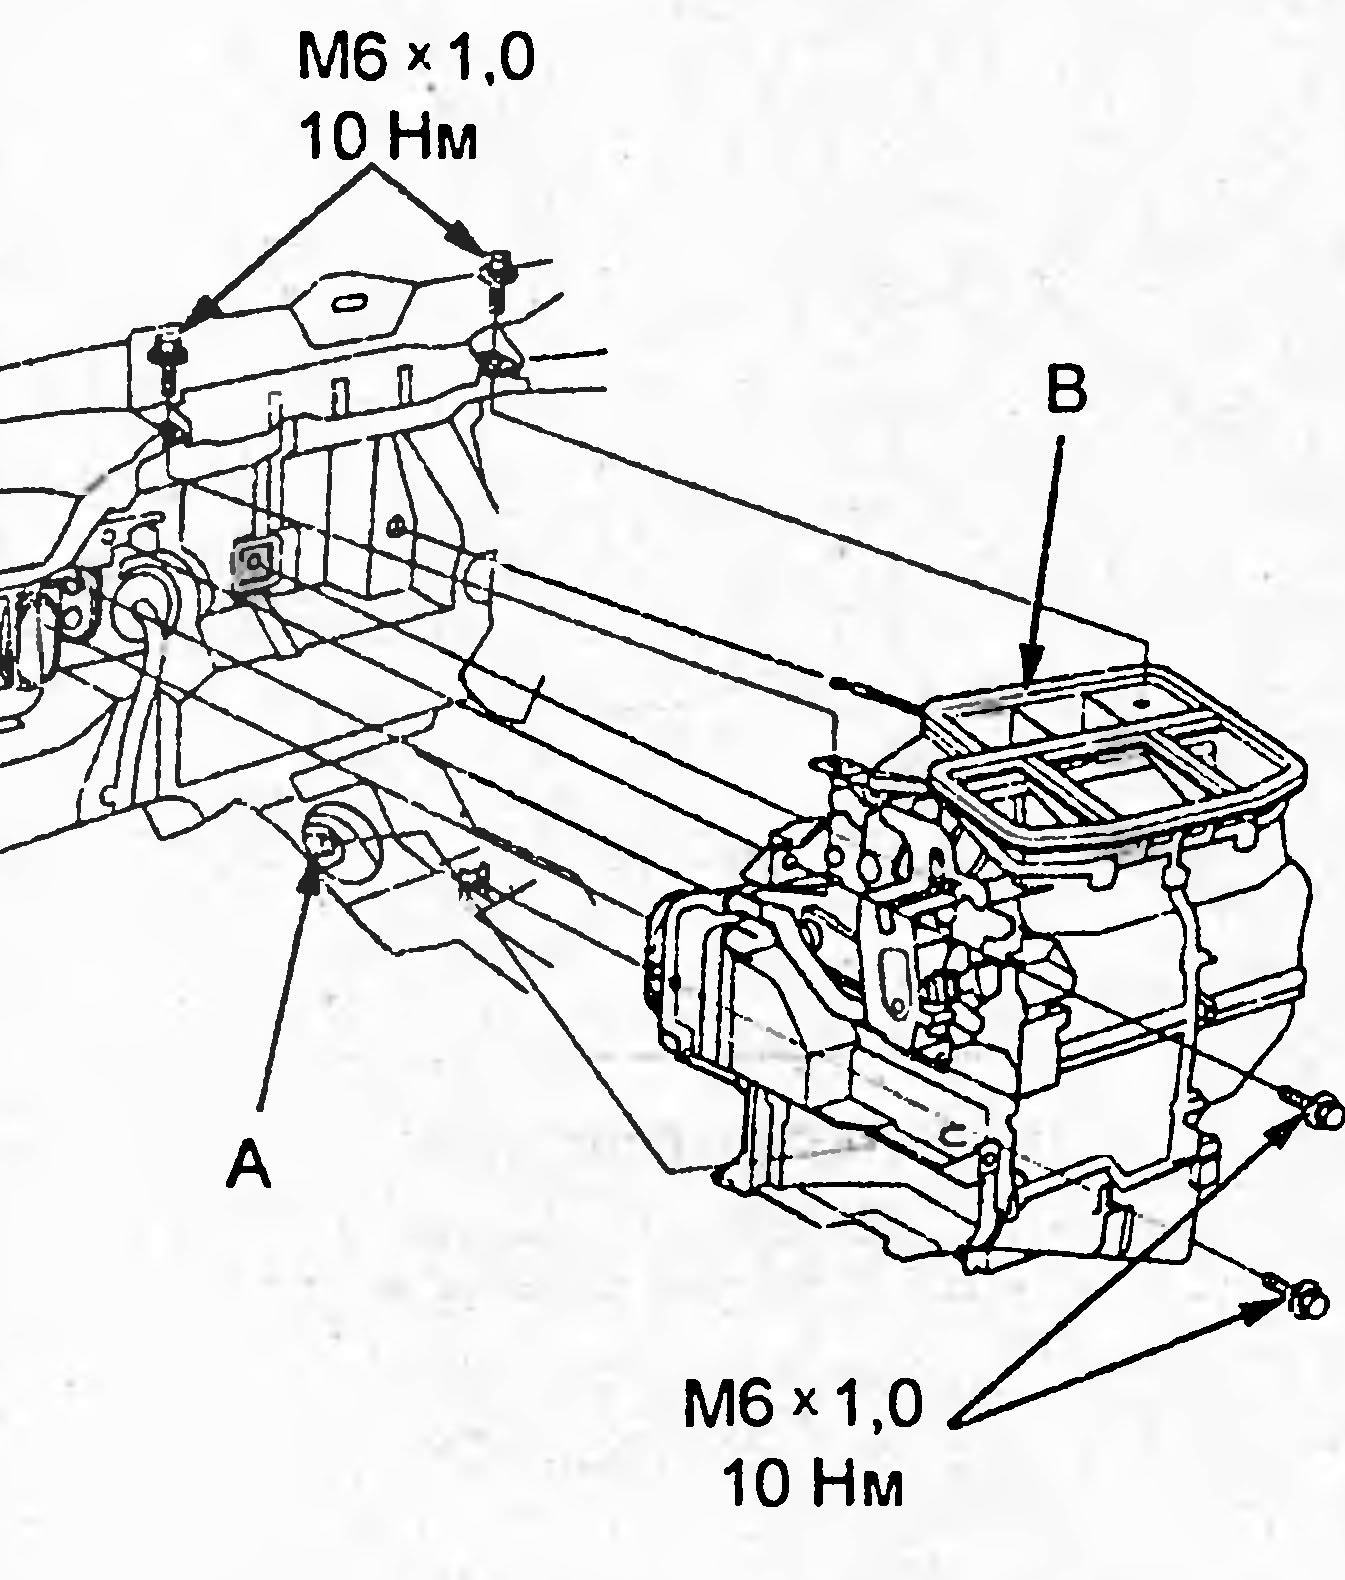
11. Install in the reverse order of removal.
Note:
- Do not swap the inlet and outlet hoses of the heater, secure the hoses with clamps.
- Fill the cooling system with coolant.
- Securely fasten the drain hose.
- Adjust the heater valve cable.
- Check the system for coolant leaks.
Hatchback
Attention: components of the passive safety system are located in the area of the heater unit. Before starting work on removing the heater unit, read the safety precautions for operation and repair work (see chapter "Supplementary Restraint System (SRS)").
1. Disconnect the cable from the negative terminal of the battery.
2. Remove the refrigerant from the system.
3. Loosen the bolt and disconnect the refrigerant circulation pipes from the evaporator.
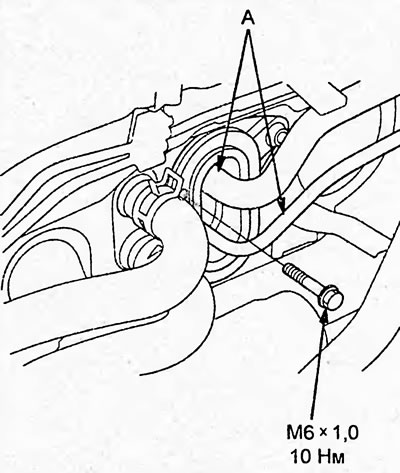
4. Disconnect the cable retainer (A), disconnect the heater valve cable (C) from the lever (B).
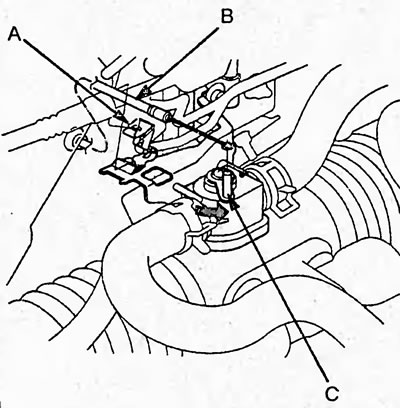
5. Drain the coolant (see chapter "Cooling system").
6. Loosen and move aside the clamps (A), disconnect the heater inlet hose (B) and the heater outlet hose (C).
Note:
- Drain any coolant that comes out after disconnecting the hoses into a clean pan.
- Do not allow coolant to come into contact with electrical components or painted surfaces. If coolant does come into contact with electrical components or painted surfaces, remove it immediately.
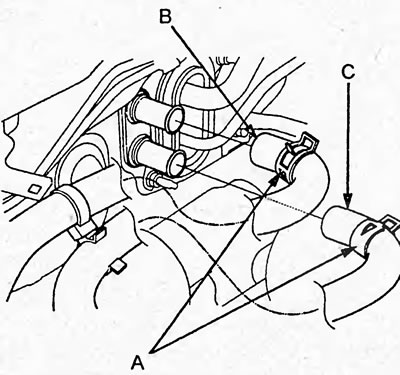
7. Unscrew the heater unit mounting nut.
Note: Be careful not to damage the fuel and brake lines.
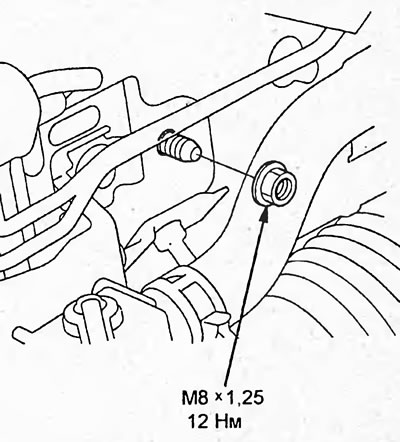
8. Remove the toolbar.
9. Remove the heater fan unit.
10. Disconnect the drain hose (A), unscrew the bolts and remove the heater unit (B).
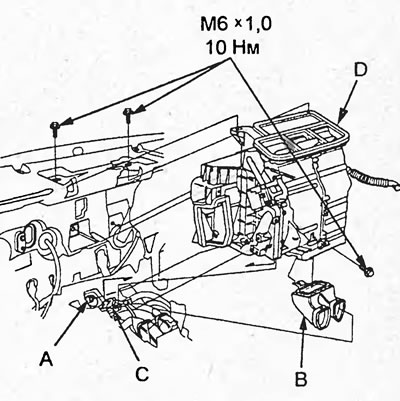
11. Install in the reverse order of removal.
Note:
- Do not swap the inlet and outlet hoses of the heater, secure the hoses with clamps.
- Fill the cooling system with coolant.
- Securely fasten the drain hose.
- Adjust the heater valve cable.
- Check the system for coolant leaks.