
2. Disconnect the cable from the negative terminal of the battery.
3. Remove the refrigerant from the system.
4. Remove the generator.
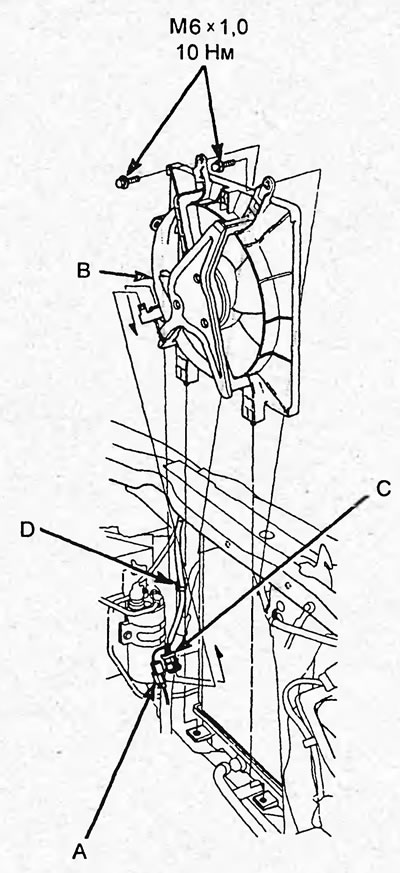
5. Remove the compressor electromagnetic clutch connector (A) from the frame (B) and disconnect it, disconnect the condenser fan connector (C), and disconnect the wiring harness clamps (D). Loosen the bolts and remove the condenser fan.
Caution: Do not damage the condenser fan blades when removing and installing the condenser fan.
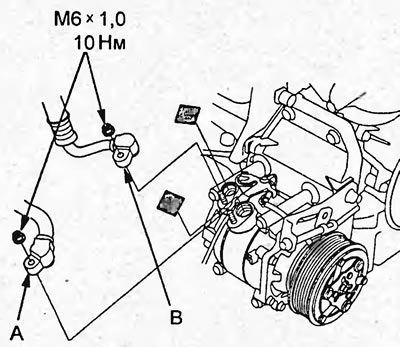
6. Loosen the nuts, disconnect the inlet pipe (A) and outlet pipe (B).
Note: To avoid contamination of the system, immediately install plugs on open ends of pipes.
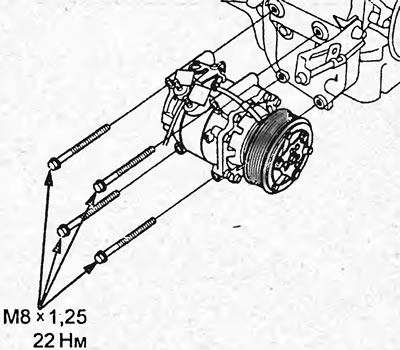
7. Loosen the bolts and remove the compressor.
Caution: Do not damage the radiator fins when removing and installing the compressor.
8. Install in the reverse order of removal.
Note:
- Before installing new O-rings, lubricate them with compressor oil.
- Avoid contamination of compressor oil.
- After using compressor oil, seal the oil container tightly to prevent moisture from entering.
- Do not allow compressor oil to come into contact with painted surfaces of the vehicle, as this may damage the paintwork. If compressor oil comes into contact with a painted surface, remove it immediately.
9. Evacuate the system.
10. Charge the system.
11. Check the efficiency of the refrigerant circulation system.
Notes on Compressor Replacement
1. Prepare two measuring cylinders.
2. Drain the oil from the old compressor into measuring cylinder "A".
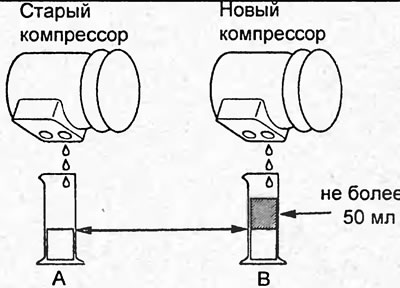
3. Drain the oil from the new compressor into measuring cylinder "B".
4. Calculate the volume of oil that needs to be drained from the new compressor using the formula:
V = VH-VWITH, Where
- V - the volume of oil that needs to be drained from the new compressor (no more than 50 ml),
- VH - the volume of oil in the measuring cylinder "B" (130 ml),
- VWITH - the volume of oil in the measuring cylinder "A".
Note: If there is no oil in the old compressor, drain no more than 50 ml of oil from the new compressor.
5. Drain excess oil from measuring cylinder "B" and pour the remaining oil into the compressor.
Disassembly and assembly
Disassemble and assemble using the assembly drawing "Disassembling and assembling the compressor".
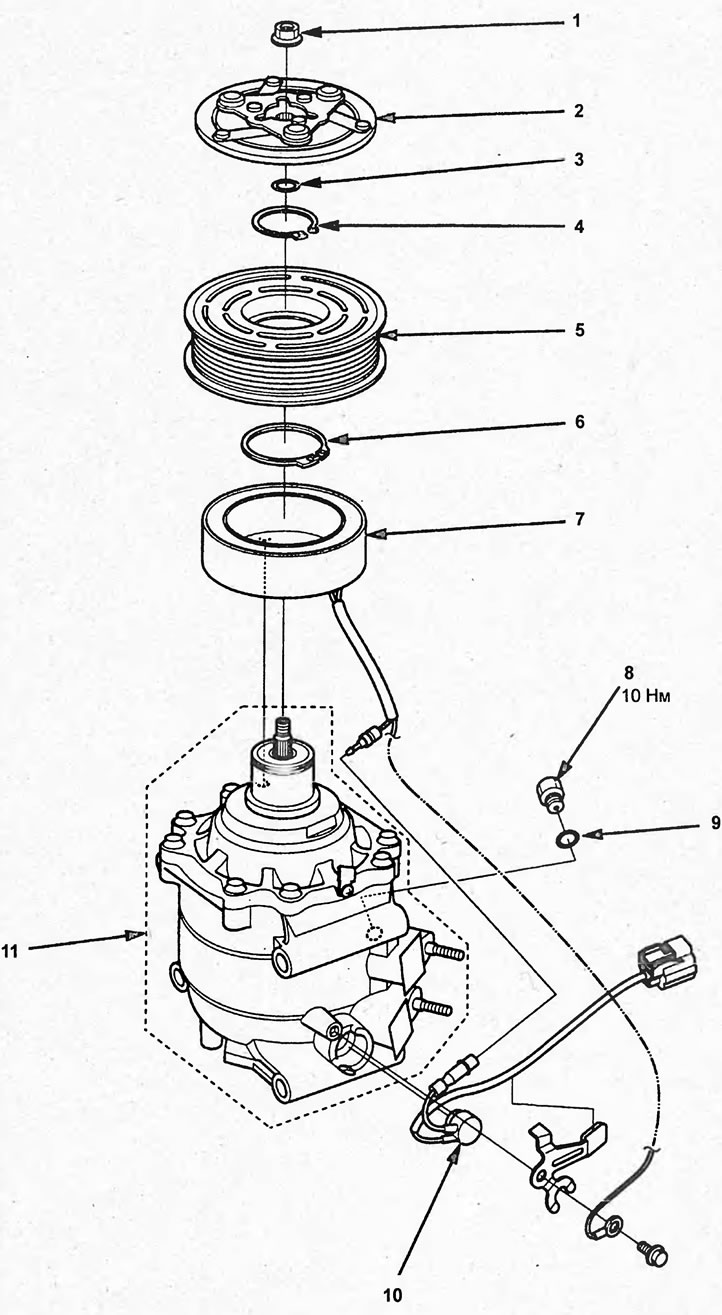
Disassembly and assembly of the compressor. 1 - nut, 2 - pressure plate, 3 - adjusting washer, 4 - retaining ring "B", 5 - pulley, 6 - retaining ring "A", 7 - clutch stator winding, 8 - bypass valve, 9 - ring seal, 10 - thermal fuse, 11 - compressor.